


Walkthrough
The sixth Wizardry game is composed of nine larger areas, with the Castle at the center of it all.


Optional sections of the walkthrough are in blue text so you can skip the unnessary to charge forward on your adventure.
Enemies in this area:
Acid Slime Amazulu Amazulu Archer Amazulu Zombie Cold Slime Floater Forager Gelatin Vapor Giant Ant Giant Wyrm Hydra Plant Jelly Cloud Jungle Vine Man O' War Pharaoh of Phyre Priestess Shamaness Vaspess White Wyrm
Follow the path to the wall and use the Miner's Pick to enter the Pyramid's ground level. You will likely find the enemies here very difficult, at first, but they provide plenty of useful experience. If you continue straight through the door and turn left, you can utilize the Miner's Pick again to expose a path to the northern region of the mountain, near the Castle.
With the path to the mountain free of the barrier, turn around to re-enter the pyramid. The first room has a door facing each direction. North (right) leads to an empty room, south (left) leads to a Pile of Sand, which we will need to return to later, and west (straight) will lead into the upper levels of the pyramid.
I recommend you to increase your party's level at the entrance and return to the mine's fountain to replenish your magic when required. Upon reaching level 10, you may want to change specialties if needed. If you have any regular fighters or thieves, now is a good time to change that. If you do decide to change classes, only change one or two at a time, put them in the back of the party, and level them back up in the Mountain or Mines.
Once you feel that your party is strong enough, proceed through the west door and follow it to Upper Level 1. While this area can be confusing, it is significantly more linear than the mines. Upon reaching the first floor, you will find the pathway splits into either straight or left. Go left (south) to the edge, don't fall off, then take a left path to the stairs (#1) up.
As you explore more of this path, you will encounter deadlier enemies. If you need to get more experience, don't be afraid to stop and grind more enemies. At the end of this path, you will find a locked chest with an Empty Sack. Return to the Pile of Sand at the ground level and fill the sack with sand at the southern side to get the Bag of Sand.
Return up to the first floor again, take a right as we did before, but this time take the right path at the edge of the pyramid to take stairs #3. At the second level, you will find two options. The second right leads to an empty dead-end, so take the first right, down the next stairs. Follow the path around this corner of the first level and, eventually, you will find a Goop Gloop in a corner. These enemies are similar to the Rubber Beasts in the mines. They will give you the disgusting, but needed, Gloop Sploch.
Return the way we came to revisit the ground floor stairs, then take the final corridor east and up via stairs #5. After following the pathway, you will eventually reach the edge of the pyramid with a choice of right or left. Take the right route (west) first.
After turning right, you will find a button in the small room that will lower a bridge along the western side to permit you to advance north along the edge. As you progress along this path, you will discover the northern bridge also needs to be lowered. The button to lower this bridge is found within the nearby room.
Follow the linear route, going down a floor (stair B), then further down (stair #6) to the first level. Eventually, you will come across another hole along the edge of the pyramid, preventing you from moving forward. Search the northern wall to reveal the room containing the button that allows you to continue southward.
Eventually, you will arrive at a chamber with a chest that bounces among the four alcoves. To get the chest, use the Gloop Sploch at any niche, then chase after the chest until it gets stuck. Inside you will liberate the important Bone Key, plus other useful items.
Backtrack up the two flights of stairs to return to stairs A on the third floor, then take the western walkway. Here you will find two doors. Go straight first, and press the button inside to remove a wall in the nearby room. Exit and enter the right door to locate another button. Pressing this will drop you back to stairs A on Level 2, and open a new passage here to the chamber in the north.
This new path leads to the basement and the top floor. We need something to open the gate at the top, so take the stairs down at the far end to enter the Basement Level. Follow this path to the gated door and use the Bone Key.
The basement area is full of traps, so pass through the hallway slowly until a pit opens in your way. Take a step backward to find a button on the wall to close the trap. Follow the corridor to the left twice and stop before you trigger the deadly rolling boulder trap. Search for another button on the left side that opens a room nearby that contains another button to disarm the rolling boulder trap. Continue down the passage until you reach yet another pit. Turn around and press the button on the wall to close the forward hole and create a new one behind you.
In this area, you will encounter Pharaohs of Phyre; farming them for their Anhks will help you with the coming bosses. There are also many high-experience enemies here which aren't found anywhere else in the level if you need to increase your character levels.
Heal and Save before proceeding. Your first instinct will be to continue forward to the west, but we need to first jump into the new hole that just opened. This small area contains two buttons; the east button brings you to where you dropped into the hole, so press the west button to continue forward. The pit on the east side will bring you back to the teleport room you just left.
As you continue north, you will find a chamber beyond the doorway. Don't enter yet. Press the button next to the entrance, then backtrack and turn right, through the door, then press the button in this room to disarm the traps in the next area.
It is safe to return and enter the chamber. Pass through it and into the corridor to the north. Before turning right toward the altar, we need to disarm more traps. Turn left, press the button to reveal a secret room, and press the button in that room to disarm the traps in the altar room.
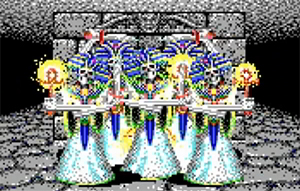
Save, then go east and approach the altar. Amen-Tut-Butt will attack you. If it brings friends, you will gain even more useful spoils from the battle. If you've encountered Pharaohs on your journey, you should have no issues defeating this enemy.
At the altar, use the Bag of Sand to exchange it for the Idol of Mau-Mu-Mu.
With the idol in your hands, backtrack and leap into the pit, press the eastern button, and make your way into the next cavern. You will find a button on the left wall, which will reveal a secret room with another button. This button will seal the pits so you can safely return to the Pyramid Upper floors. If you don't have six Ankh of Phyre, you may want to farm the Pharaohs of Phyre for additional ones to protect your party from the upcoming fights.
Once you return to the 2nd level, continue up via Stair C, which you'll find by hugging the left wall. Continue onwards until we are impeded by another gate. Use the Idol at the gate to open the pathway to the top of the pyramid.
As you enter, the Amazulu Queen will greet you. Tell her that you are not here for the rock, even though you are, and give her an offering of any object so you can pass safely. You can choose any cheap item from your inventory to get past her.
When the queen walks away, Kuwali Kubona will approach the party. She is a fabulous source of Powders, Potions, and Books. If you don't know the levitate spell to get past the burning floor ahead, buy two Foot Powder to avoid damage.
If you choose to fight the Queen or anger her, Kuwali will also join the fight; this may make the upcoming trek more challenging.
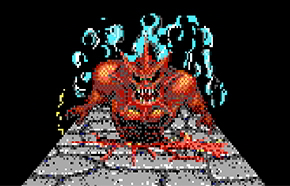
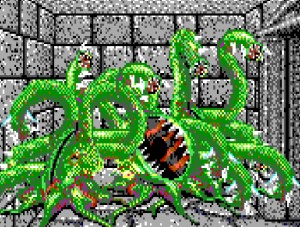
On the other side of the hot corridor, lies the volcano and Mau-Mu-Mu, the second Guardian of the Rock. If you have any defensive spells to protect your party from fire magic, cast it first. Ice spells also do a lot of damage. Other than his fire spells, this is not a difficult fight.
Once you have the second eyeball, it is now time to return to The Castle. Backtrack to the Hazard Area, cross with the Rope & Hook and make your way back to the Castle: Bottom Level. The random encounters in this area should be easy by now, so just plow through them.
As you walk through the lower corridor, stop at the first gate and use the Wizard's Ring to open it. Who would have thought that the ring was a key? Save before you open the second door, the Wizard's former pet cat is a little wild.
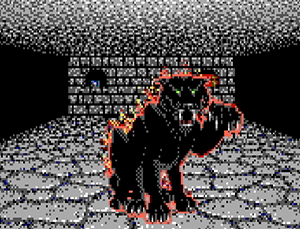
The Demonic Hellcat breathes fire and blinks out of existence intermittently, making it hard to hit. Thankfully, if you use the same tactics as you did with Mau-Mu-Mu, it should be put down rather quickly.
Within the Wizard's Lair, you will find four chests adorning the walls. The red chests contain magical scrolls, books and potions. The blue chest holds the Spire Key and the Wizard's Record, which gives you a hint of where to explore next and the reason you encountered the undead the earlier spire.
You can also search the western torch to reveal a secret passage to the Wizard's Lab. Stepping into the closet will expose a Stave of Moons. Find the button on the right side to open the path further. In this secret room, you will find another chest containing the Ruby Talisman and other possibly useful items.
If you wish to create a passage to the Wizard's Cave, mix several powders located the corner and strike the stick. You will take damage, but having a shortcut to the mines may be helpful.
Next, return to the castle entrance where your adventure began. This time, take the stairs to the right of the fountain and use the Spire Key to continue up. At the top, we will use the second Key of Spades, which we've been holding onto for a very long time now.
Upon you entering the top of the eastern spire, you will be confronted with a very fast-talking ghost. I hope you can read fast, as it will give you a hint of what is to come. It will then drop the Horn of Souls, which is required to continue advancing your journey.
Travel back to the bottom level of the castle, then venture to the end of the hallway. Here you will find a door with the face; place the two Ruby Eyeballs you received from the earlier guardians and enter. The stairs lead to the River Styx.
Continue to the River Styx