
Tomb Raider 4: The Last Revelation
Level 3: "The Tomb of Seth" Walkthrough
Available Secrets: 5
Items Found: Eye Piece (2), Flares (3), Medipack - Small (8), Medipack - Large (4), Sands of Time, Shotgun Shells - Normal (5), Shotgun Shells - Wideshot, Uzi Clips
Weapon Found: Shotguns (2), Uzi
Enemies: Red Scorpions, Wild Dogs
The Tomb of Seth, also known as Seti, is known as KV17 in the Valley of the Kings and is the largest tomb in the valley dedicated to one pharaoh. Since the people thought that the pharaohs were gods, it is unknown if this is an undiscovered tomb, or KV17.
Remember: If you can't make out the images in the Walkthrough, click on them to open a larger one. Also, hover over, or click, on coloured words for helpful images.
After a great introduction FMV (click here to view the video again), you are finally about to start the real game.
 So, Lara Croft has journeyed back to Egypt to find new artifacts in the Tomb of Seth, but after all her adventures she only brought automatic pistols, 3 measly flares, and some medipacks. Oh, she brought something new, infrared binoculars, which is great for scouting in the dark, but isn't very great for survival. You would think she would have learnt to come with an arsenal large enough to equip an army by now. Thankfully, there are items scattered all over the dungeons that were left by previous, obviously less fortunate, adventures than herself.
Unlike the previous games, the dynamic lighting actually means something... you will need flares, lots of flares. Thankfully you will find lots of flares all over the place. Each bundle of flares gives you 12 flares, which will sound like a lot, but you can easily burn through them quickly, so be as conservative as you can.
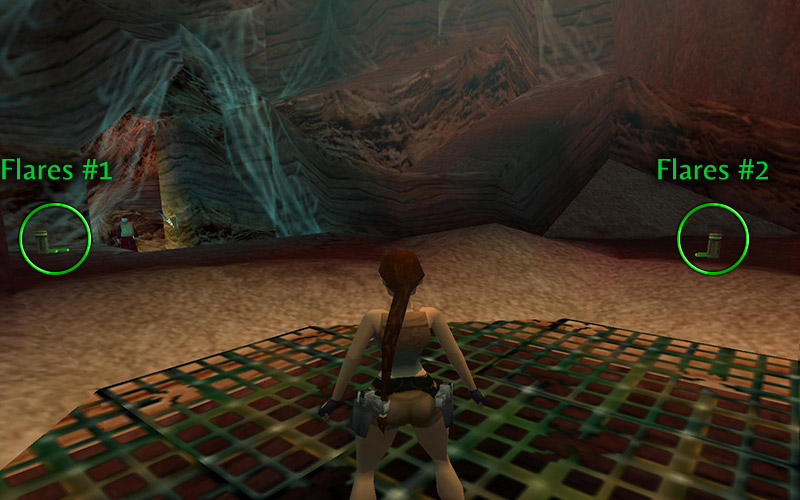
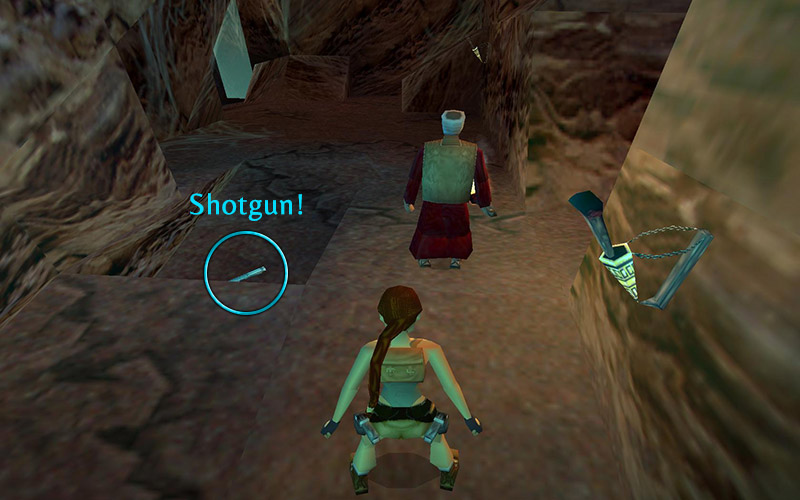
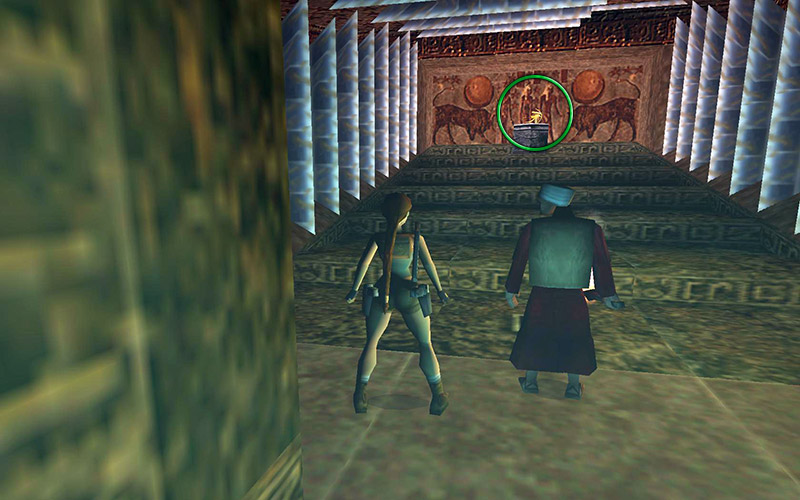
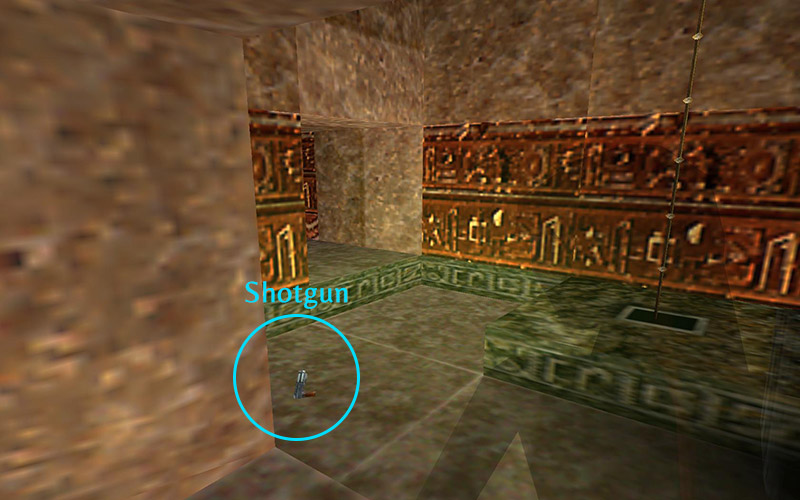
Once you gain control of Lara, you will need to start picking up some handily placed items. Just forward and to the left you will find your first bundle of flares. Turn around, or press roll to flip around and you will find more flares on the opposite corner of the room. Now head back toward your guide. Just to the left of him is a Shotgun. When you get it you will automatically get 6 normal shotgun shells with it. It's not much, so keep your pistols equipped.
Unlike previous games, your allies are safe from friendly fire, which means you can fire without worrying about shooting them by mistake. Yay!
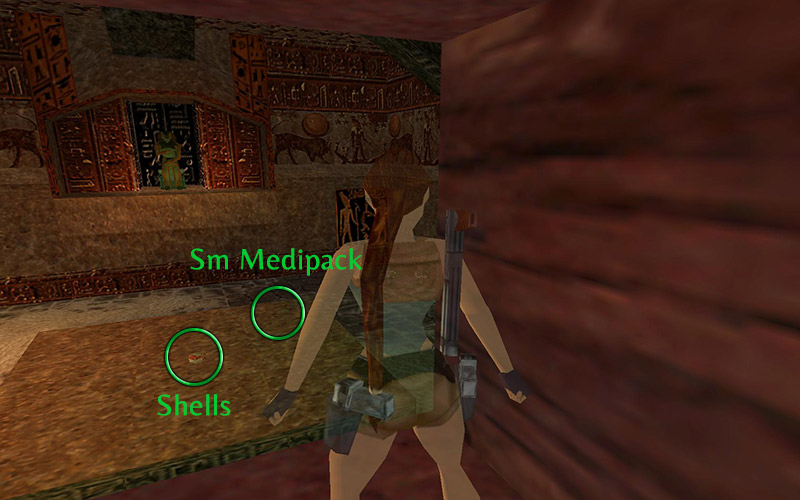
Follow the path as it twists left for a bit, but don't go too far. You will find a slanted ledge to your left, so leap up onto it and run to the top to find another box of shotgun shells (normal). Head back down, then follow the slope down and head for the large medipack from the small sunken area. A red scorpion will come out of the soil, so kill it first, then grab the loot.
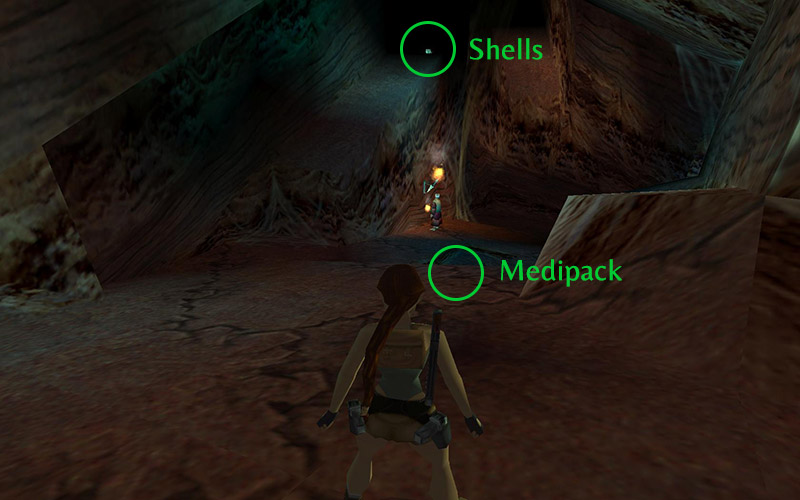
As you make your way down to the right, there is another red scorpion hiding in the next empty sunken area too. Keep your weapons drawn as you head down toward the next sunken area. A short cutscene will start, which is actually looking through the eyes of your next enemy, a wild dog! No, you can't pet it, so kill it before it kills you. Another red scorpion is waiting for you in the nearby depression too.
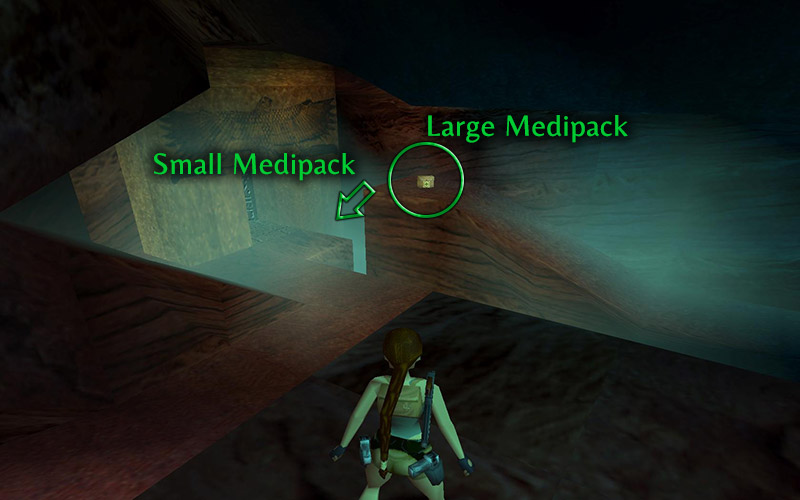
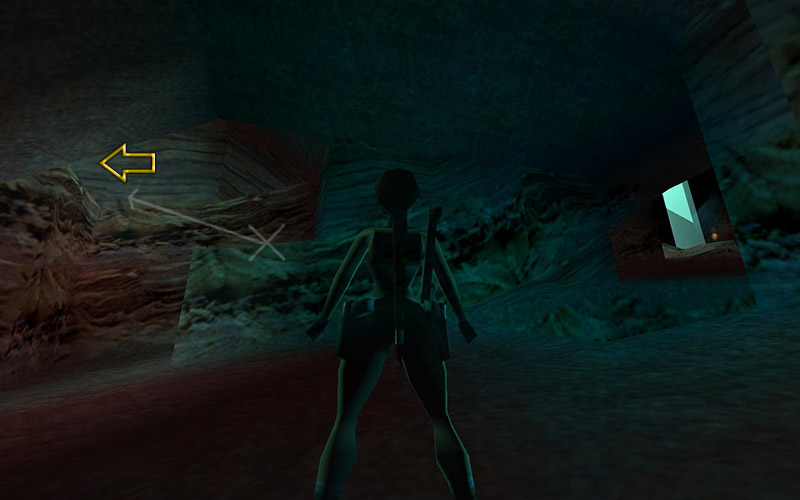
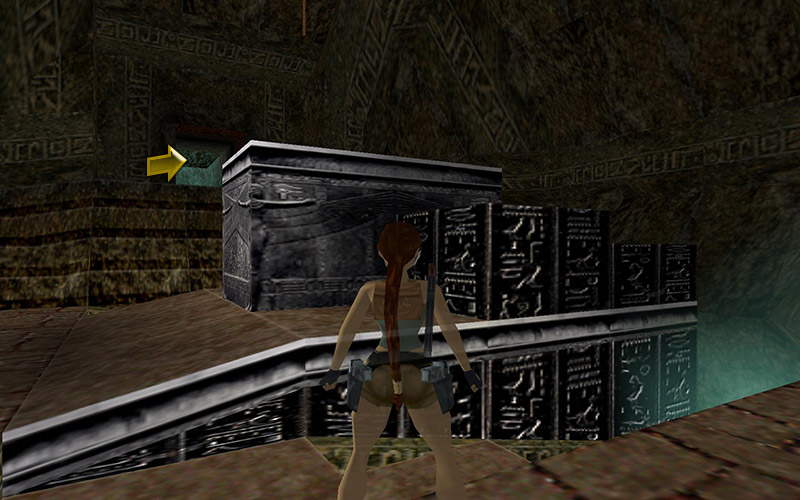
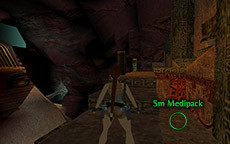
As you look toward the door, you will see a large medipack high up on a ledge. Climb up and grab it, then enter the foggy and dark area right of the door to find another small medipack (you might need a flare to see it). But wait, don't enter that door yet, there are more goodies behind you. Head away from the door and toward the fall wall. To your right is another hole with a red scorpion, but ignore it for now and climb, onto the lower ledge on the wall, now press jump and left to sideflip onto the next ledge for Secret #1 (9 of 70). It isn't much, just a small medipack, but every bit helps. Head back down and enter that doorway. (Note: If you press PAUSE and chose Statistics, you can see the number of secrets you found so you can tell if you missed one as we continue onward.)
As you enter the next room the door will close behind you and 2 red scorpions will attack from opposite corners of the room. Once defeated, you will find yourself instinctively drawn to those 3 holes in the walls. Don't give in... unless you don't care about getting a secret. Head down the passage on the south side of the room and into the room below.
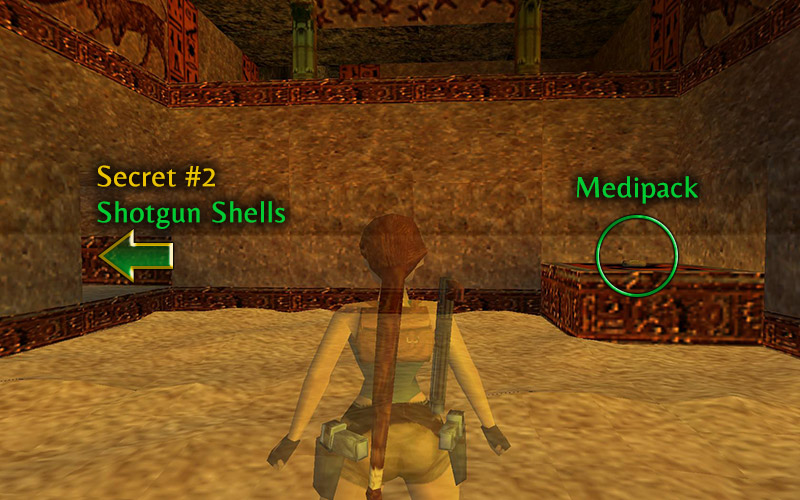
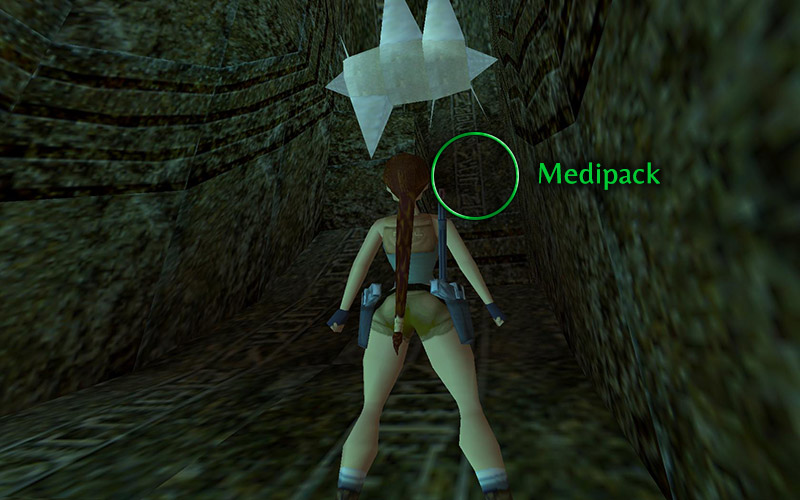
You will immediately see items on the other side of the room, but we can't get to them yet. Safely drop into the pit and find the alcove to the left to enter Secret #2 (10 of 70) containing a box of shotgun shells (normal). Two red scorpions will attack you from behind, so roll and open fire. Once your alone, pick up the small medipack from the raised floor. Now climb back up and run back up to the previous room again.
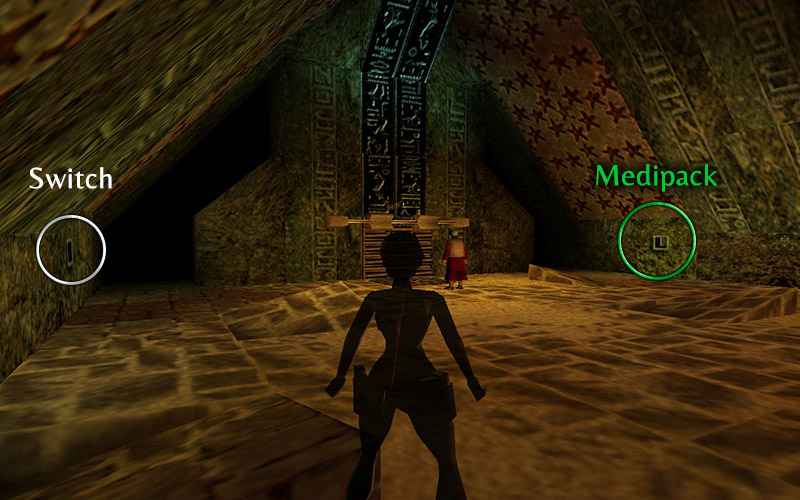
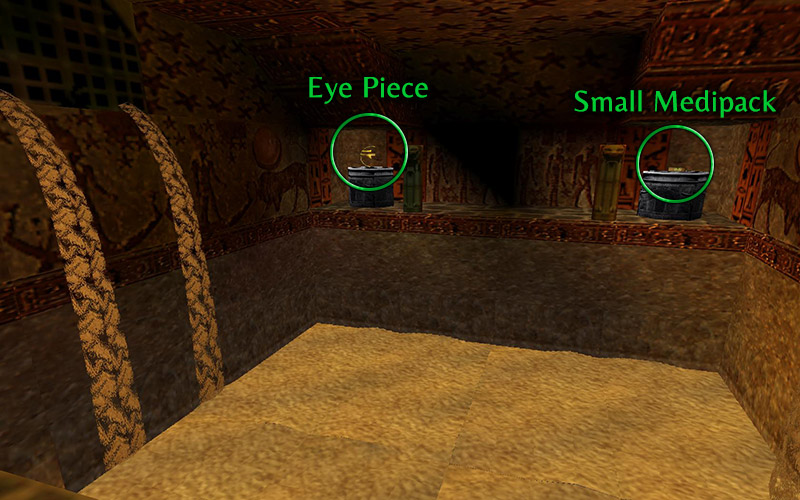
First, use the hole in the wall on the south side, which shares the exit to the lower level, for a large medipack, then use the hole on the other side of the room closest to the guide to activate the sand in the room below you. The third hole does nothing. Head back down to find the pit is now full and grab the two items on the pedestals (just walk up to the pedestals and press action). The right pedestal will have a small medipack, the right will give you an eye piece. The door upstairs will open so head back up and enter the next room.
There are 3 things to note in this room. First is a spot for a key, which you only have half of right now, second is the stairs leading down, and third is the vine atop the some rocks in the middle of the room. Let's go for a swing on the vines first to get Secret #3 (11 of 70) . (A video walkthrough is also available for this secret)
Climb atop the rocks and stand just under the vine. This is a little tricky to do the first time, so you may want to save first. Press jump and hold action to grab hold of the vine, make sure you're at the bottom and turn to face the alcove (the controls are mirrored on some versions). Now, still holding action, press sprint once, don't hold it down and wait until Lara crosses her legs around the rope again then press sprint again and as soon as you reach the highest part of the swing, jump! Note: This technique will be required in the future too, so you might want to practise if you had trouble with it.
Once you hear the chime, the secret is counted, but if you want the goodies, you are going to have to work for them. Climb up to your right and immediately duck until you see a huge spinning spike go by overhead. Now head up, sticking to the right side, and jump onto the flat ledge. Stay close to the back walls and you will be safe from the spike for now. Climb up onto the next ledge and grab the small medipack.
Now turn left and use look to turn the camera upwards and wait until the spinning spike moves past. Climb up to the next ledge, quickly take a step forward so your in the middle of the ledge, turn left, and back up against the wall. Take a running jump to the center of the room and grab the next ledge and pull yourself up. You are safe again, for now.
Climb up further and grab the flares to your left. Stay on the left side and slowly make your way to the far side, then turn around and safely drop to the ledge below. Turn around and walk to the edge, then wait for the spiked cylinder to pass again. Once it is safe, do a standing jump to the next platform and draw your guns. First one wild dog will run around the corner and attack, so kill that one quickly, but once you make the corner 2 more wild dogs will attack.
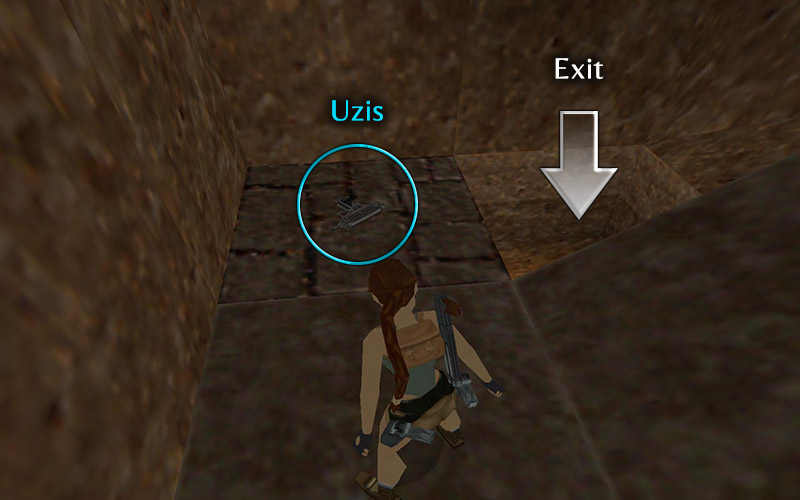
Once you take care of the mean doggies, keep the left of the room and walk off the ledge and onto the ramps. The right side has a pit with 2 red scorpions in it so don't fall in. All that work has finally paid off – you now have Uzi and 30 rounds for them! Now safely drop down to the ledge on the right and back into the sand room. Make your way back to the room with the vine.
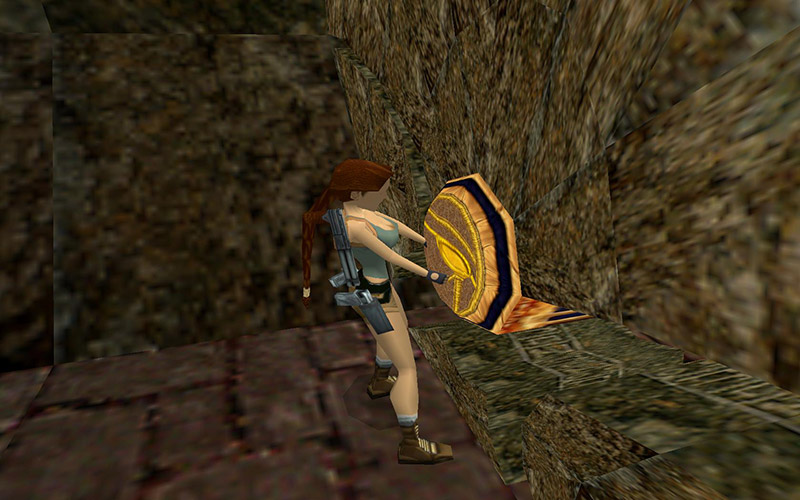
This time, head down the stairs, but don't rush into the room! Wait until your guide disarms the blade trap, then go up and grab the second eye piece. Head back to the room with the vine and to the odd circle with the eye. The two pieces you have need to be combined first, so go into the menu and select one of the eye pieces, then choose combine and select the second, which gives you the Eye of Horus! Now use the symbol to open the door to the next room.
 Once you start following the newly opened path, 2 wild dogs will rush to meet you. Show them what kind of good pet owner you are, then follow the path up to the sphynx room! Your guide will rush by you, but you should take your time and explore, and loot. When facing the sphinx, there are two lower areas to the side of you where you will find items; uzi clips to your right and a small medipack to your left.
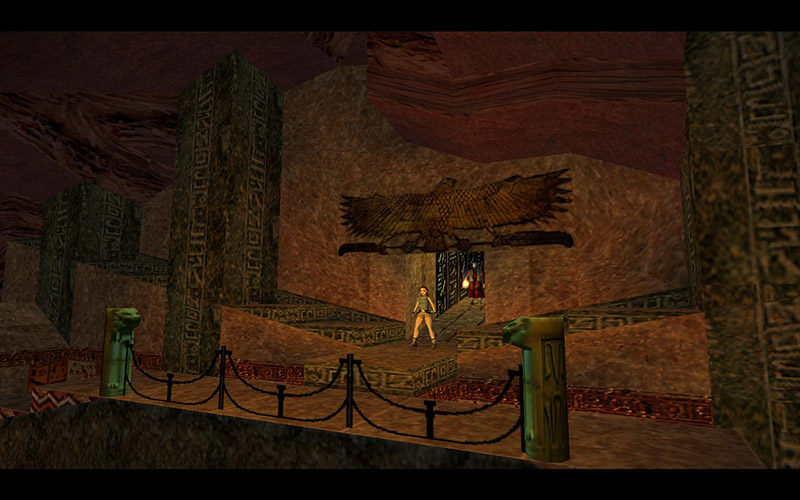
You might feel the need to climb down to the sphinx, but we will get there later anyway, so, for now, let's go find that guide. Take the stairs to the south (left when facing the sphinx) where you will find your guide lighting a fire to open the next door. How does he know where he's going? Well, he obviously doesn't as he takes a left to a locked gate at the T instead of going to the green room to the right, where you should go. As you follow the green-lit path, don't jump over the shallow hole; there is a small medipack there. Climb out and continue through the room with the pool of oil and statue via the right passage and up to the next room.
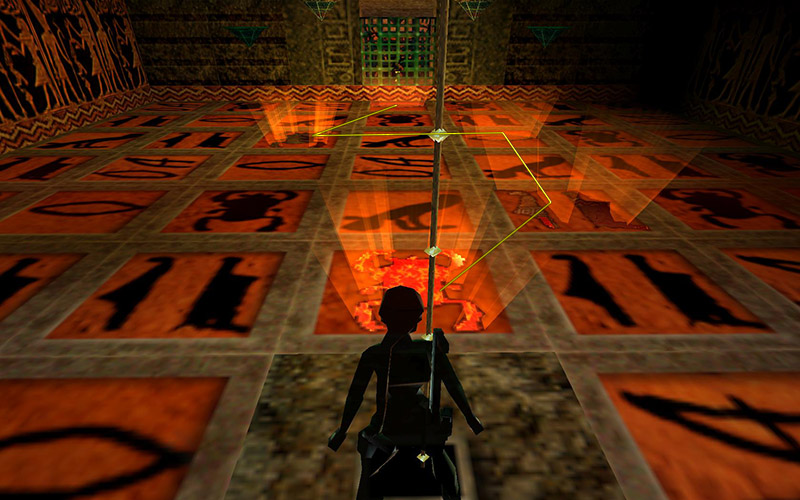
You will find yourself in a room with a bunch of symbols on the floor and a chain at the door. Pull the chain and your guide will get access to the pool of oil and light it. Some of the tiles on the floor will now be glowing.
The key here is to jump from glowing tile to the next glowing tile without touching the other glowing tiles, or the borders, to get to the gate. As you jump off each glowing tile, it will ignite, tiping you off that it was successful. But in this case, making a mistake can be rewarding, so just run around to a few of the symbols, then head back the way we came, but down to the left. At the far end is another chain to reset the puzzle, pull that, then grab the Shotgun (or shells) on the floor near it. If you make a mistake in the tile room just head back here and pull that chain. Now head back to the tile room and walk to the first one, then make standing jumps from each tile (you need to activate them all) as you head to the gate. This the path I recommend to take. Grab the Timeless Sands and continue forward to the base of the sphinx. (I told you we would get there.)
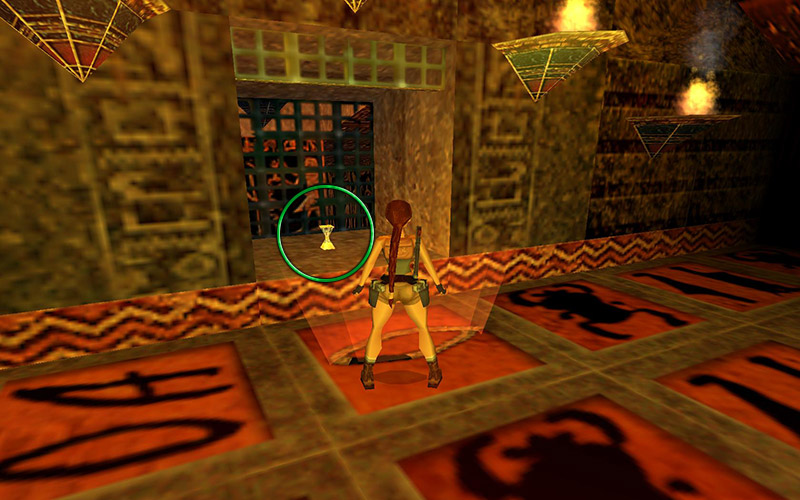
Head to the south side (to your left) and follow the wall to the west. Your guide will head down a path going down, but if you want secrets you will not follow. Instead keep going west and climb up onto the rock ahead. The brown wall before you is full of grooves, which allows you to climb it like a ladder. Go all the way to the top and pull the lever up there. That just opened up Secret #5, but wait, we haven't gotten #4 yet.
If you have issues following these steps to get to Secret 5, check out this video. Ahead and to your right (north-east of the switch) you will find a flat striped area on the side of the sphinx. Jump there, now angle Lara to the other striped area, almost facing the corner, and jump while pressing left to jump around the corner. Cross the head and do the same thing to reach then next platform and Secret #4 (12 of 70). Here you will find more shotgun shells (normal) and a large medipack. You can head back to the base of the climbable wall the way you came, or you can the express way down by walking to the nearest stripped platform, facing the sphinx and stepping backward with action held as you slide down to the ground level, then run around the sphinx again to the south.
At the base of the ladder you will find a door opened to the right of it. Secret #5 (13 of 70) contains a box of shotgun shells (normal) and a box of shotgun shells (wideshot). Now head down the southern passage your guide took.
 Upon reaching the next room, your guide will suddenly get spooked and run back up. Maybe Lara should have read those inscriptions, too, but her mentor didn't and he turned out fine... oh, right. Oh well, she's Lara Croft, right? Head down into the passage and kill the 3 red scorpions, then down into the room. Those items in the center of the room sure look like a trap, but they aren't, so calmly grab the shotgun shells (normal) and small medipack, then climb up to the statue on the other side of the room.
Press action at the statue and use the sands of time to dump all that sand at the sphinx into the room your in. Now Lara has her own sandbox! Sadly a red scorpion thinks it is his sandbox, so you might want to teach it a lesson, before changing your mind as you head around the west side of the room and out through the other side. Go back to the sphinx and enter the mouth (press action, up then duck), and follow the passage to the next level. (I would recommend saving just before the slope down.)
Continue to the Burial Chambers