
Tomb Raider 4: The Last Revelation
Level 7: "Temple of Karnak" Walkthrough
This walkthrough is for the first visit to the Temple of Karnak after Lara first finds out about the horrors she has awoken. If you are looking for the 2nd visit to this area, skip to Part 2 of the "Temple of Karnak".
Available Secrets: 4
Items Found: Canopic Jar 1, Crossbow Normal Ammo (1), Crossbow Poison Ammo (1), Flares (5), Large Medipack (3), Shotgun Normal Ammo (5), Shotgun Wideshot Ammo (4), Small Medipack (4), Uzi Ammo (8)
Weapons Found: Shotgun
Enemies: Black Scorpions
Remember: If you can't make out the images in the Walkthrough, click on them to open a larger one. Also, hover over, or click, on coloured words for helpful images.
 The Temple of Karnak isn't so much a building, but rather of city of temples. Because of the huge size of the real temple, it figures that it would be broken up in sections for Tomb Raider: The Last Revelation. The first three levels work together as one huge level, which includes Temple of Karnak (where we begin this leg our adventure), The Great Hypostyle Hall, and Sacred Lake. You will be bouncing between the 3 levels, with two visits each, so I will break up the levels into 2 parts, and inform you which level you should have come from.
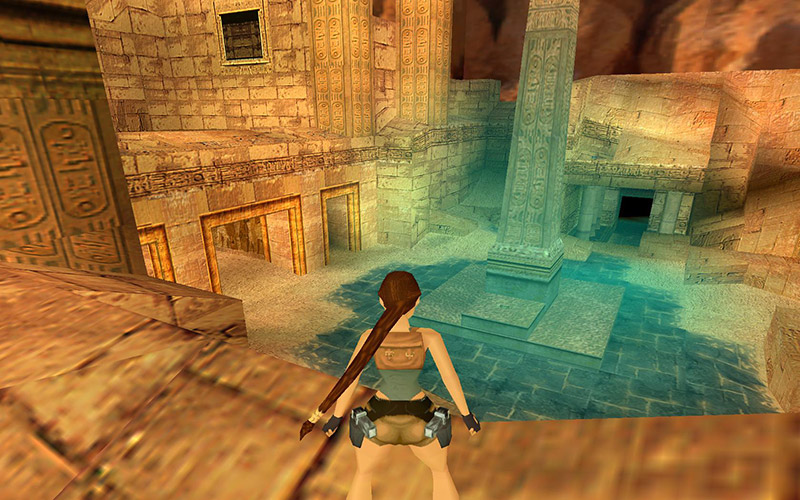
After the introduction FMV (Watch it here if you missed it.) and Lara slamming her jeep against a wall, it's time to start exploring these massive ruins. You can forget about the jeep, it is completely wrecked and it will not be touched again in the game. Climb over the western wall, partake in the beauty of the area, then slide down to your dangerous encounter with a new enemy.
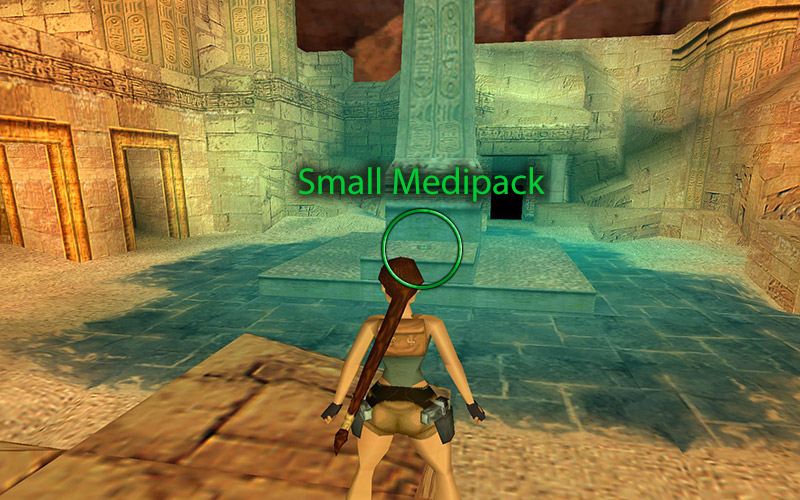
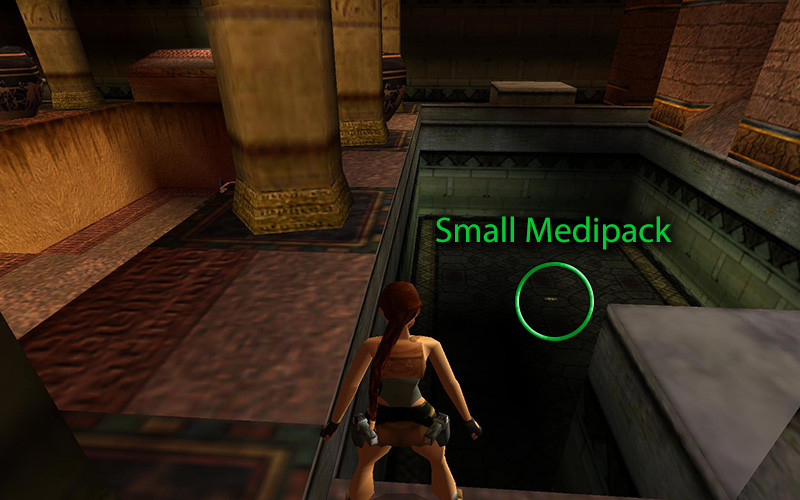
Two Black Scorpions are hiding around the obelisk, so get your automatic pistols firing until they are gone, and be sure not to let them hit you or you will need to use a Medipack to cure the poison. Lucky for you, if you did get poisoned, there's a handy Small Medipack on the ledge near the obelisk.
From here you will see three exits – the 3 doors to the south, a large pillared entrance to the west, and a broken wall to the north. Not all choices continue the story, but Lara's a Tomb Raider, so let's go raiding first!
The 3 Doors (South Path)
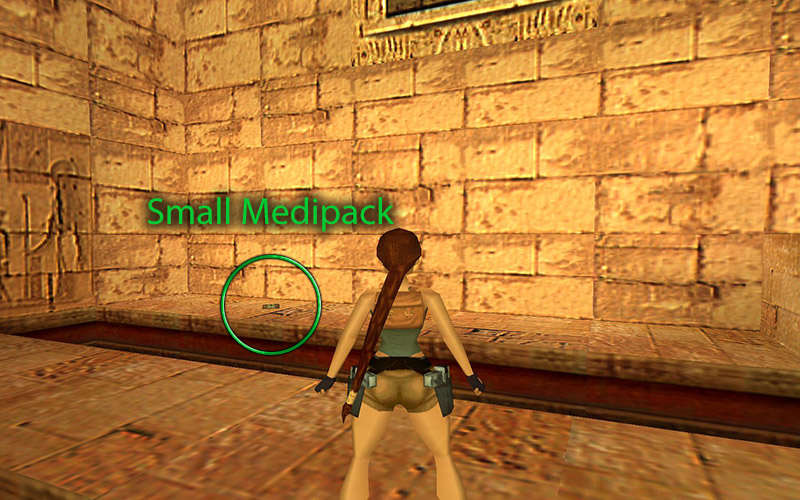
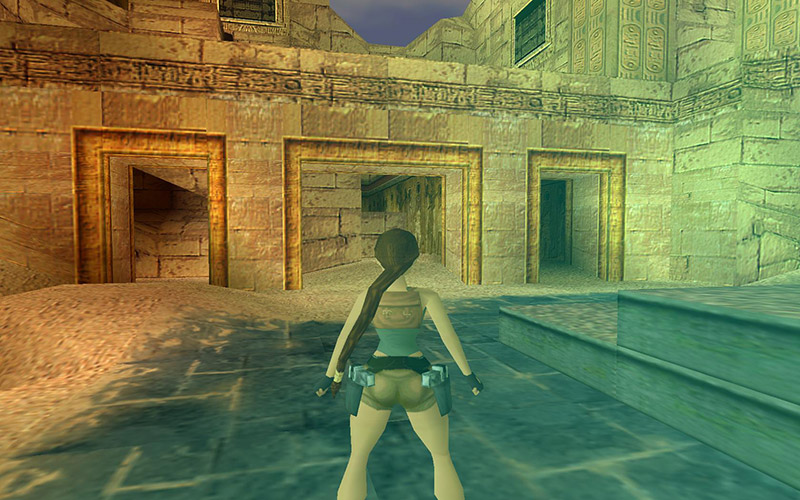 Head to the 3 doors and take the middle one (there's nothing in the other 2) and leap to the first block. Don't cross over yet, instead take the high road by climbing up the wall to your right. You will see a Small Medipack on the next platform so jump over and snag it. Turn around and you will see more loot the other side of this area. Jump back to the next platform, then do a running jump to the Uzi Ammo, then leap across to your left to snag the Shotgun Wideshot Ammo.
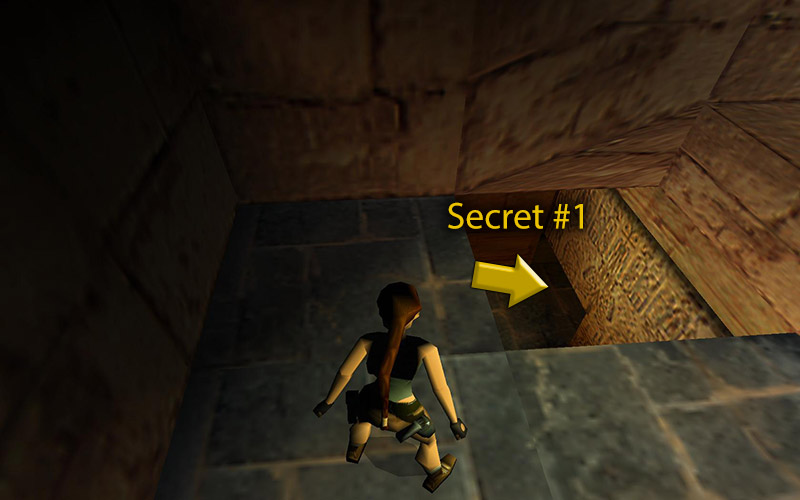
Instead of jumping all the way back, let's save some time and safely drop from this platform, which will leave you next to pit. Drop down and crawl into Secret #1 (26 of 70), but draw your pistols as soon as you hear the chime and shoot that Black Scorpion that crawls your way. Now run inside, but before heading through the door to the right, shoot the vase to get Shotgun Normal Ammo.
Draw your pistols and head through that doorway, but step back immediately and shoot the Two Black Scorpions that scurry out to meet you. One more Black Scorpion is hiding in the far left corner as you head further in. Now just shoot the green 4 vases and collect your loot; you will find a Large Medipack, Shotgun Wideshot Ammo, Uzi Ammo, and Flares. Now back track to the obelisk again. (Out the door, crawl through the hole, climb up and follow the path.)
Pillared Entrance (West Path)
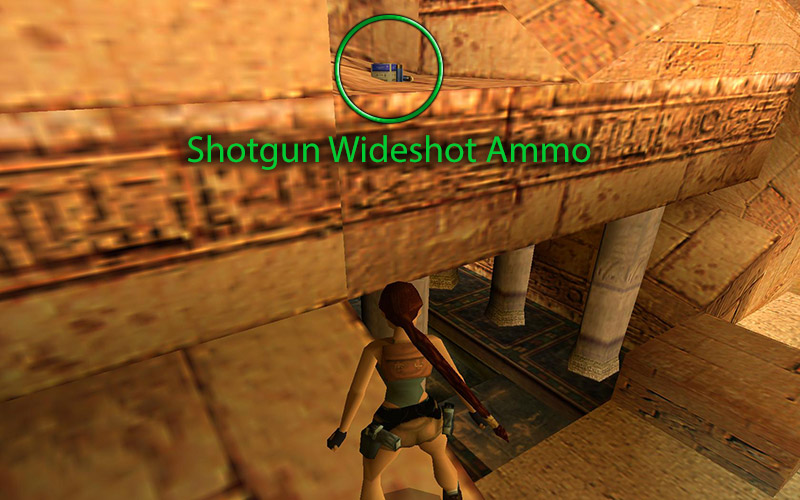
 Now let's head west toward the pillars, but don't enter yet. You see those blocks to the left? We need to climb those. Well, when I say climb I mean do some tricky jumps. From the rock near the entrance, do a standing jump to the higher rock, but stay near to the pillars or you'll slide right off. Now WALK as far back as you can, then do another standing jump and grab ahold of the ledge to snag a box of Shotgun Wideshot Ammo. Having trouble? Maybe this video will help.
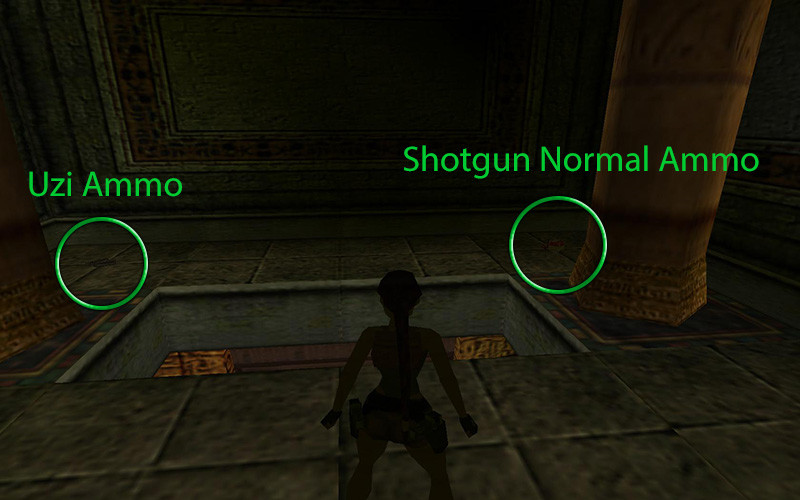
Once you got the item, safely drop to the ground and enter the pillared entrance. You'll probably notice the odd door to your right as you enter. That will come later, for now, go straight. Lara will notice something above, so follow her gaze and take the high road by climbing up the block on your right, then get up to the next level. You will notice an item beyond the cage, but ignore that for now. First, turn around and leap to the next platform, then the next one to grab Shotgun Normal Ammo and Uzi Ammo. Now head back to the middle platform and use the two hole switches to open the cages giving access to a Shotgun, Small Medipack, and Canopic Jar 1 (which will give you a cutscene teasing a later area).
If you didn't know, Canopic Jars held the 4 "vital" organs during the mummification process, 1 jar for each. By modern understanding of biology it might seem a bit odd that those organs were the liver, stomach, lungs and intestines, but that is what they thought to be important back then.
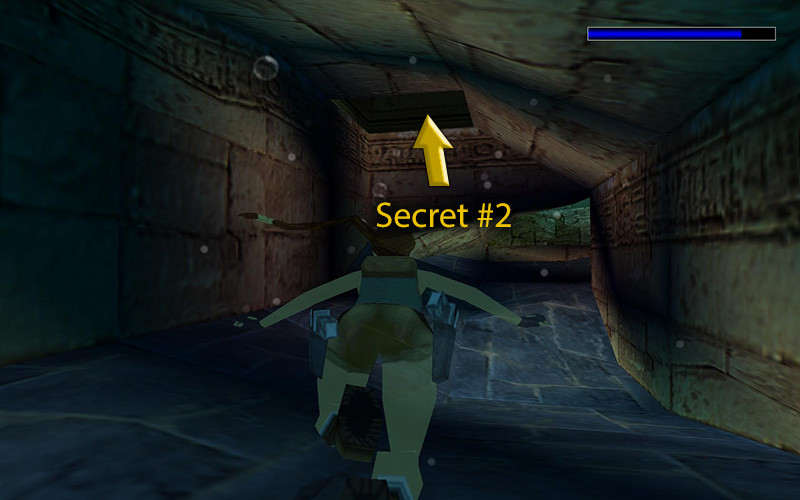
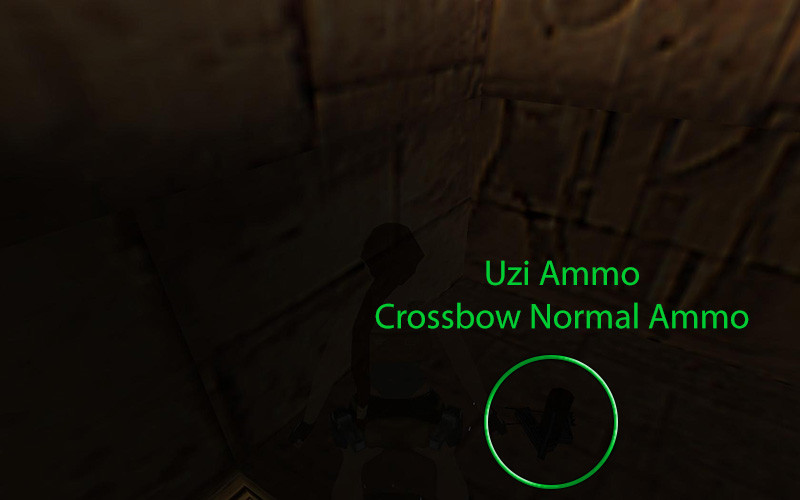
Anyway, now that we got the important item, drop back down to the main level and take swim. At the bottom you find some flares. After you grab, enter the crack in the wall, and follow the path until you get a gold and blue door. Open it and swim on through (you should have more than enough breath, Lara's a good swimmer after all). Once the path takes a left, look for a hole in the ceiling on the left side, that's Secret #2 (27 of 70). There are two items here in one pickup location, so be sure to pick up both the Uzi Ammo and Crossbow Normal Ammo.
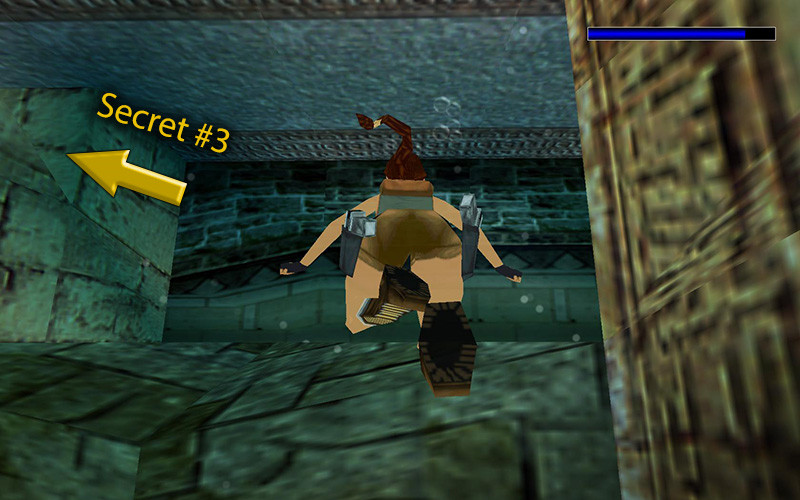
Now back in the water, continue north until the path takes a right turn. Go left. Yeah, that's right, left. You see that crack in the wall? That's Secret #3 (28 of 70)! There are four pickups here, so you might need more air while you pick up the Large Medipack, Uzi Ammo, Shotgun Wideshot Ammo, and Crossbow Poison Ammo, but you should have enough to hit it afterwards. The path onward is blocked by a gate, so swim all the way back, taking a breath at Secret #2 if needed, then trek to the obelisk again.
Beyond the Broken Wall (North Path)
 Head North of the obelisk and climb onto the broken wall, but don't jump down yet. Instead, climb the step to your right to get higher. From here you can see two items above the entrance to the next area. Jump onto the sand on the right side of the area, then climb over to get to the building to snag a box of Shotgun Normal Ammo and Uzi Ammo. Now safely drop down to the ground level.
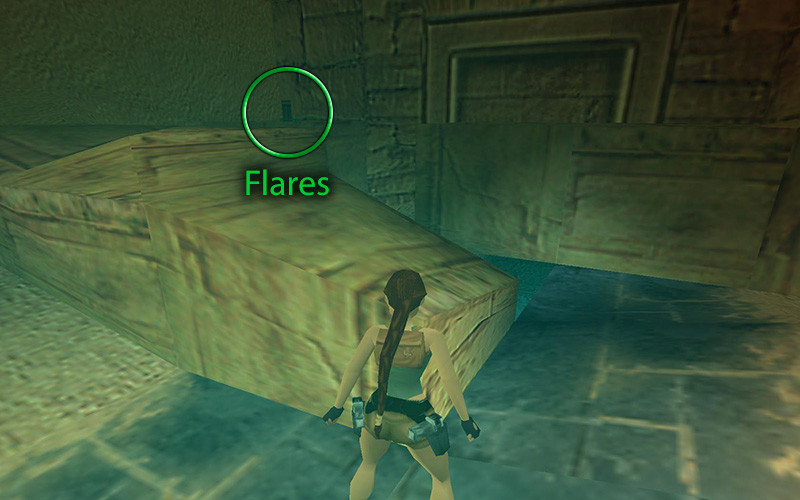
The large entrance has a right and left option, and both lead you to the same area, but the left side has flares. Before you get the flares in the far corner, a Black Scorpion will say hi, so kill it and grab your light makers. The pit in the middle will bring you to the large room we saw in the Canopic Jar cutscene. Black Scorpions reside in the 2 pits in the room, but only the right pit has a Small Medipack. It's up to you if you want to bother with killing the little stinger in the left pit since it's otherwise empty.
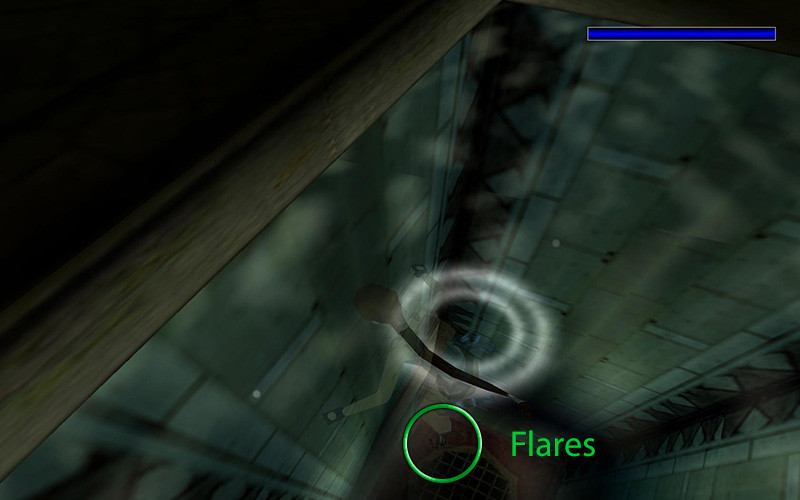
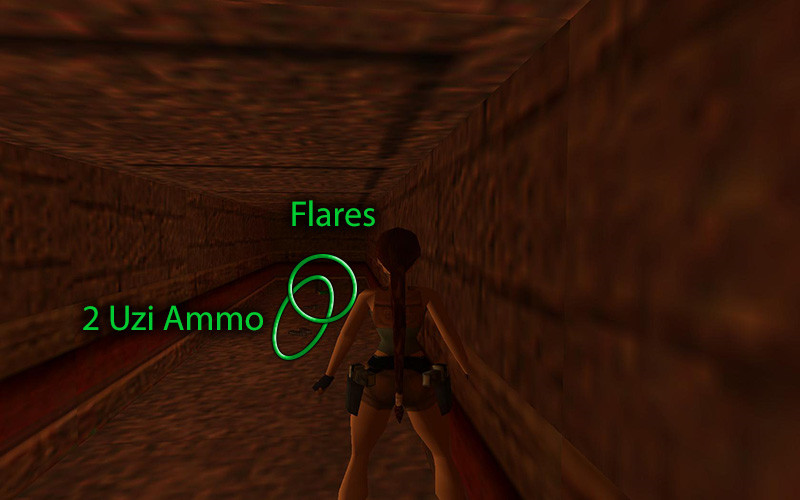
Before we head toward our goal, head to the left (west) side of the room and you will find a small crawl space high up between the first two pillars. Jump then pull yourself up with crawl to enter Secret #4 (29 of 70). Inside 2 Uzi Ammo and more Flares are stashed away. (At this point it is probably pretty obvious that things are going to get dark and very dangerous in the future.) Crawl back to the room. We need to cross over to the other side, but getting there may not be very obvious. Above the two pits you will see an odd rock ceiling – they're climbable! Jump up and hold action to climb across the room to the other side. If you chose the right pit, another Black Scorpion will welcome you.
Once you're done playing with the pest, press the button in middle to open the door on the opposite side. This will release another Black Scorpion, but you will have more than enough time to kill it as you jump down by the bowl and run up the steps. Pull the deep lever that was revealed and the bowl will take a little trip. Follow it... safely!
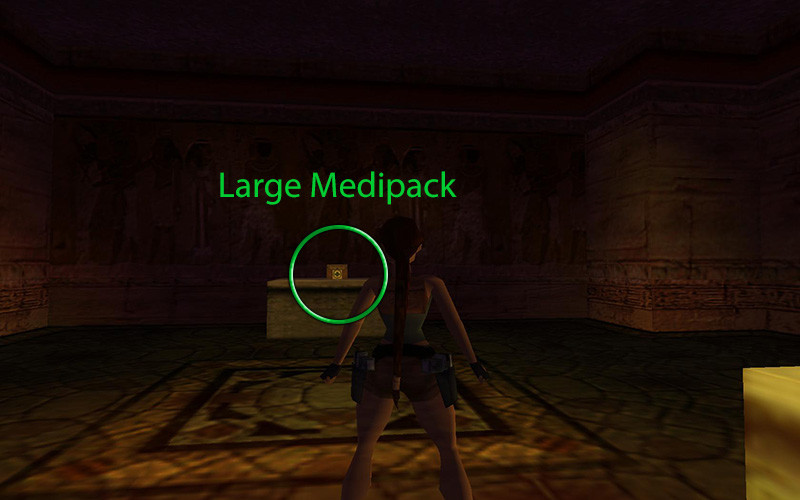
You will find a Large Medipack on a table, which surprisingly is not a trap, so snag it, then go up to the left (east) door near the horns. You will see a small opening behind the statue, place the Canopic Jar there, get a new tease of where to go next (remember that door?), then continue down the path toward the pool.
Yay, more swimming! Actually the current is so strong that you won't do much swimming at all. Jump into the pool on the far right (west) side of room, and collect the 2 boxes of Shotgun Normal Ammo hidden under the ledge (you may need flares to see them, but yous should have plenty). Once raided, that's all we can access, so let the current bring you to the bowl again. With your back away from the horns, take a right and climb up into the crawl space.
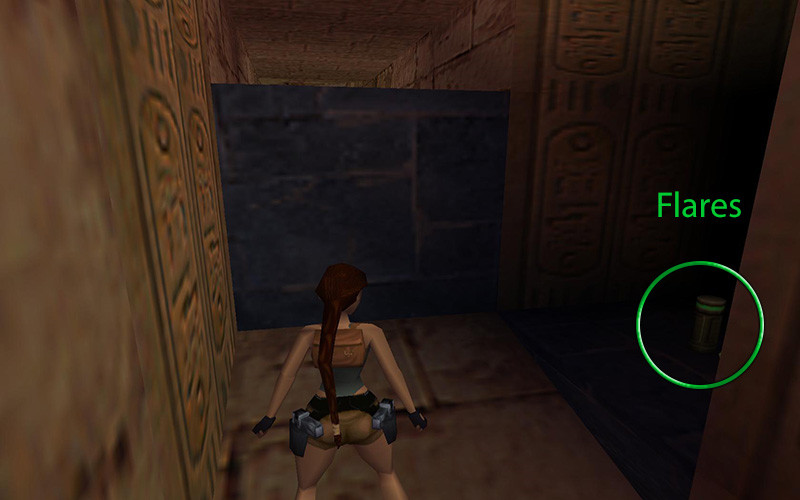
The path zig jags and will require you to pull up into more tight spots as you go, but it's quite linear, so I won't bore you with the details. Just don't miss the flares just to the right of the second crawl space. If you reached the sandy area, you missed it. The crawl space after the sandy area will bring you back to one of the entrances of the bowl room. You can climb up on a block opposite of the crawl space we dropped from to get out of here. Head back to the Obelisk, then through the Pillared Entrance on the west side. Entering the door to your right will bring you to the next level.
Continue to the Great Hypostyle Hall