
Tomb Raider 4: The Last Revelation
Level 14: "Coastal Ruins" Walkthrough
Available Secrets: 0 (During this visit to the level)
Items Found: Broken Handle, Crossbow Normal Ammo (1), Gate Key, Grenadegun Normal Ammo (1), Shotgun Wideshot Ammo (1), Small Medipack (2), Token. Wall Hook
Weapons Found: Crossbow
Enemies: Skeleton
Remember: If you can't make out the images in the Walkthrough, click on them to open a larger one. Also, hover over, or click, on coloured words for helpful images.
These Coastal Ruins, just outside of Alexandria, will be the main hub for the next several levels of Tomb Raider: The Last Revelation.
As you begin this level, remember that you can return to Alexandria via this same tunnel, which is very useful if you are running low on health and want to save those Medipacks. There's aren't many threats here, though, so its main purpose is to return Lara to her friend, who will give you tips if you get lost..
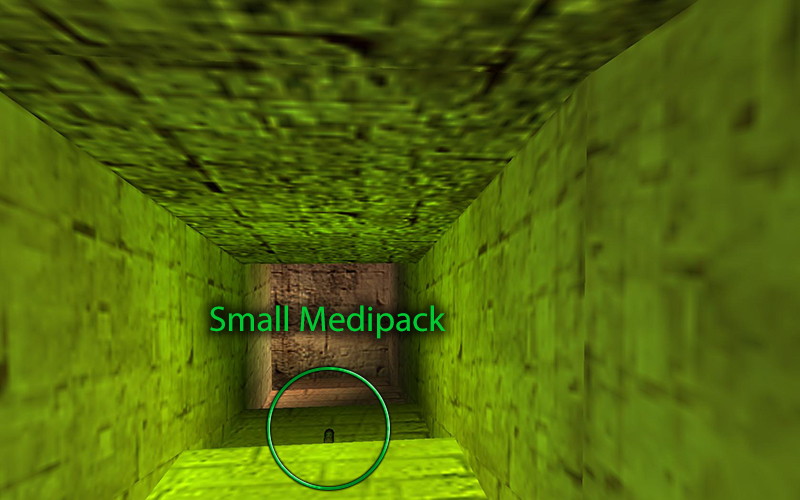
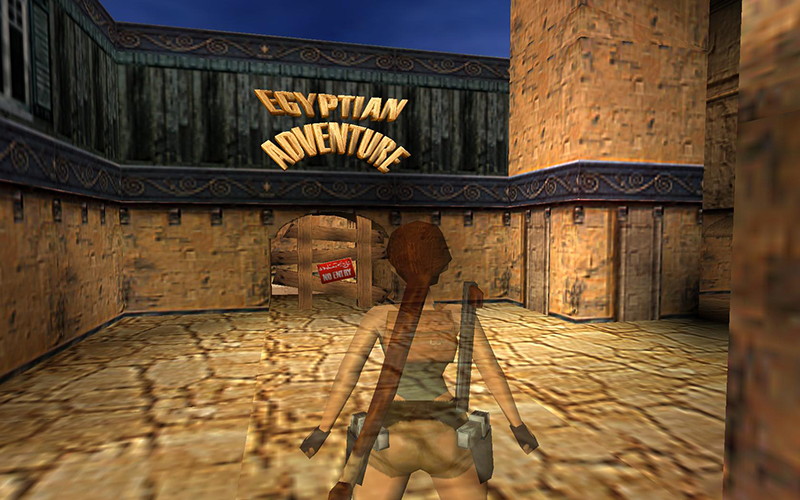 The shadows of this tunnel contain a Small Medipack, so pick it up and continue it into the next courtyard. You may be tempted to go straight, but leave that path for later and take a right and blast through the boards blocking your access to Egyptian Adventure.
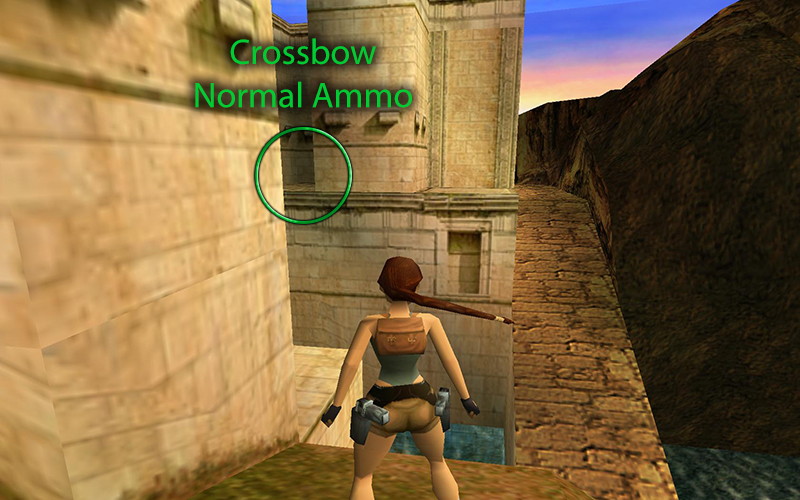
Since the park is all closed up, don't worry about the admission and take a left. Ignore the first passage and shoot out the boards on the 2nd one. This room contains the fantastic Crossbow we've been waiting for, but you need to deal with a trap-filled puzzle to get it. The mirror shows the truth about this room, so use it to navigate the spike traps and grab Crossbow on the far corner. You know, we might have stumbled across the reason Egyptian Adventure was closed; too many visitors dying, perhaps? Retrace your steps to return to the stairs. Take a left and enter the pyramid room where a mechanical mummy will jump out of the coffin. Don't worry, it can't hurt you.
Before continuing, I recommend you to combine the Crossbow with the LaserSight, select your Explosive Arrows (you should have plenty if you've been following this guide), equip the Crossbow itself, and save your game. The passage to the right of the pyramid will land you on a timed platform in which you need to take out all the targets on the other side or you will fall to your death. Use Look to target the closest middle target and fire one explosive shot to disable the traps below you, allowing you to safely drop down. Don't switch your ammo, yet; we will need it later. A Token will drop down at the far side of the room – grab it, then climb up into the crawlspace and return to the pyramid.
Note: If you found yourself trying to complete this puzzle without any explosive arrows in your inventory, shoot as many as you can with your pistol (jump and shoot), then do a side jump to one of the corners of the room after a few seconds (it should be safe from the spikes there), and shoot each target individually from safely. You can also try using the grenade gun, but it will likely require more than one shot to knock them all down.
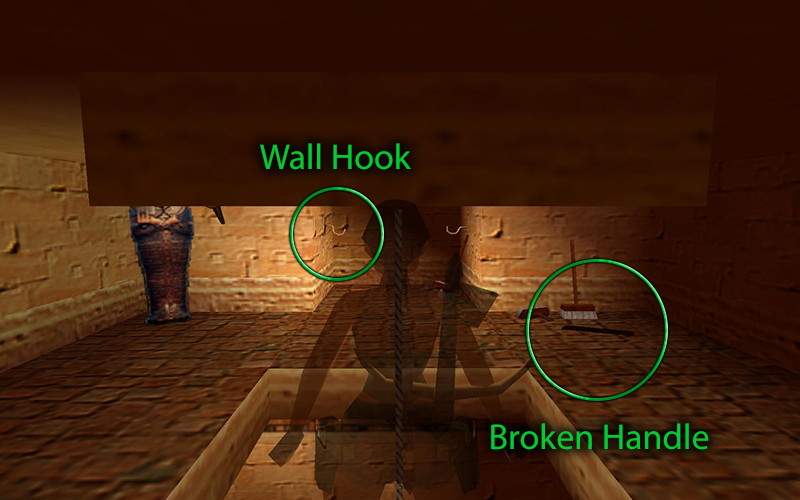
Head past the mummy, beyond the room we got the Crossbow from, then take a right to the snake charmer. Use the Token here and a rope will rise from the basket. Climb that rope and jump off when Lara's hands are at the next level. Snag the Broken Handle from the brooms in the corner then pry the left-most Wall Hook off the wall with your Crowbar. Combine these two items into the Hook and Pole, then drop back down to the snake charmer.
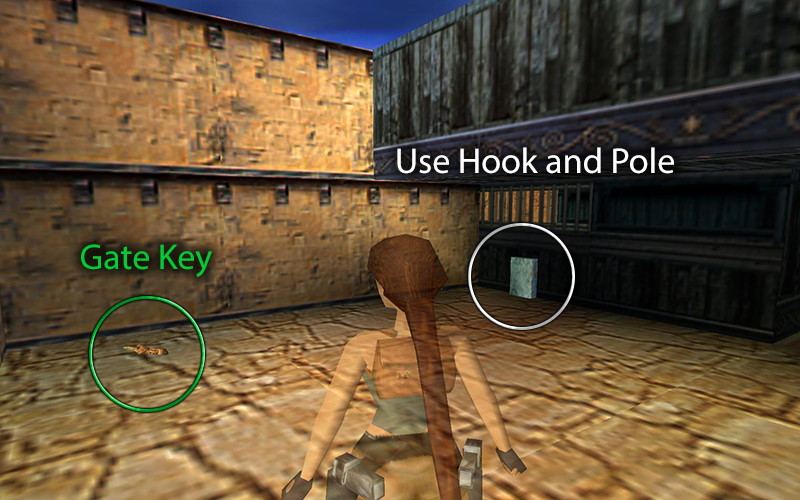
Leave the room and take a right to return to the entrance. The back of the admission stand has a blue box to indicate where you need to use the Hook and Pole - this will give you access to the Gate Key. We can now exit the Egyptian Adventure, take a left to the palm trees and continue our own adventure.
Note: Do not return to Alexandria until we use the Gate Key or you may lose it due to a bug.
Take the path to the right of the palm tree (the other side is a dead-end) and get on the platform in the middle of the water. Enter the crawlspace with a diagonal action jump, then climb the ladder in the next room. Soon you will reach the coast and all its beauty.
 This will be your new hub for the next couple of levels. Basically you will enter one level, get a key to the next level, return here just to dive into another area. There is also a secret in this area but it isn't accessible until later, so it will be covered in the level which gives you access to it.
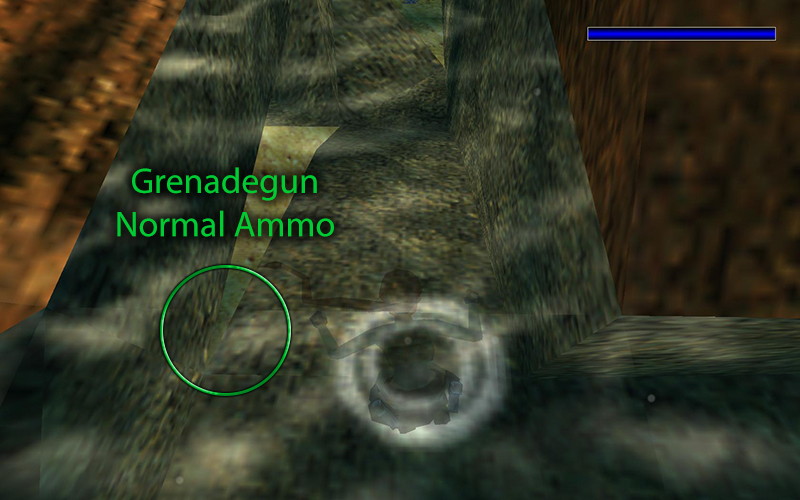
First, let's grab some loot. Head north-east around the nearest fort and leap to the platform attached to the walls. If you use Look you will see some Crossbow Normal Ammo on a ledge. Line Lara up for a running jump to grab the ledge and score your prize. Save, then dive into the small pool near the ledge and keep the right as the current drags you to the sea for Grenadegun Normal Ammo. If you miss it you can easily swim against the current to get to it. (I've encountered some nasty control issues getting out this small area, but I find that if you just let the current drag her for a bit and you should be fine.)
Pull yourself out of the water and return to the higher ground near where we picked up the Crossbow ammo. Oooh, what's that?! That, my friend, is a new enemy – the Skeleton! These things are immune to normal ammo, and will only be knocked down temporarily by Shotguns. The conventional way to deal with them is to disperse their body with grenades or an explosive arrow, but if you are feeling adventurous (and lucky) use the Crossbow's LaserSight and shoot the head off (which will just cause them to run around and ignore you). Some of these ancient warriors need to be turned to dust to trigger an event to continue the story, so you might want to get used to using some of the ammo we've been hoarding.
Note: If playing on the PC, there is a weapon bug with the LaserSight giving you unlimited ammo when using it. Just equip the Crossbow, use Look to engage the sight, then press "1" to switch back to pistols with the scope still active and fire away with your new laser-sighted pistols!
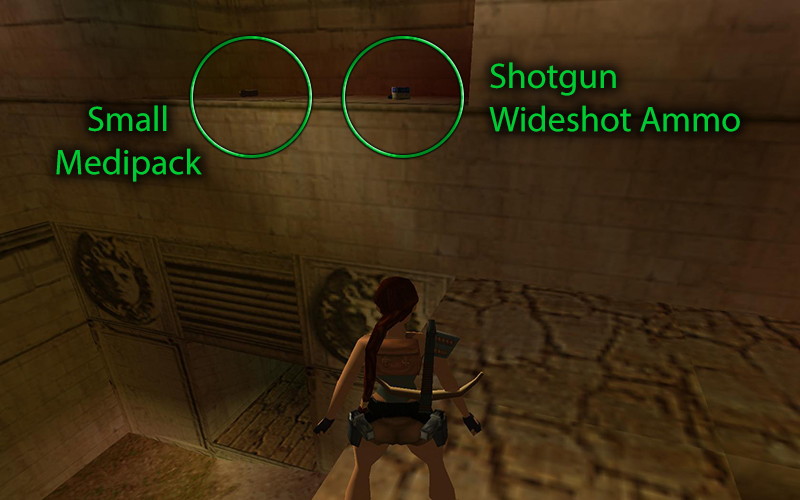
After dealing with the annoying Skeleton, let's head southwest, up the hill, and enter the fort. Two more Skeletons will enter via the upper walkway, but one might not make it to the stairs. Don't waste any ammo until they are at the bottom, and if they both survive the journey, lure them together before you unleash your exploding arsenal. Head up those steps they came from and leap over the first two gaps. You will see a ledge to your right - so jump and grab that ledge for a Small Medipack and Shotgun Wideshot Ammo.
Continue across the broken ledges until you get to where the living bones came from. Open the gate with the Gate Key we got earlier and head into the Catacombs. This is just a brief visit, though. Head right, and find the huge face on the wall. It's a big button that raises a block beneath you. Doesn't do much good right now, but it will in a moment. Climb back out to the Coastal Ruins.
Safely drop down to the ground level and enter the pit with the suspended boulder. I recommend you to save before continuing in case you mess up, then find the torch on the ground in the western area. WALK toward the fire, but don't get too close or you'll catch on fire, and light the torch. Find the pulley on the wall next to the boulder and jump underneath it to burn rope. Stay under that pulley until the boulder comes to a stop, then climb into the passage it was protecting.
This gate here will need to be pried open with the crowbar. Continue through to the Catacombs - once again, this will be short visit. We find ourselves in the room below the one we visited just moments earlier. That brown square in the floor is the block that was raised from the button we pressed earlier. Pull the column onto that brown block, then retrace your steps back to the Coastal Ruins.
Once back to the boulder pit, find the ladder next to the rope pulley, climb up to the ground level, head back up those stairs and across the broken ledges and head back into the Catacombs... For real this time.
Next Level in development...