
Tomb Raider 4: The Last Revelation
Level 4: "Burial Chambers" Walkthrough
Available Secrets: 5
Items Found: Amulet of Horus, Hand of Orion, Hand of Sirius, Medipack - Small (6), Medipack - Large (3), Scarab Talisman, Shotgun Shells - Normal (6), The Golden Serpent
Weapon Found: Shotgun
Enemies: Mummies, Anubis Hounds
Remember: If you can't make out the images in the Walkthrough, click on them to open a larger one. Also, hover over, or click, on coloured words for helpful images.
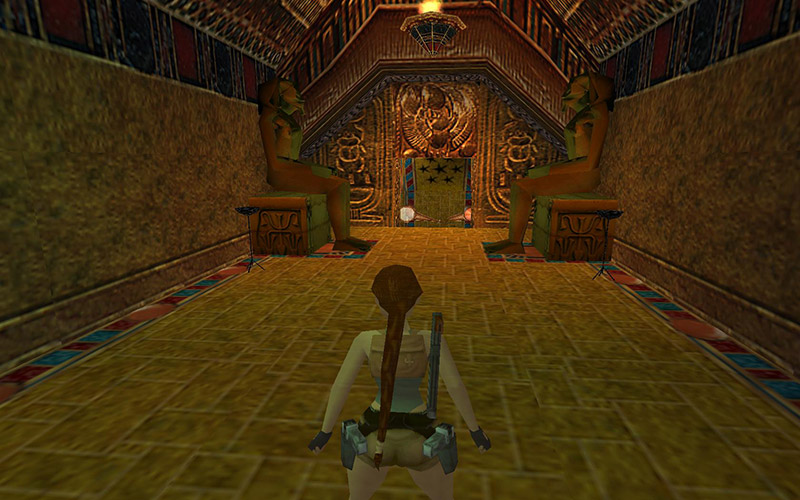
Behold, the Burial Chambers in the Tomb of Seth. Amongst the tomb of the pharaoh or god is many of his most devout followers.
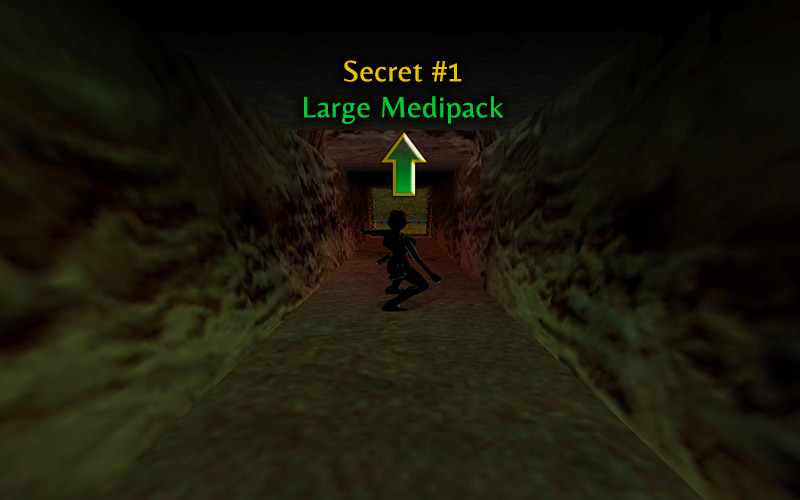
I hope you took my advice and saved before the end of the last level, as Secret #1 (14 of 70) might take a few tries, and without a save there isn't any second chances. As you slide down the slope, as soon as you reach the area lit up red, jump and grab on the ledge. When you pull yourself up, you will find a large medipack. Now just head back down and follow the slope down.
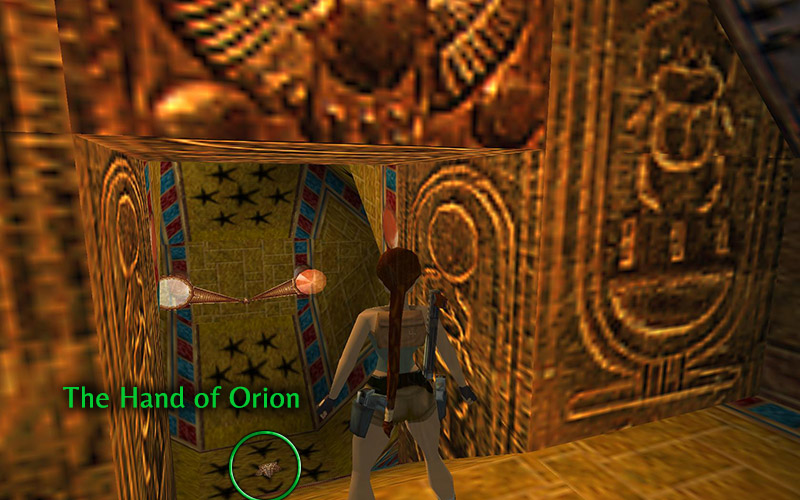
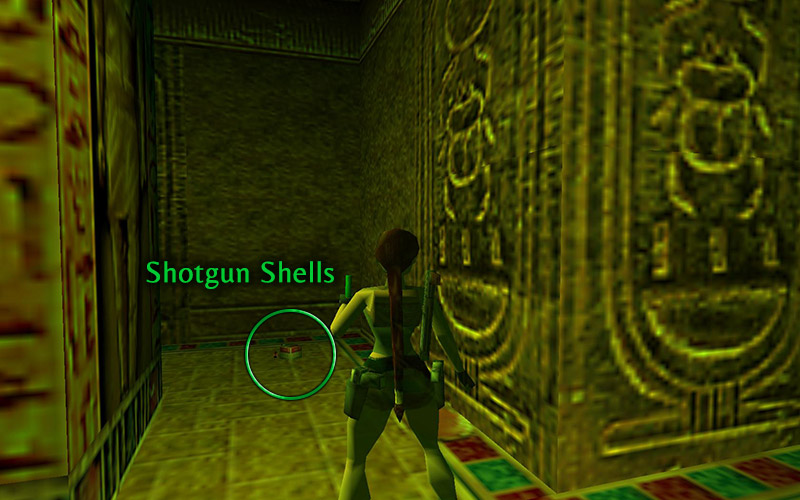
 Once you reach the lever, you may want to save again. Pull that lever and head into the gate. As soon as you land a spike trap will arm with a timer. Pick up the Hand of Orion and two passageways will open ahead of you. If you want Secret #2 (15 of 70), take the left path and pick up the box of shotgun shells (normal). The gate will open allowing you to continue on ahead. (This is the same point of where the right path would have taken you.)
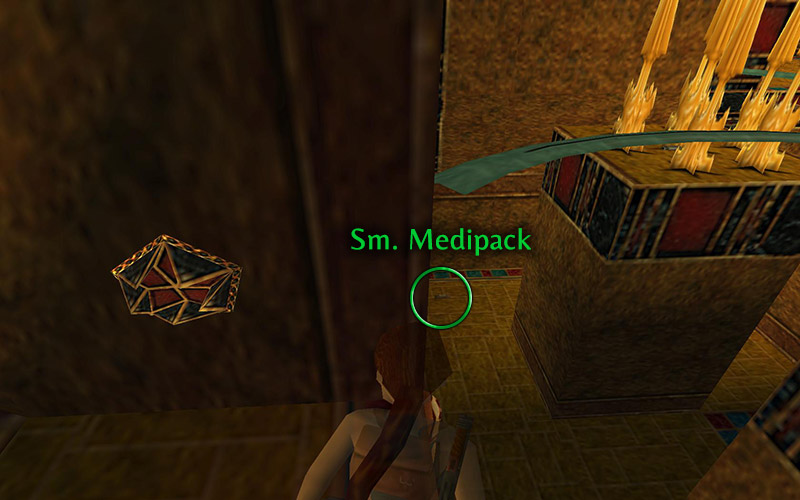
You will soon come across another spike trap. Walk up close to the area with the stars (where the spikes come out) and as soon as they retract, do a standing jump to the other side and keep going. As you make your way through the next hall you will see two huge urns on each side. Shoot the one on your left to reveal a small medipack (the right one has nothing, but you can destroy it if you wish). Jump through the next spike trap as you did before and make your way to the room with more spikes.
First, safely drop down to the floor and grab the small medipack here, then climb back up. Place the Hand of Orion into the slot on the wall which will retract the spikes, but start the spinning blades. Your fortune hasn't improved, much. There are two items on the pedestals, which will take some practise to get, well, without resorting to medipacks. If you don't want the shotgun and ammo, skip the next paragraph.
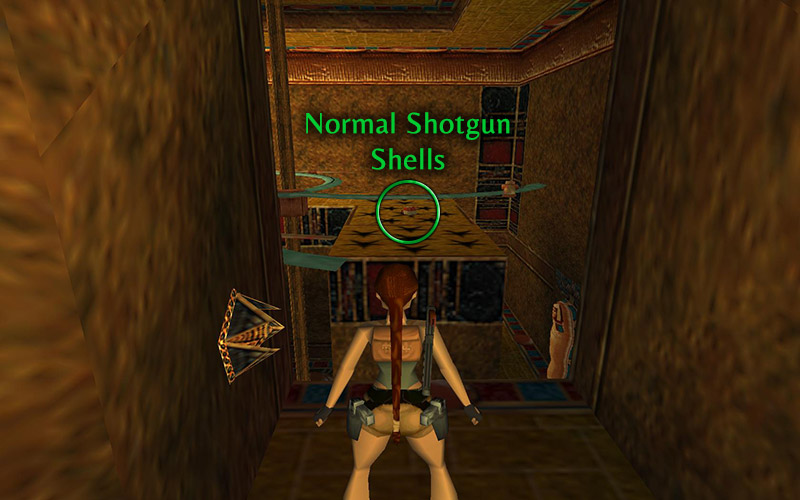
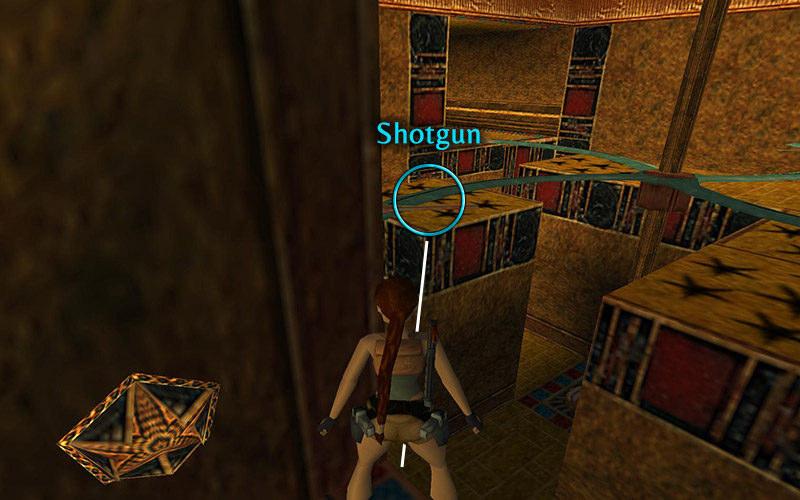
For the shotgun shells (normal), there are two ways: 1) Do a running jump to the shells after a blade passes, then jump to the floor, or 2) do a series of side jumps a blades pass, jumping side to side until you have a clear spot to grab them and head back. Now for the Shotgun (which give you shells if you have it), walk to the edge when you placed the Hand of Orion and to the far left corner and face the corner of the platform where the weapon sits. Wait for the inner blades to go toward the center as they cross the platform and jump to it and walk to the weapon. Don't pick it up, jump straight up over the next blade, pick up the weapon and rotate yourself to be facing the nearest wall. Side jump right and jump forward to leave the room.
Alternatively, if you don't want the weapons, wait for a blade to pass and jump and grab the ledge of the pedestal, then use one of Lara's new moves in this game, the corner grasp. Just shimmy along to your right and continue pressing right and Lara will make the corner and onward. Just continue until you are at the door (the square pedestal will have stars on it) and pull yourself up as a blade passes overhead. Either side jump or back flip (depending which side you pulled yourself up on) to get out of this room.
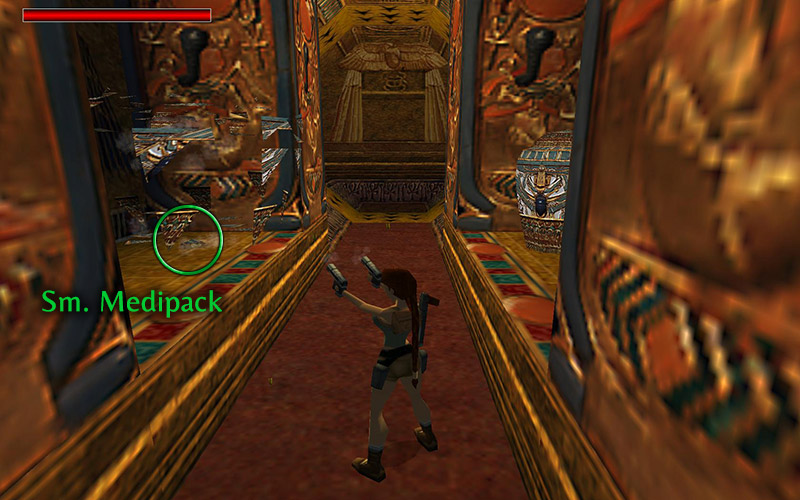
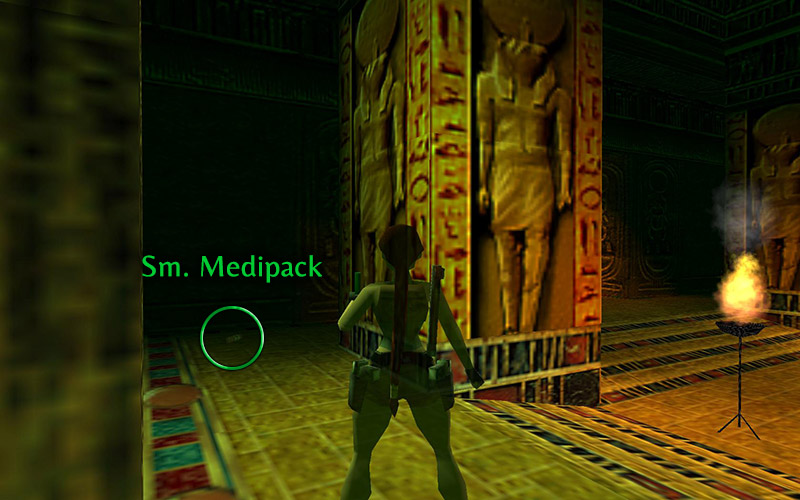
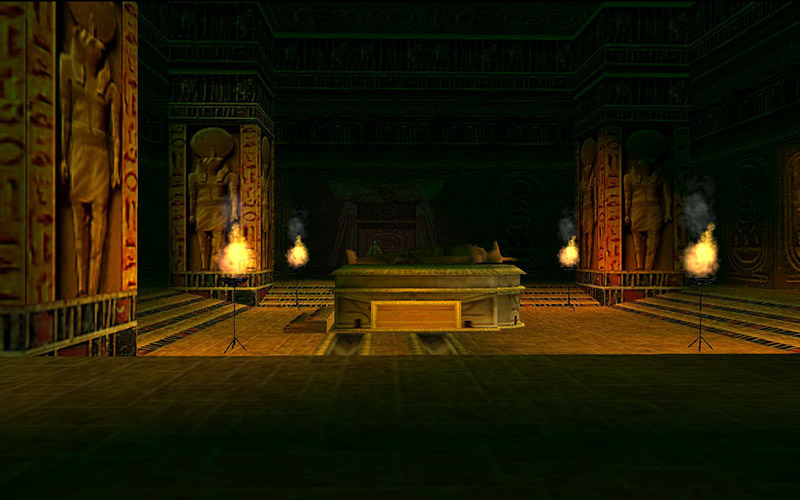 As you enter the next room you will be greeted with a quick cut-scene showing you the sarcophagus. If you want all the secrets, DO NOT approach that sarcophagus yet. First, let's grab some items in this room. In the shadows behind the pillars at the south-east and north-west corners of the rooms you will 2 find items: a small medipack, and shotgun shells (normal).
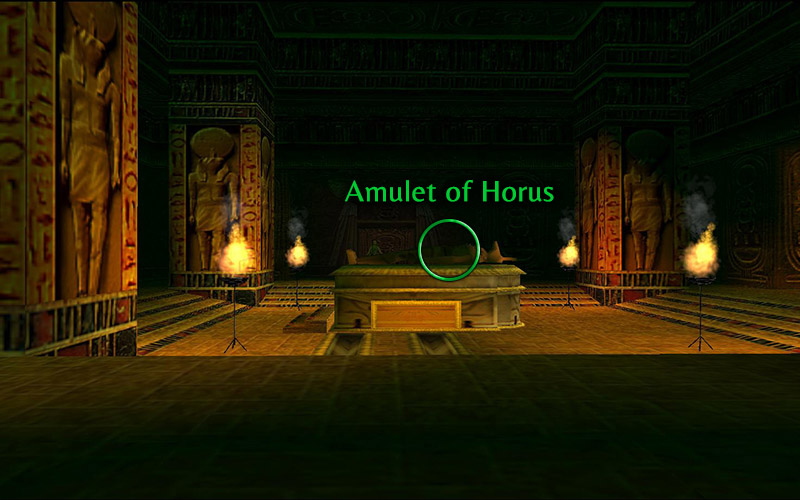
Now head into the next room, still avoiding the sarcophagus in the middle, where you will find a large statue in the middle. Grab the small medipack on the left side, then follow the left wall into the south-east pit, then back under the statue for Secret #3 (16 of 70) containing another small medipack and shotgun shells (normal). Okay, now you can head back to the sarcophagus and approach it from the feet for a cutscene of Lara getting the Amulet of Horus.
Follow the streams of blood back to the statue room where you will find the pits now full of lava (good thing we got that secret). SAVE, then push (or pull) the statue in the middle to the left area where the tile on the ground has a square with a circle on it, while avoiding the mummy cases. If you do awake the mummies, reload as they are invincible and will only cause you trouble when moving the statue!
Once you got the statue moved, the door behind the west mummy will open. Walk up to mummy, then retreat until it clears the path so you can run by it to the next room. Safely drop into area to your left. Arm yourself as you follow the dark cave to the left. When you get closer to the passage ahead, two Anubis Hounds will attack. Once clear, ignore the passage into the wall since we don't have the items needed yet, and head to the left.
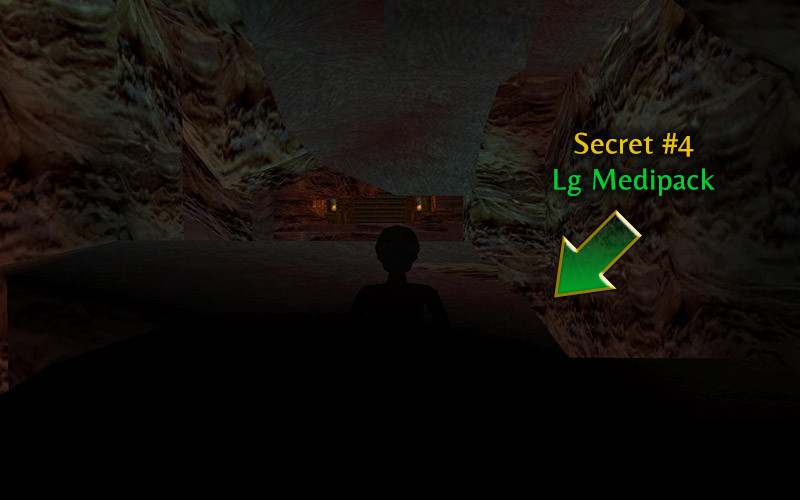
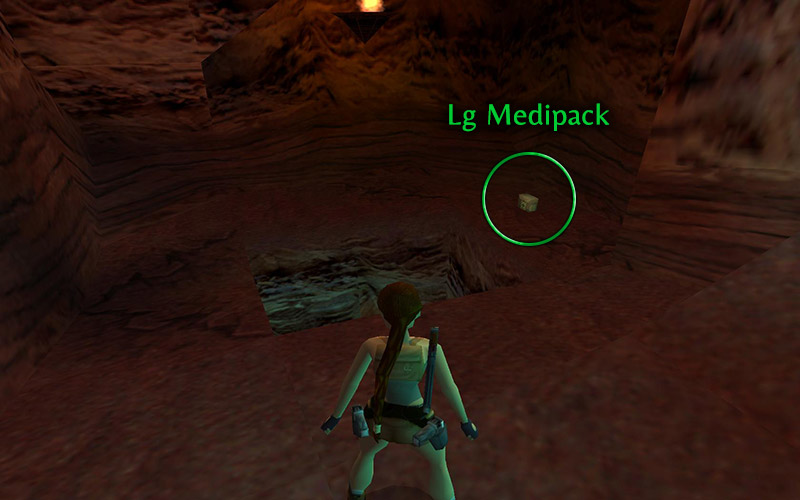
As you head up the stairs, stick to the right wall and into the pit below the stairs for Secret #4 (17 of 70) and a large medipack. Get back onto the steps but don't continue straight, instead take a left and cross the bridge. In the next room 2 more Anubis Hounds will attack. Continue up then safely drop down to the left.
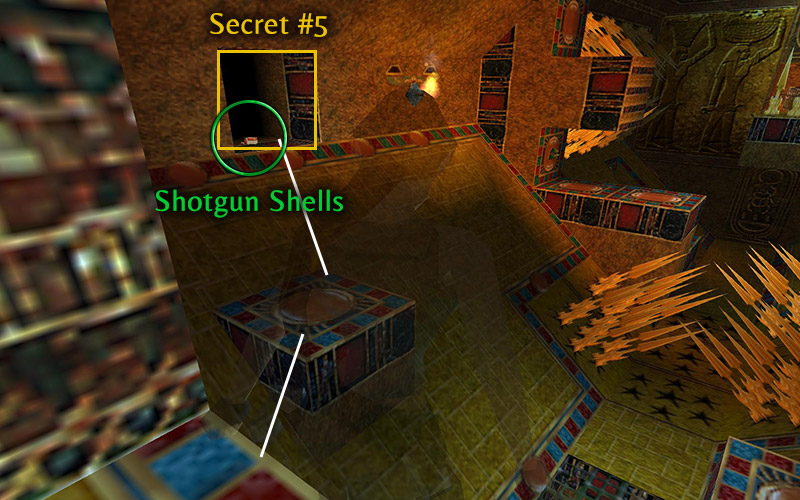
Once you reach the next room you will spot some shotgun shells (normal) to your left which is Secret #5 (18 of 70)! (Video Walkthrough) To get there, angle yourself to be block between you and the shells, and take a standing jump, then walk to the nearest corner of that brick and take another standing jump to the shells.
Now jump over to the platforms on the other side of the room and go north as far as you can go, then take a running jump back across again. You will see a receptacle for another object, which you don't have yet. The wall just above the receptacle is climbable, so jump up and climb up to the next alcove, where you will find a lever. Pull it, then safely drop back down to the receptacle, and look to the south wall where we entered. You will see the passage at the bottom of the room is open now, so take a running jump across to the other side and make your way into there and climb up to the room above.
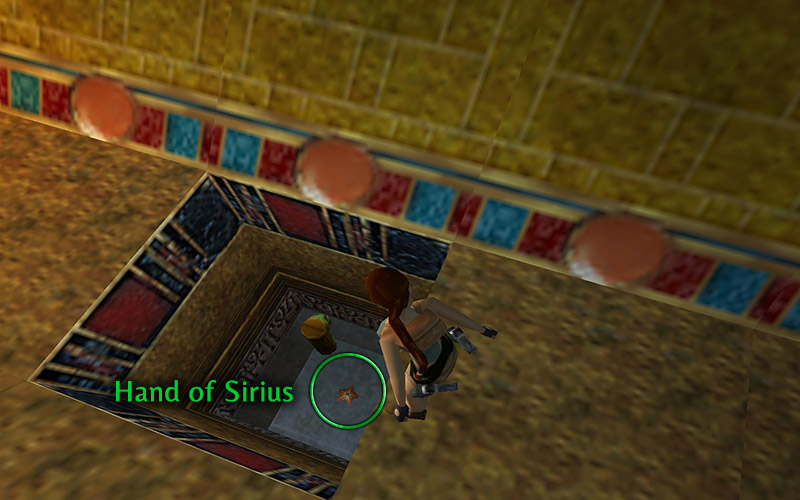
Here you will find two more levers, one of which is on the wall. How odd. Pull the lever you can get to get a different perspective on everything. Now head back to the previous room by taking a standing jump just before the slope, then slide down to the floor. The hole in the floor is now open, so safely drop down and grab the Hand of Sirius. Just follow the path out and climb up the wall to return to the previous room again.
Simply climb up onto the blocks going forward until you reach the spikes hanging from the ceiling. Crawl under the spikes as you head left, then jump down to the doorway below from the middle of the last block. Here you will find a hole with 3 climbable surfaces. Take a standing jump across to the other side while holding action to grab onto the far wall, then climb down (or press and release action to head down faster).
There are two sleeping Mummies in this room with a rope in the middle. This rope will rotate the room again, as well as awake the invincible mummies, so make sure you're facing the closed passage ahead, then pull that rope. Head forward to get the attention of the mummy at the door, then back up until he clears it and quickly run by him, while also avoiding the second one in the corner. Quickly scale up the wall and you'll be back in the larger room again.
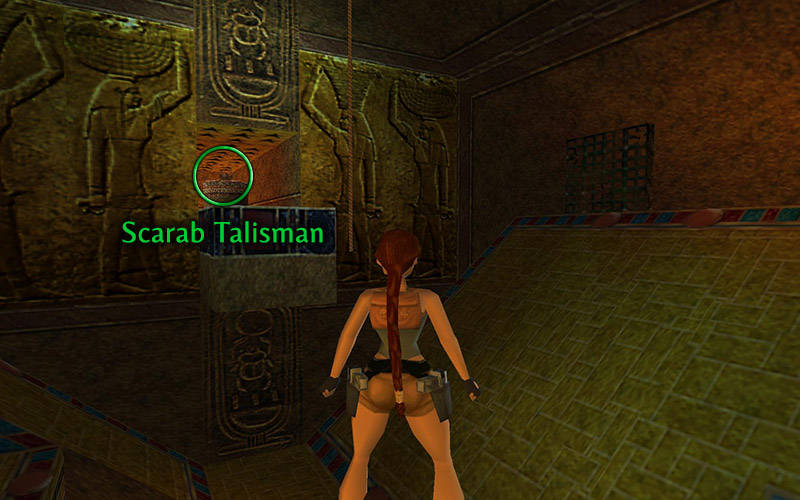
Jump to the platforms to the south and place the Hand of Sirius into the receptacle. You will now find a rope between you and the platform where your prize is held, so jump to the rope. This one is much easier than the last one, just make sure you're facing the next platform, press sprint and let go when you're above it. You can now grab the Scarab Talisman.
You can see a passage beyond the pedestal, so walk around it to continue forward, with weapons ready! Another 2 Anubis Hounds will run around the corner, so take them out then continue on, and finish of the third hound which will run around the next corner once you enter next room. Continue down the path to find yourself back in the cave again.
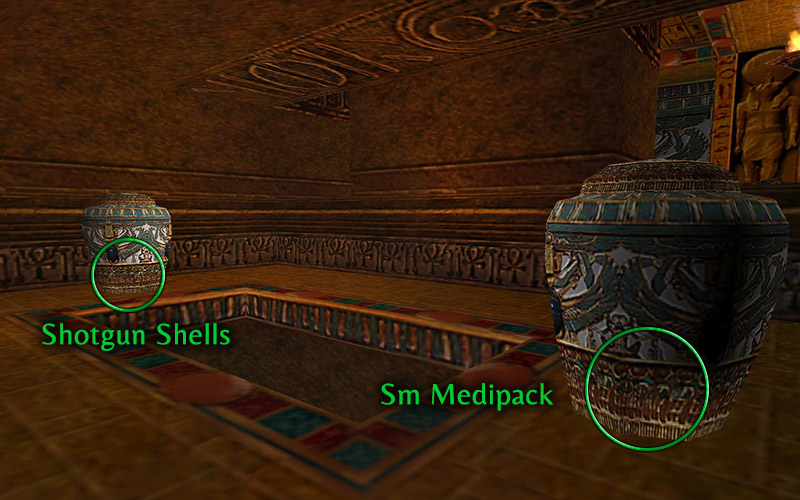
Another Anubis Hound will come out of the shadows ahead of you, then take a right and head back up those stairs, but this time head right up to the statues. The wall between them is climbable, so make your way to the top. Each of the jars here have items, so destroy them and take the Small Medipack and Shotgun Shells (normal). Climb or jump up into the next room.
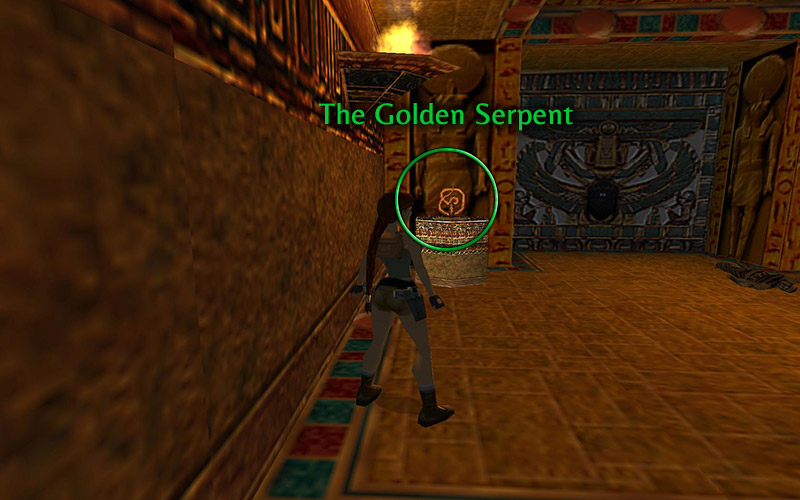
Now, before you grab the Golden Serpent from the pedestal, SAVE and look around to get a baring on your surroundings. Those two mummies on the floor will come to life once you grab the item, so get ready to avoid them. Also, the steel gate up on the wall above one of those sleeping monsters is your way out, so once they awaken, you will need to get there. The best way I have found is to grab the serpent, then flip round and jump over the mummy as he is waking up and get into that corridor. If you can't do that, just wait for them to come after you, and run between them when you can.
You will slide into a pit of sand that is filling up with spikes on the ceiling. RUN to the other side (sticking to the center since there is a gap in the spikes, then turn to the left to reach the opening. Climb up and make your way around to the next hole in the floor. Pick you the Large Medipack beside it, the drop down onto the ledge below, then again so you're back on the steps that led to the two different areas.
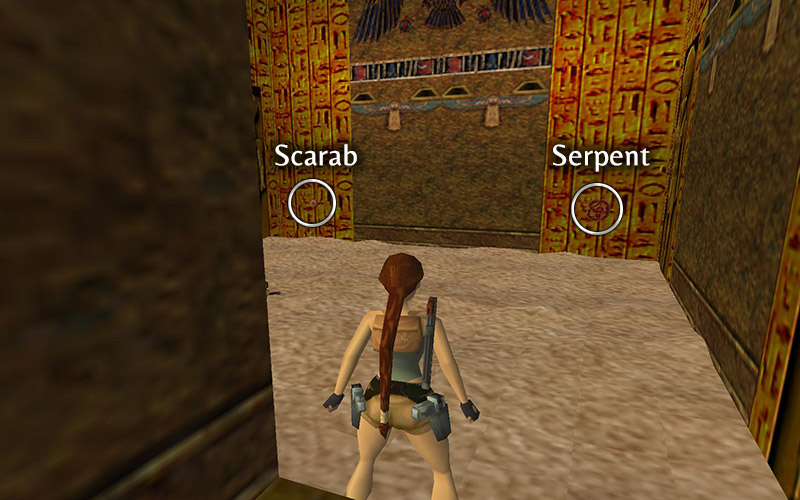
Head down into the cave and through the passage in the golden wall. Leap over the brick and enter the room with the sleeping mummy. There are two receptacles here, one for the scarab (on the left) and one for the serpent (on the right). The room will start filling up with sand, lifting you slowly to the top, and the mummy will awaken. Since there is no way to kill that thing, run around the sides of the room until the sand is high enough to reach the ledge leading to the next level.
Continue to the Valley of the Kings