
Tomb Raider 4: The Last Revelation
Level 10: "Tomb of Semerkhet" Walkthrough
Available Secrets*: 2
Items Found*: Large Medipack (2), Shotgun Normal Ammo (1), Shotgun Wideshot Ammo (1), Small Medipack (3), The Rules of Senet, Uzi Ammo (1)
Weapons Found*: None
Enemies*: Anubis Hounds, Scarabs
* Because the level splits, these stats are only for the pre-split area of the walkthrough, and will be broken down again in each of the other sections.
Remember: If you can't make out the images in the Walkthrough, click on them to open a larger one. Also, hover over, or click, on coloured words for helpful images.
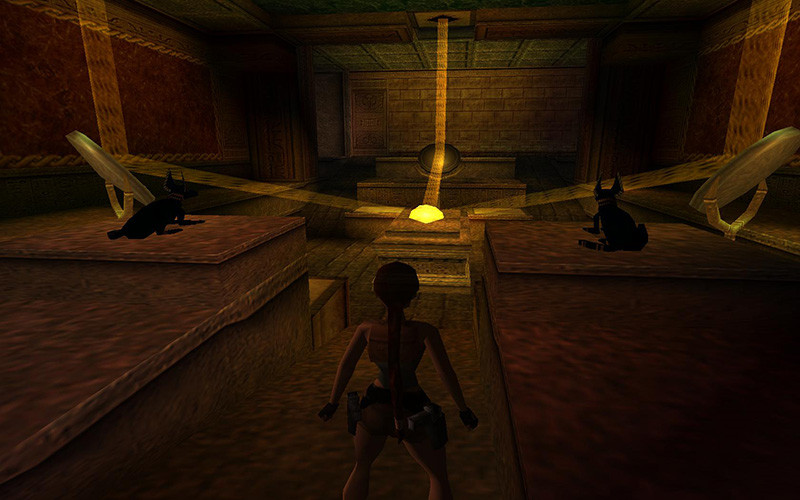
Just who is this Semerkhet fellow whose tomb we just entered? Truthfully, from what we know of him, he's relatively a nobody when it comes to pharaohs. He only reigned for eight and a half years, and most of the tablet telling of his achievements are so severely damaged that there's much we don't know about him. But, apparently he liked playing Senet... but which of the pharaohs didn't?
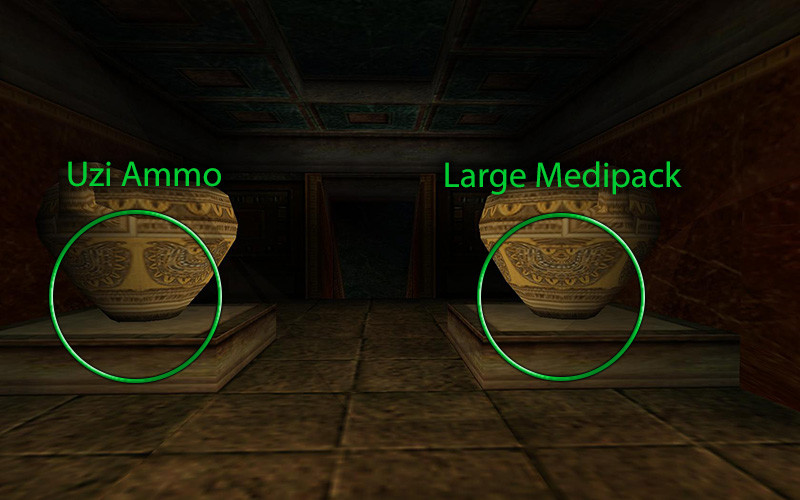
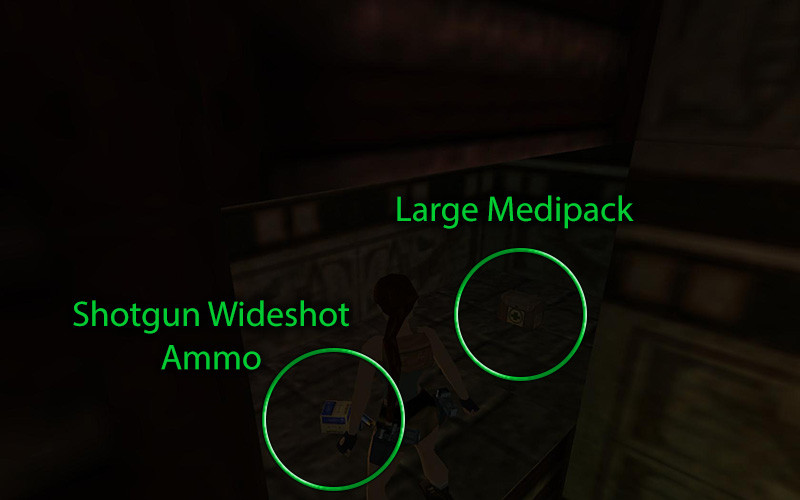
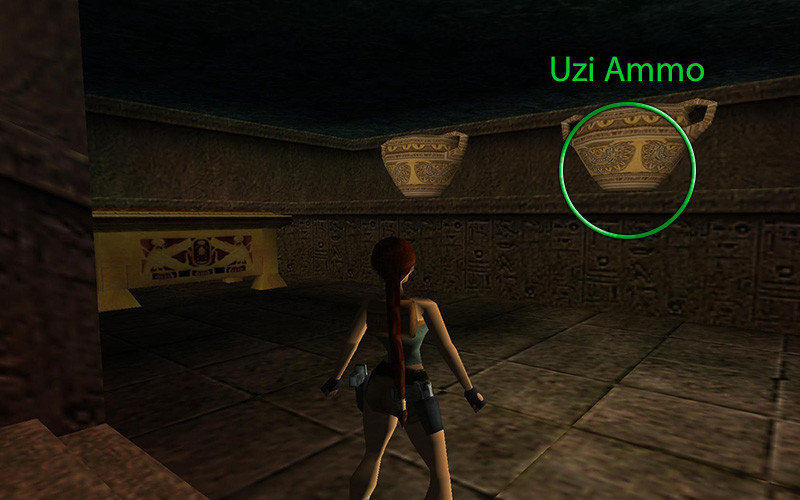
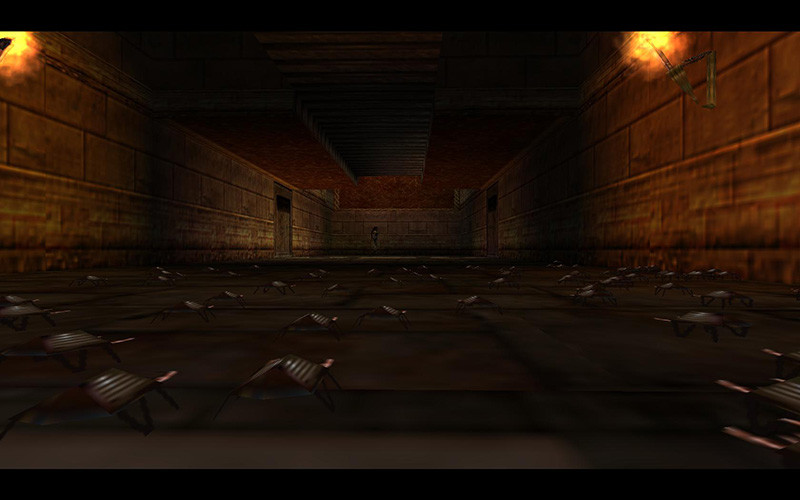 As soon as the level begins you will see two urns on each side of you – shoot them both and grab the Uzi Ammo and Large Medipack. Slide down the ramp to encounter a new deadly enemy – the Scarabs! Aaaaahhhh! Flesh-eating bugs! Quickly jump past them, then jump and grab the railings above. Climb forward and into the next room – do not fall back into the swarm or they will eat you alive!
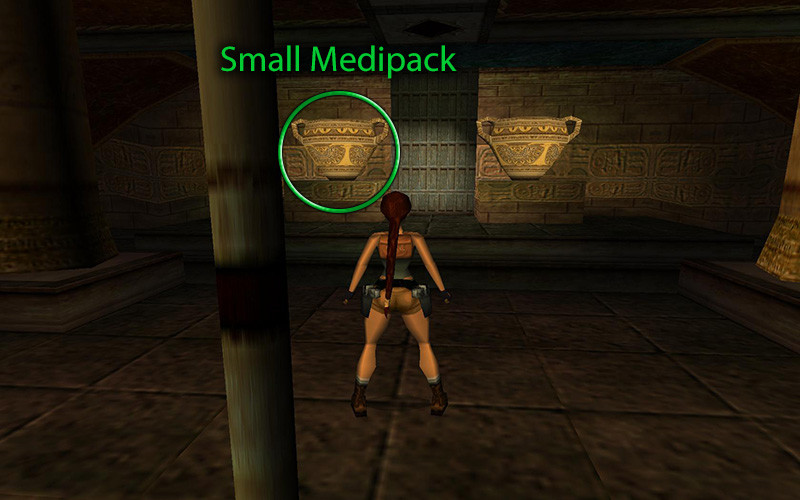
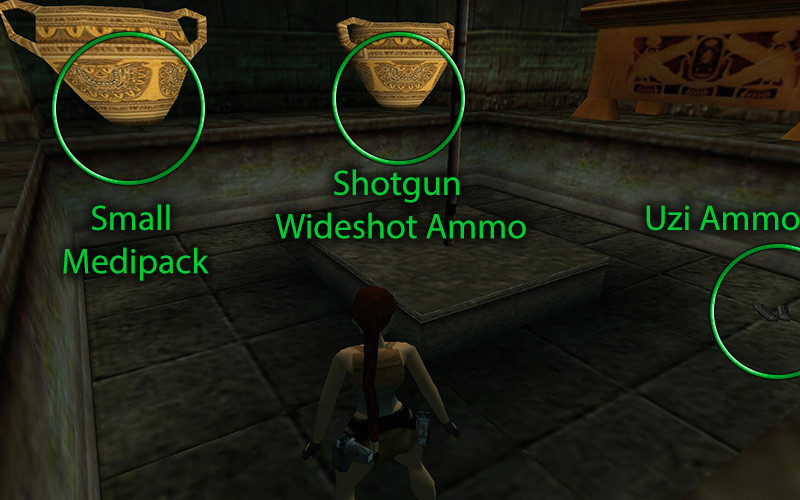
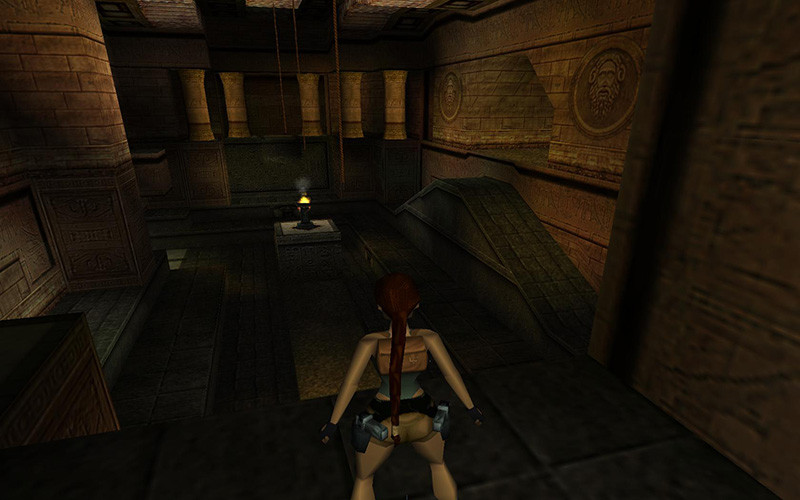
Drop down once you're at the end of the railings and slide down to the pole, then use that to slide to the middle level (not all the way down) and dismount. You will see two urns on the west side, so shoot them, jump the gap and grab the Small Medipack. Jump back over to the pole and you will notice something on the other side near the fire. This is an extinguished torch which can be lit using the flame. It's not a real item, but is supposed to be used to get the attention of some Scarabs below. It doesn't work very well, so ignore it.
Before continuing, for the sake of your sanity, save now! I would also recommend getting use to back-flipping and twisting before continuing (back-flip with mid-air roll). It is needed!
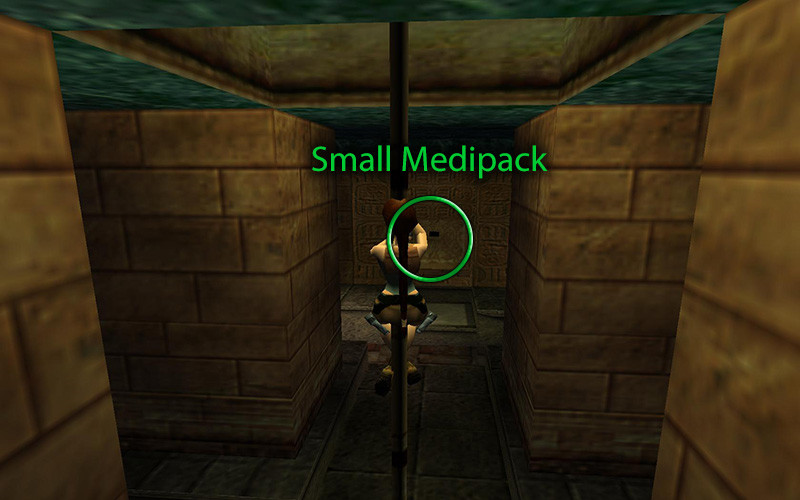
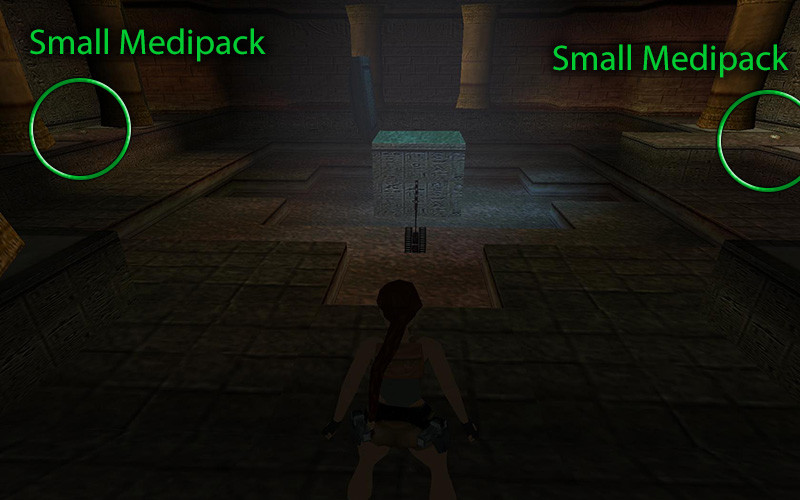
Return to pole and slide down more, but don't touch the ground or those Scarabs will eat you. There are 4 points of interest - the north and east niches have mechanisms to open the gate above, the torch is useless and south niche has a Small Medipack.
With just a bit off the ground (if you're too high she will hit her head and fall into the Scarabs), back-flip and twist toward one of the niches, jump toward it and use the niche to either grab the Medipack or activate a mechanism, then back-flip until you are past the pole, then jump forward and grab it again. Repeat until you used all 3 niches (or at least the north and east ones), then climb back up to the middle level and dismount. The door where the urns used to be will now be open. so enter the next area.
Preparing for Senet
 There appear to be 3 doors in the next room, but only the one on your left will open. Continue on and fall into the Senet room. Yeah, we'll be playing Senet soon, but there are a few things we need to accomplish before we do.
Note: There is a massive shortcut here if you want to skip ahead and just play Senet, which will skip bunch of items and secrets. Jump down to the board and go to the tile just north-east of the blue piece and do a running jump to the red railing and pull yourself up. It's up to you if you want to cheat, though. Click here to skip to the part where we play the game if you choose cheat.
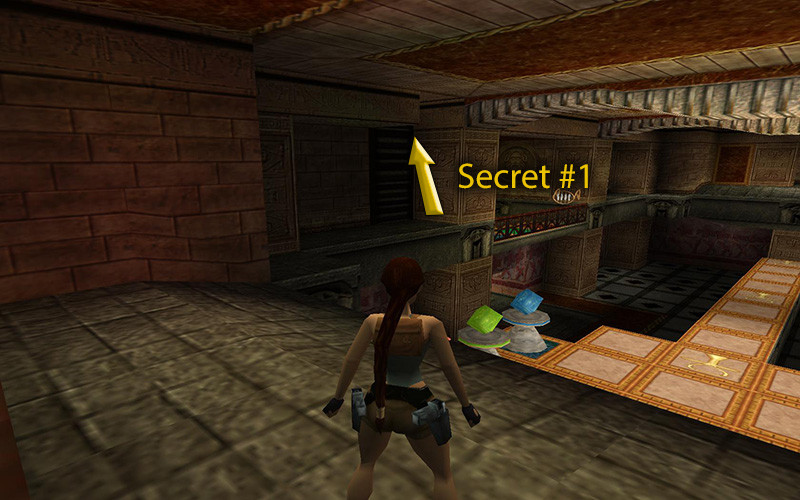
Facing the board game, jump to the left ledge and climb the ladder into Secret #1 (31 of 70). Shotgun Wideshot Ammo and a Small Medipack are your reward, then drop down to the game board. Head through the east doorway (with the giant head above it) and climb the ladder and drop down into the next room. 2 Anubis Hounds, remember those doggies, will run to meet you so teach them how to play dead. I recommend jumping back to the ledge where you entered and take them out safely.
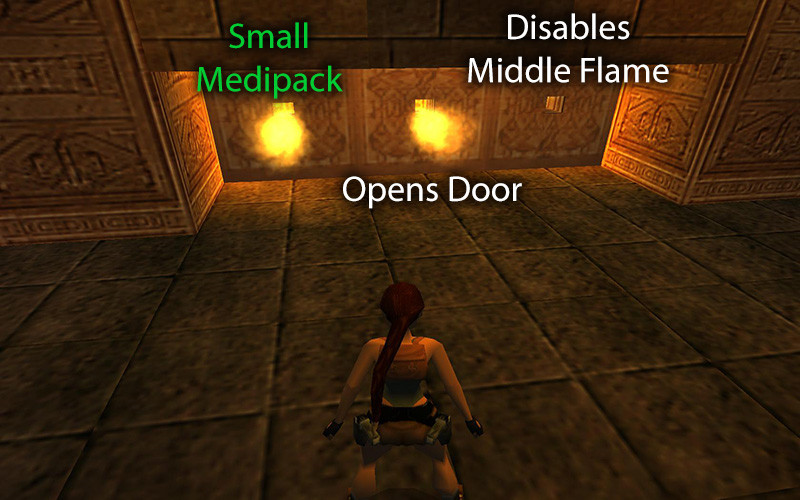
Continue to the north wall where you will encounter 3 niches, enhanced with fire! You need to use the right one first, then the middle one. The left one contains a Small Medipack. The trick is to stand in front of the niche just so you aren't getting fire damage, and run to it when the flame goes out, use ACTION to pull the mechanism, then jump backwards to get out of range for when the fire reignites.
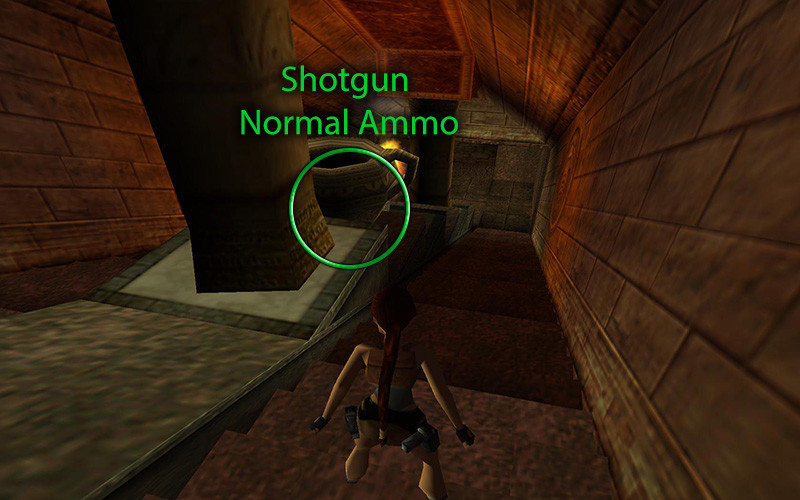
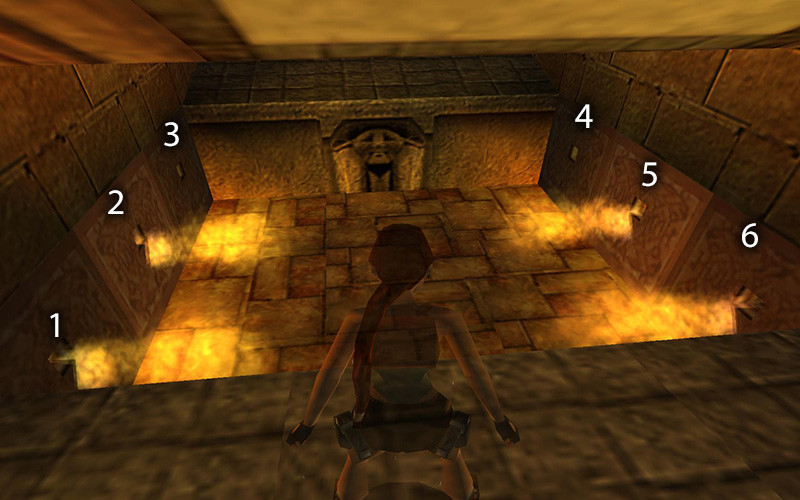 Once all 3 are used, enter the path to the right of the 3 flames, which just opened, and jump down to the next niche puzzle. Even though this one has 6 niches, it isn't all that difficult, but I included a guiding image to the right to help out. To safely use the mechanisms, run to activate it when the flame dies, then press BACK once, then WALK and BACK once (do not jump) to dodge the flame while avoiding the one behind you. 3 and 4 give you Shotgun Normal Ammo and a Small Medipack. Use 4 a second time to raise a cage in the previous area. Be sure to go back each and every time you use a niche, even if Lara is off-screen when a gate is raised (you can still move and the flames can still kill you). 2, 5, and 6 are constantly active at the beginning so it's pretty easy to figure out that you use 1 first, then 5, then 6, with 2 finishing the puzzle.
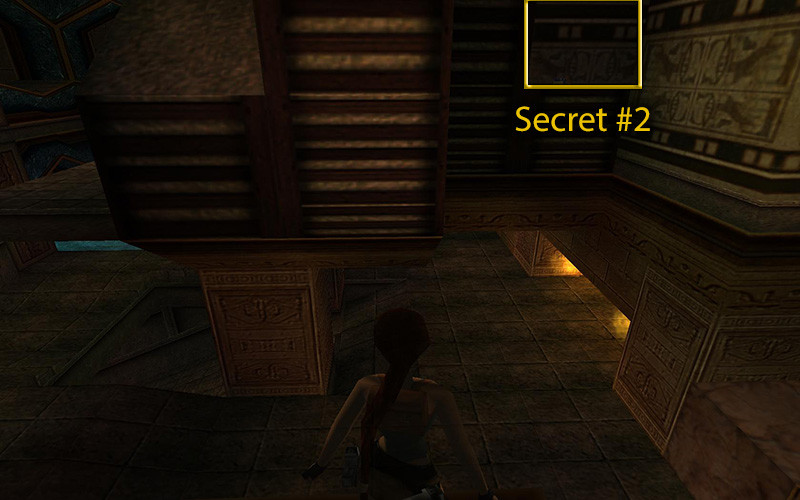
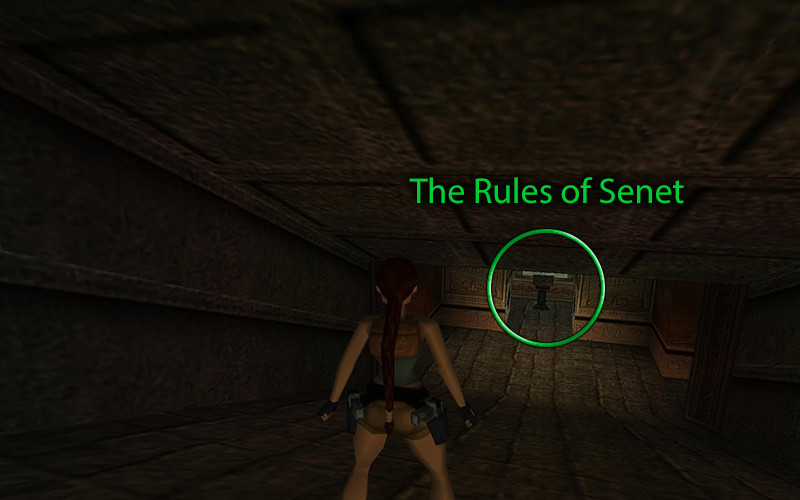
To return to the previous room, jump to the west ledge (the one without the pool) and use the bars overhead to cross to the new passage. Climb onto the right (west) cage, take a running jump to the ledge in the middle and use the flaming niche here, too. Before we continue to the goal, leap to the other cage (east) so we can access Secret #2 (32 of 70). Jump to the ladders on the wall and keep going right, around the corners, and climb into the alcove holding a box of Shotgun Wideshot Ammo and a Large Medipack. Safely drop back down, grab The Rules of Senet from the lower area we just deactivated.
Familiar yourself with the rules, then head back to the board room, climb up the ladder on the opposite side and backflip to the ledge to start the game.
Playing Senet
Save in a new save slot just before playing since there are two ways to continue: one if you win and one if you lose. If you win the end of the level will arrive quickly, if you lose you have much more to come, but it also gives you more items and 5 secrets. What's better for you, winning or raiding all the loot?
Since you're here, it's play time. If you didn't read the instructions, or took to the shortcut, I will give you the basics. The game plays much like the modern board games of "Sorry" or "Trouble" where you race your pieces to the end, landing on your opponent's pieces along the way, but much more basic. Some compare it to "Backgammon", but it's nowhere near that complex.
The harp looking thing on the wall is your dice – each white visible after a spin is one step, but 4 blacks is 6 steps plus an extra turn. After each spin you need to step on a color (only the first color you step on counts so be careful) to move the corresponding piece. Landing on your opponent's piece sends that one back to start (as does yours if Semerkhet's lands on yours) and landing on any ankh gives you an extra turn. Your goal is to get all your pieces to the last square with the ankh, but it needs to be exactly the right amount of white steps or 4 blacks to win, so plan wisely! That's basically it.
Note: If you cheated and got here through the shortcut, side-flip through those same railings to leave.
Depending on the outcome, the level splits into 2 sections:
Win Lose
Winning Path
Available Secrets: 0
Items Found: Crossbow Normal Ammo (1), Crossbow Poison Ammo (1), Large Medipack (1), Shotgun Normal Ammo (1), Uzi Ammo (1)
Weapons Found: None
Enemies: Anubis Hounds, Bats, Scarabs
Four cages just rose up out of the board to bring you to the next area. Jump down from this ledge and use either of the two ramps on the side to bring you back to where we first entered this room. Jump to the left cage, then make a series of running jumps (grabbing the edges to pull yourself up) as you go, to cross the room. Take a long walk down to the next level, and the big doors with an ankh on them will open as you approach. Take out the 2 Anubis Hounds, then continue downward. Once you reach the next area, shoot the urns to earn some Uzi Ammo. Continue down the next stairs, shoot the urn in the middle for Shotgun Normal Ammo, and take out the Anubis Hound at the bottom. Another Anubis Hound will appear as you take a left into the next hallway.
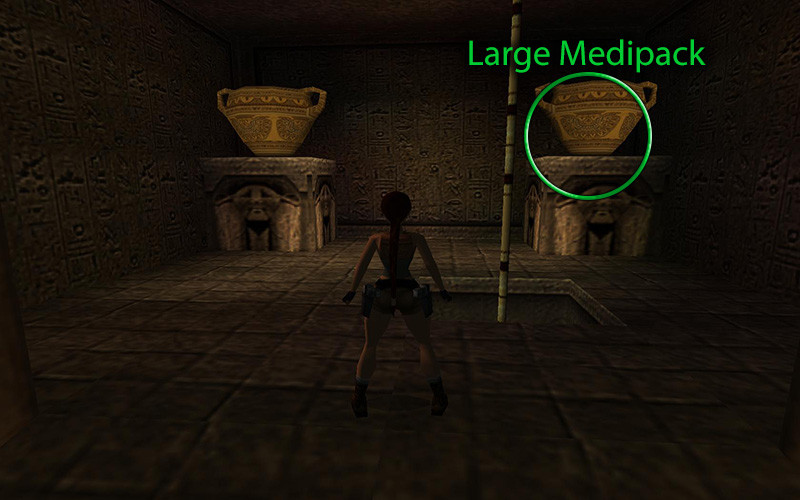
 Drop down into the room below and run and jump for your life across the Scarab infested chamber, jump up the ramp and onto the pole. Climb up and dismount in the room above. Shoot the right urn in this room for a Large Medipack. Continue past the mirror room and land near the base of the pole. This will attract the attention of 2 Bats above, so jump back up to the ledge and wait for them to come to you to dispose of them.
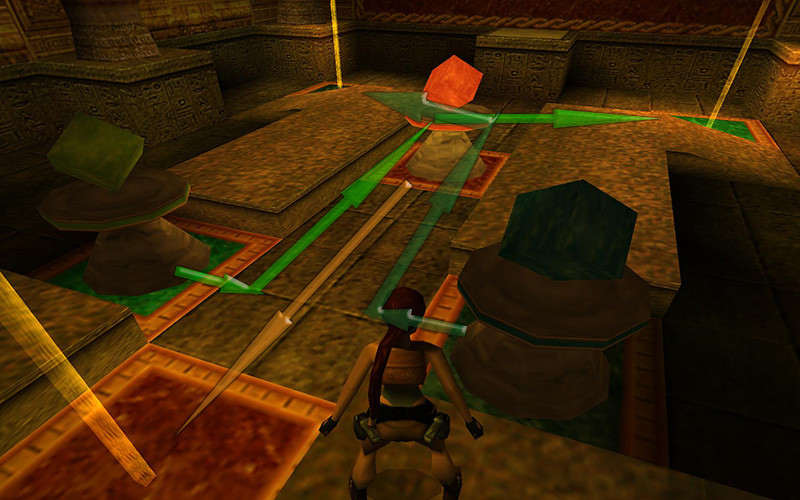
Climb the pole and position Lara so her back is toward the coffin room, then dismount and search behind the coffins for Crossbow Normal Ammo and Crossbow Poison Ammo. Take a running jump to the other corridor. You'll be above the mirror room now, and will find 3 Senet pieces – 1 orange, 1 dark green, 1 light green. Drag them to their corresponding colored tiles. See this for help if you need it.
Once done, the mirror room will change, and the 2 Anubis Hounds will awaken. Return to the pole, slide down, dispose of the black beasts, and drop down. All that's left is the crawl toward the next level.
Continue to the Guardian of Semerkhet
Losing Path
Available Secrets: 5
Items Found: Cartouche Piece 1, Cartouche Piece 2, Crossbow Explosive Ammo (2), Crossbow Poison Ammo (1), Flares (1), Grenadegun Flash Ammo (1), Grenadegun Normal Ammo (1), Large Medipack (2), Ra Cartouche, Revolver Ammo (1), Shotgun Normal Ammo (2), Shotgun Wideshot Ammo (2), Small Medipack (6), Uzi Ammo (3)
Weapons Found: Uzi
Enemies: Anubis Hounds, Bats, Fire Elemental, Ice Elemental, Scarabs
So you lost against an undead pharaoh. Don't feel down, I'll still guide you out of this tomb. It isn't going to be easy, though.
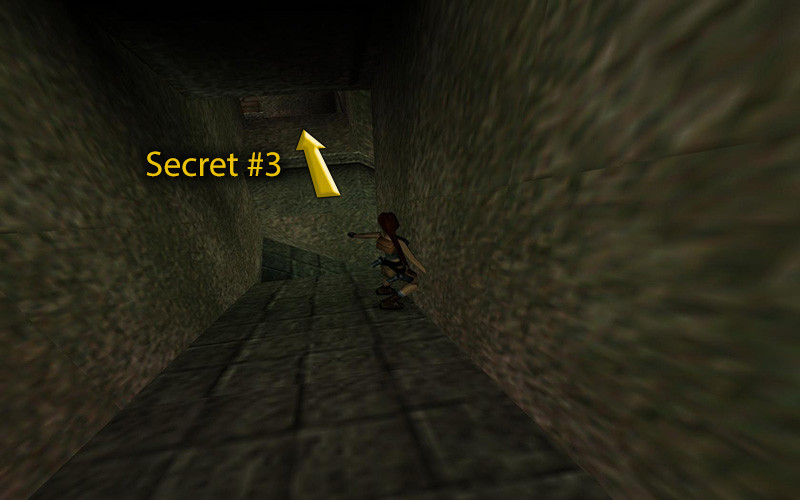
4 new trap doors just opened at the corners the board, and all will give you access to a secret, but the ones on the north side are much easier. Save your game (in a new save slot if you want to save the one before you played the game) then enter a pit. Slide down facing forward, and continue until you see a flat ledge and jump to Secret #3 (33 of 70) while holding ACTION to grab the ledge if you jumped to soon. (Having problems – maybe this video will help) Slide down the pole, collect the Uzi Ammo on the ground then the Small Medipack and Shotgun Wideshot Ammo hiding in the urns.
Climb all the way back to the sliding slopes, save, then continue your downward journey. Why save? Because if you do this wrong Lara will fall to her death. Position Lara at the at north-west corner of the ledge, then turn so her back is angeled toward the wall and press back once. This should leave her in the middle of the slope so you can catch the pole with the ACTION button. If you miss, and have the action button pressed, you should land on a nearby ledge taking a little damage. If you caught the pole, slide down to the ledges and dismount. Uzi Ammo and a Small Medipack are hiding here.
Cartouche Hunting
 Slide down the pole to the bottom and walk to the edge of the platform. A lone Bat will fly out, so take care of it before continuing. This multi-level room will be the hub of attention for a while, so expect to return here often. I would also recommend you to save.
Note: If you arrived via the southern openings in the Senet room, you will have arrived from the north side of this room. The stairs in the south-west corner of the top level will be our first destination, so use the ropes to cross the room. (You may have also retrieved 2 items from this path that we will get to later.
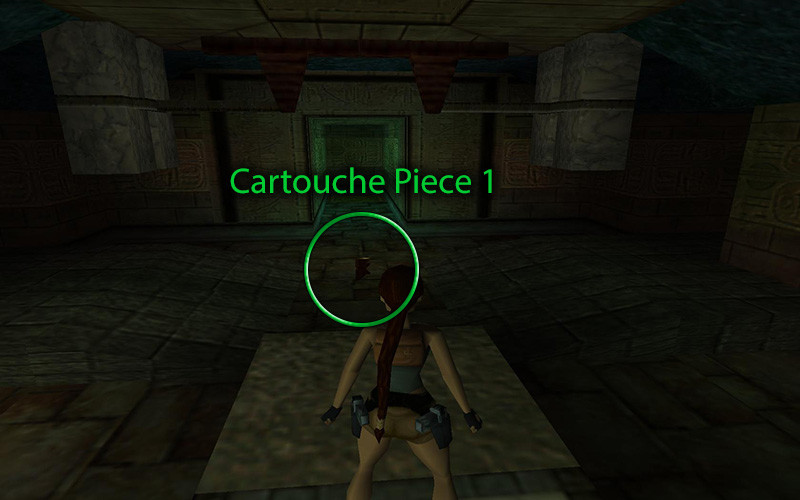
Jump over to the stairs in the north-west area of this level and head up with pistols drawn. 2 Anubis Hounds will attack when you enter the room, so put them down. At the far side of the room is a golden Senet piece. Drag it backward until it stops, then pull the lever to obtain Cartouche Piece 1. We're done here, so head back to the main room.
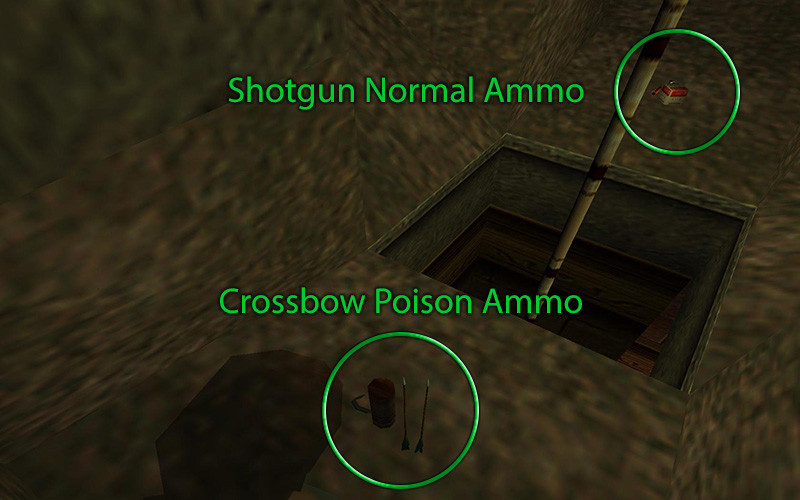
We need to get to the other side, but instead of taking the ropes, let's opt for an easier experience. Head toward the pole we entered from and safely drop to the middle level, then drop again to the bottom. Now head south and climb the ladder to the top. A Bat will come to join you, so take care of the problem. Climb up the pole and dismount into either alcove. Like the other side, 2 items are hiding here – Crossbow Poison Ammo and Shotgun Normal Ammo. Slide back down and drop off near the large red wall.
Find the small crawlspace in the west wall and make your way to the next room. What a familiar looking puzzle. This time, there is a small catch, but one that can be avoided by pulling the Senet piece once, then circle it and push it the rest of the way. Once the piece is in place, it will be smashed giving you access to Cartouche Piece 2. (If you pulled it all the way, you need to jump at the last minute to avoid joining the piece. You can combine the pieces now if you wish to create the Ba Cartouche.
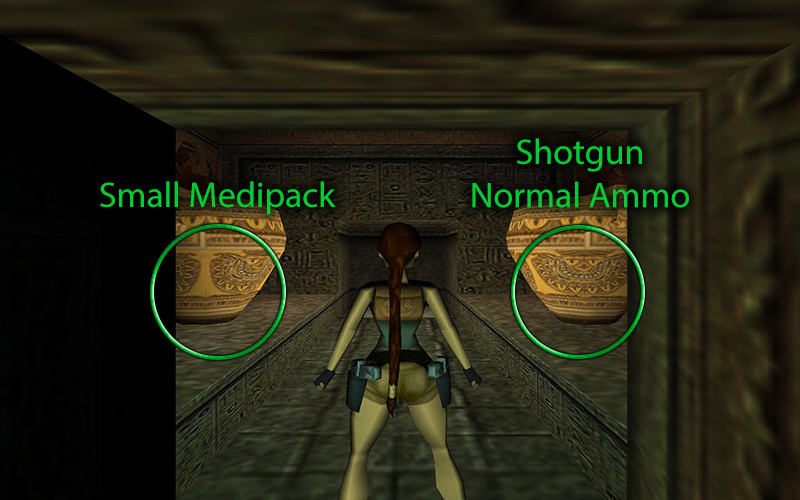
Before heading back, lets get some more goodies. Drop down to the step below the north end of this walkway and deal with the 2 Anubis Hounds who make their home here. In the next room to the south you will find a Small Medipack and Shotgun Normal Ammo hiding in urns. Now climb back up the way we came down and return to the main room. You may have some trouble getting from the walkway to the passage – if so, hold action while jumping to lower her trajectory.
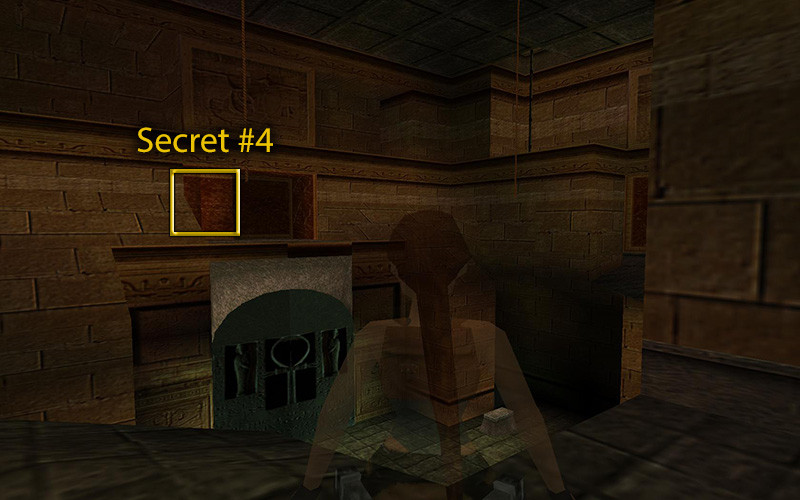
Once back to the main room, climb up to the north-east pole, save, then take a running jump and grab hold of the nearest rope. Shift to face the red door above the larger one below, slide to the bottom of the rope, and swing to the platform. The door on the left will open to Secret #4 (34 of 70) to reveal a bundle of Crossbow Explosive Ammo and a Small Medipack.
Head back to the main room and drop down to the main floor. If you haven't yet, assemble the Ba Cartouche from the 2 pieces and place it in the receptacle next to the east gate. 2 Anubis Hounds will attack, so draw your weapons and take them out with some flip shooting.
Inside the next room is another Senet puzzle, but this one involves 3 burners set to a timed lever. Not as easy as last time. Safely drop down to the ground and head for either of the 2 poles to the north. Climb up and move the piece next to the first flame (not over it or you will catch fire), then return to the bottom level. There is a crawlspace at the south-west corner that will take you back to the main room.
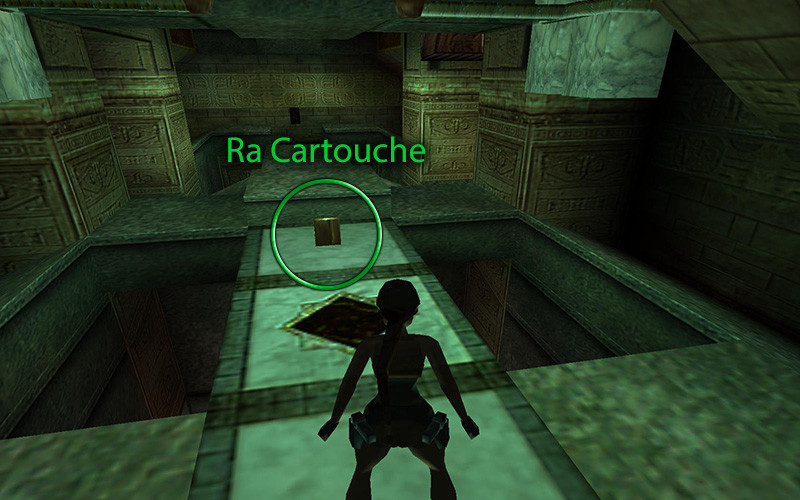
Return back to the burner room. There are 2 options for you to chose from. The lever will give you just over a minute to move the Senet piece, so once you taking a running jump and grab hold of it, you need to either run to the poles and finish pushing the piece into place, or use the crawlspace and pull it back. Either works, just save before attempting it so if you fail you don't have to redo everything again. If it helps, you have around 15 seconds after the music ends before the flames relight. The hammers give you enough time to jump back, so don't worry about them hitting you. Take the Ra Cartouche and return to the main room again.
Ropes and Elementals
 As you climb the stairs to the next large room, a new fiery enemy will appear – the Fire Elemental. Don't waste your time trying to kill it, you can't. If it hits you, there is a good chance it will light you up like a torch, so move fast. You have 2 options here, to run back to the last Senet puzzle and lure it into the water near the poles, or jump down and run to the passage in the west side of the room and pull the lever releasing an Ice Elemental (causing the two to fight and cancel each other out). I would recommend the pool, though, as pulling the lever gives it time to burn you to ash.
Note: If you choose to release the Ice Elemental after killing the Fire Elemental in water, use that same pool of water to take out the Icy one. Also, only in this one case it will die without freezing the water.
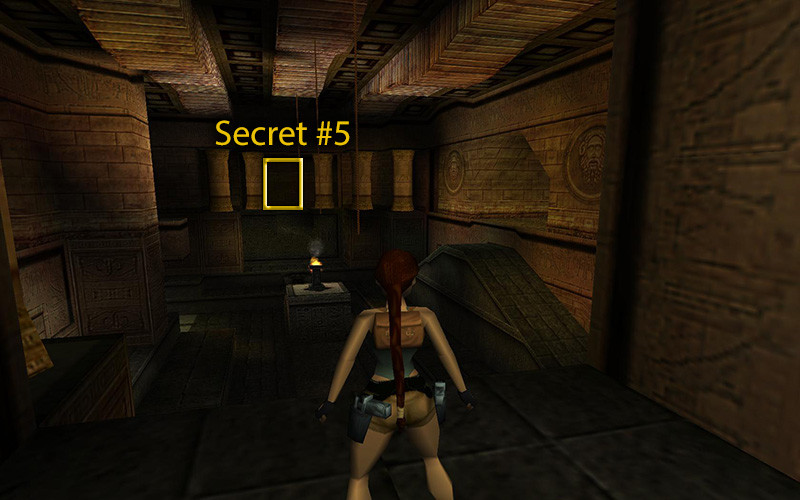
Regardless of the method you rid yourself of your elemental problem, grab the 2 Small Medipacks from the Ice Elemental room, then climb back to the entrance where the first Elemental spawned. Save if you value your sanity as the next rope swing might truly test it. You need to swing all the way to the other side of the room, but Lara has a bad habit of twisting so you will need to realign yourself after every jump. When you finally land on the far platform you will arrive at Secret #5 (35 of 70). Grenadegun Normal Ammo is sitting just to your left, then run around the corner to your right to find Revolver Ammo and Uzi Ammo.
Return to the platform landed on, save, and make a running jump back to that rope. Twist yourself so you're facing east toward the pole, swing across and dismount. As you run to the pole, 2 Bats will attack from behind. Take a running jump to the pole, climb to the next ledge, turn around and dismount. Another 2 Bats will by flying around up here, too.
The next 3 paragraphs are to get to Secret #6, but you might want to read ahead to see if you think it is worth the trouble. If so, just skip to here.
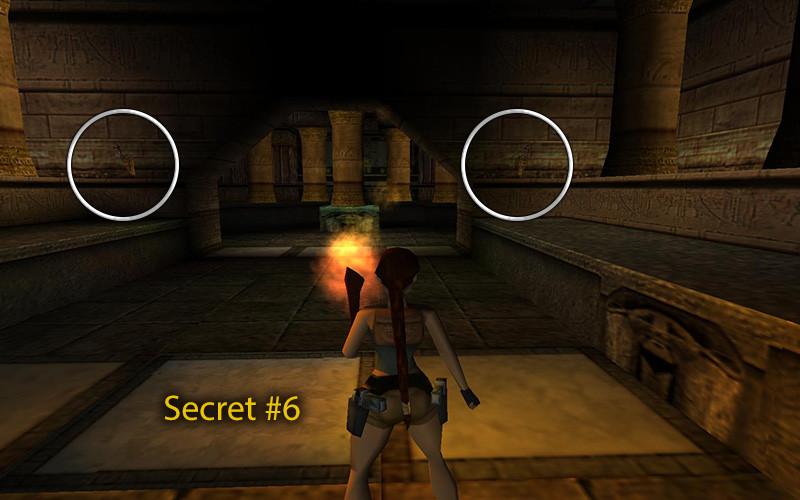
There is a switch south of the ledge we landed on, so jump up and pull it, then climb back up. A new platform is available to the north of this ledge, so jump over and grab the Torch from the niche. Good news, we just got piece to open another secret. Bad news is you're not going to like where it is. Remember that flame where we encountered that Elemental? We need to get all the way over there. Toss the Torch to the bottom, then use the pole to descend, jump to the walkway, then jump to either side where the pillars are and safely drop to the bottom. (You can drop from other places, but you will take damage.) Grab the Torch, light it with the fire under the ropes, then light the two sconces on each side of the room the pole is in. Climb into the new hole in the floor for Secret #6 (36 of 70).
This is not a friendly secret. Yikes, a blade trap. To get through undamaged, we will need to do a timely roll. Walk up to it so your as close as you can get without dying, then press roll when the blades open to jump through. Turn around (don't roll or you'll go back into the blades) and head into the next room. Look at all this loot! Wait, the fun is not over yet.
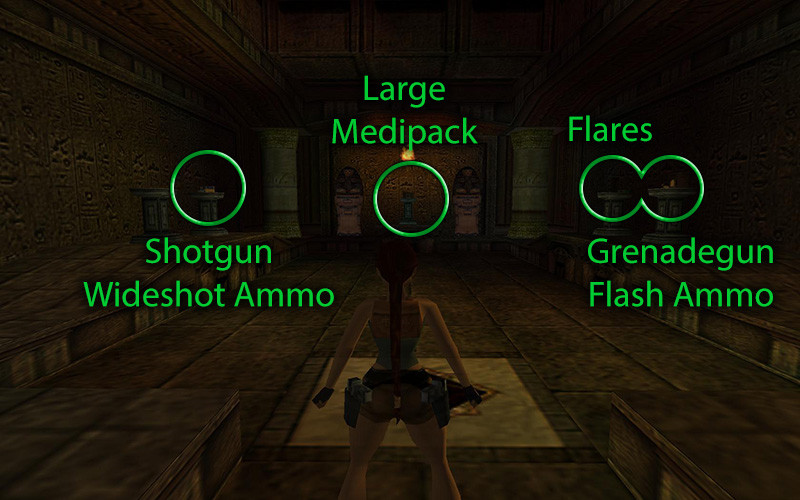
First grab the Shotgun Wideshot Ammo from the left and the Grenadegun Flash Ammo from the first right pedestal. Once you grab either the Flares or the Large Medipack a swarm of Scarabs will emerge, so grab the last item quickly, then run to spinning blades. Those Scarabs will continue after you, so DO NOT STOP. A trap door will open giving you access below it, so go down, then climb forward, make a right, then climb to your left. At this point you should be safe, so head back up the ladder to the main floor. Sadly, you have to use those ropes to return to the pole again and climb up to the upper level.
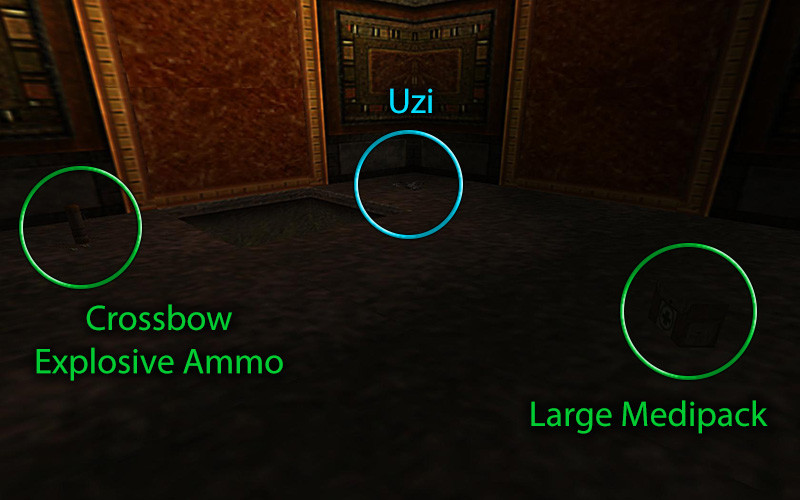
Jump across to the other side, enter the corridor and climb out to your right just before the end. Just above the opening we climbed up through is another lever. Jump to pull it, climb back up and a cage will be raised. Climb on the cage, turn around and climb into the hole above it to enter Secret #7 (37 of 70). You will find an Uzi, a Large Medipack and Crossbow Explosive Ammo. Drop back to the cage and enter the passage to the end of the level. (Sorry, the ledge coming from the Winning Path is too high to reach from this side.)
Continue to the Guardian of Semerkhet