
The Enemies of
Tomb Raider 4: The Last Revelation
Enemies within Tomb Raider: The Last Revelation come in all shapes and sizes, making it difficult to know the best method to defeat them, especially with the limited ammo in the game. Through this guide, you should find what you need to defeat those annoying baddies, and take as little damage as possible in the process.
Note: This guide is not yet complete and is still in development. As the Walkthrough is completed, more enemies will be available.
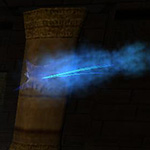
Air Elemental
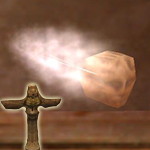 Size: Small
Danger: High
Recommended Weapon: Immune to all attacks!
Levels found in: Catacombs
Anubis Hounds
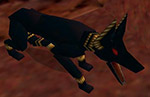 Size: Small
Danger: Medium-Low
Recommended Weapon: Automatic Pistols
Levels found in: Burial Chambers, Tomb of Semerkhet
Even though they look meaner, they are really no different than wild dogs. When it is just one or two of them the Automatic Pistols will normally be fine, but when in larger packs you may need heavier weapons.
Assassin
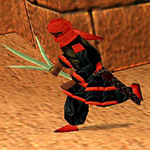 Size: Medium
Danger: Medium-High
Recommended Weapon: Automatic Pistols, Shotgun, Uzi
Levels found in: The Great Hypostyle Hall 2, Desert Railroad
Much like the henchmen, these goons go where Von Croy does, only they are far more annoying. Expect a flurry of melee attacks, impressive acrobatics, and an ability to deflect bullets with their swords. They also fire guns in rare occasions. In open area, use Automatic Pistols, in close combat, use the shotgun or Uzi. When they are deflecting bullets by spinning their sword, turn away so they lower their defence, then resume your attack.
Bat
 Size: Tiny
Danger: Low
Recommended Weapon: Automatic Pistols
Levels found in: Sacred Lake, Sacred Lake 2, Tomb of Semerkhet, Guardian of Semerkhet
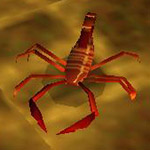
Black Scorpion
 Size: Tiny
Danger: Medium
Recommended Weapon: Automatic Pistols
Levels found in: Temple of Karnak, The Great Hypostyle Hall, Sacred Lake 2, Alexandria
Unlike the red scorpion found earlier in the game, this thing is annoyingly nasty! It doesn't do very much immediate damage, but it instead poisons Lara which will most noticably messes with her vision, but also does continuous damage until she takes a Medipack (any size will do). Thankfully they can be easily killed with a few shots from your automatic pistols.
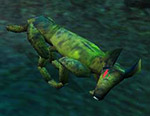
Crocodile
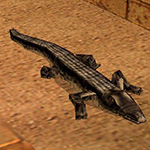 Size: Medium
Danger: Medium
Recommended Weapon: Shotgun / Automatic Pistols
Levels found in: Sacred Lake, Temple of Karnak 2
These beasts are surprisingly quick on land, and their bite will take a massive chunk of your health. Most times you will want to quickly kill them with two shots from your Shotgun, but in open places, wherever you have enough room to manoeuver and jump around, Automatic Pistols should do the job.
Fire Elemental
 Size: Small
Danger: Very High
Recommended Weapon: Immune to all attacks!
Levels found in: Tomb of Semerkhet
Guardian Bull
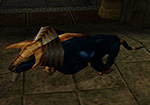 Size: Large
Danger: Medium-High
Recommended Weapon: None
Levels found in: Guardian of Semerkhet
Yet another creature that can't be killed through conventional means. Thankfully he isn't all that deadly. All its attacks involve ramming you, so just dodge by jumping to the side. If you time your jumps well, you can even get this bull to break things by making him ram into them.
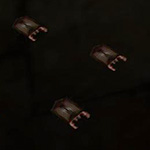
Henchman
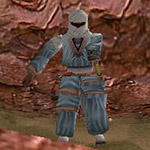 Size: Medium
Danger: Medium
Recommended Weapon: Automatic Pistols, Jeep
Levels found in: Valley of the Kings, KV5, Temple of Karnak 2, Alexandria
These are your first enemies with guns in the game, so expect a little difficulty at first. While two shots from the shotgun will take these guys out, they can still be easily dispatched with your pistols. Their primary weapon is the Uzi, but they use a Sword when in melee range. To save health and ammo, rush them while constantly firing your pistols, so they switch to their swords. If you're in the Jeep, just run them over!
Ice Elemental
 Size: Small
Danger: High
Recommended Weapon: Immune to all attacks!
Levels found in: Tomb of Semerkhet
Mummy
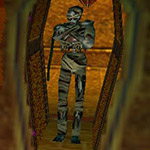 Size: Medium
Danger: Medium
Recommended Weapon: None
Levels found in: Burial Chambers
Unlike most enemies in the game, there is no way to kill Mummies. You can knock them down with heavier weapons, but they will just get right back up after a few seconds. Only thing you can do is to stay out of their reach. Thankfully they are slow.
Red Scorpion
 Size: Tiny
Danger: Low
Recommended Weapon: Automatic Pistols
Levels found in: The Tomb of Seth
The Red Scorpion is normally found in sandy areas of the game, often hinding in shallow pits. While their sting is not poisonous, when attacking in groups they can still quickly kill. Don't waste any precious ammo on these insects; just a few shots with a your automatic pistol will take them down.
Scarab
 Size: Extremely Tiny
Danger: Extreme
Recommended Weapon: Immune to all attacks!
Levels found in: Tomb of Semerkhet, Guardian of Semerkhet
Skeleton
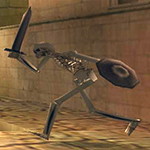 Size: Medium
Danger: Medium
Recommended Weapon: Grenades, Crossbow Explosive Ammo
Levels found in: Coastal Ruins
Wild Boar
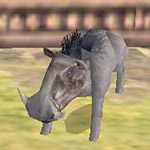 Size: Small
Danger: Low
Recommended Weapon: None
Levels found in: Ankor Wat, Race for the Iris
When you encounter these less than cute boars you won't have a single weapon on you. Just lure them to your mentor and he will take care of them... eventually.
Wild Dog
 Size: Small
Danger: Medium-Low
Recommended Weapon: Automatic Pistols
Levels found in: The Tomb of Seth
These aren't your kind fluffy friendly pets that are just begging to get their bellies scratched. Wild dogs are mean when alone and just nasty in packs. When it is just one or two of them the Automatic Pistols will normally be fine, but when in larger packs you may need heavier weapons.