OUR GAME GUIDES
Legend of GrimrockMurder in the AlpsThe Legend of Heroes: Trails in the SkyWizardry 6: Bane of the Cosmic ForgeWizardry 7: Crusaders of the Dark SavantWizardry 8Rune Factory: FrontierRune Factory: Tides of Destiny

Wizardry 7 Walkthrough
Unlike its predecessor, Wizardry 7 is more fluid with the order areas are explored and completing quests. Below is my recommended order, but feel free to explore the vast world yourself. Each region has its section, so you can quickly jump to it using the menu on the right when you need help. Use the compass icon on the right to open the navigation menu.
I know directions can be challenging to follow when running around in a 3D grid, so I have included map guides in key walkthrough areas. Clicking on the text with the red dotted underline will show the directions on the map.
If at any time you find the game too difficult, and it will likely happen unless you love griding levels, lower the difficulty to Easy from the menu. Don't worry, unlike modern games, there is more than enough difficulty on easy. Regardless, the walkthrough instructions and warnings expect a normal or higher difficulty setting.
Starting with a New Party
A new party starts in the final dungeon in Wizardry 6. The robot named Aletheides tells a story of the Astral Dominae and the Dark Savant's plot to wield the power of the universe. Your party will arrive on the Planet Guardia after a long ride on the small starship until it suddenly sends you to the surface. Once you are teleported onto the surface and breathe the fresh air, equip your party with what equipment you have so you can survive the forest you are within.
Your first reaction will likely be to rush to the nearby city, but that is a bad idea. Level 1 characters will never make it past the ambushes that await travellers. Instead, stick to this area, find the path, follow east until you meet the woman on a speeder, and then go south. You will find your first dungeon here, filled with low-level enemies to practice on. Continue to the Tomb of Ra-Sep-Re-Tep.
Starting with an Imported Party
You will start in different areas depending on where you ended in Wizardry 6.
If you grabbed the Cosmic Forge:
You will start your journey in the northern area of the Field of Wild Orchids. From the start, find the path, turn left and follow it. Eventually, the party will fall asleep and wake up in the southern area. You are now very close to the New Party starting point. Travel north until you find the path again. Wait to enter the city; you'll need some information to enter the city without fighting past the guards. Follow the path south and enter the Tomb of Ra-Sep-Re-Tep.
If you travelled with Bela:
Congratulations, you have started in an overworld area full of high-level creatures, and your equipment isn't the greatest. Equip what you have and expect to die a lot at the beginning. Also, don't expect to receive a warm welcome from the T'Rang.
Travel out of the clearing from your landing zone, then turn left on the road. Follow this road to Ukpyr. Tell them you are here to join them. From here, complete the Ukpyr quests first, then use the warp there to go to New City so you can do the Ra-Sep-Re-Tep's dungeon and everything else in the game.
If you travelled alone:
This import might be challenging to complete compared to the others, as many factions will dislike you. That's only fitting due to the acts you committed to get here. Don't expect to make peace with the Umpani unless you have deep pockets and high diplomacy.
You will start your journey in the Northern Forest just east of Nyctalinth. Find the path to the south, then follow it west. Upon arriving at the entrance of Nyctalinth, a guard will greet and direct you to H'Jenn-Ra. Follow the broken path towards the west and turn towards the north when you reach the wall. Continue northwest until you reach the High Chamber. Do not enter the door facing west at this time.
Another guard will greet you inside. Turn left, then enter the door to your right. Enter the Imperial Chamber and approach the window to collect your first test.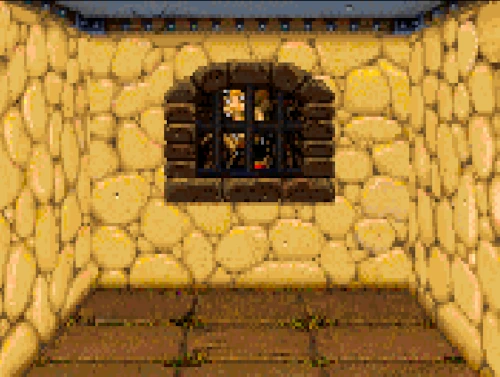 Thankfully they have a shortcut to Shritis' residence in New City. Provide the message to Shritis as H'Jenn-Ra asked. Leave this building to enter New City.
I recommend turning left and follow the pathward, then turn right to leave through the west gate. Defeat the guards, then follow the path west. Rattkin will ambush your party, but you should be able to deal with them, especially if your Bard brought the Poet's Lute and Angel's Tongue along. Turn south at the first intersection to enter the Tomb of Ra-Sep-Re-Tep.
The Tomb of Ra-Sep-Re-Tep
To enter the tomb, click on the ladder that descends in the darkness. Unlike Wizardry 6, ladders are common and need to be activated. Press the letter C or click the ladder to use it while facing it directly.
Once inside, turn left and enter the northern chamber. Continue to the end, then swing left again. Two small rooms will be to your left as you move forward. The last one at the back has a hidden parchment in the left corner. Search to find it. You will need to know about the armoury to access New City.
The other rooms in the northern area have nothing but higher than-usual encounter rates, so return to the exit ladder unless you need the extra experience. (If you are playing with new characters, levelling as quickly as possible is wise.) Before we continue, there is a healing fountain not far from here. Go south from the ladder, then follow the path to the right. It will slowly heal HP, MP and Stamina, making it an excellent spot for weaker parties to heal up when needed. To increase your magic casting skills as fast as possible, I recommend casting healing spells, then using the fountain to replenish your MP.
Since we have a healing potion to replenish MP, if your party is below level 5, it is wise to use your spells in combat as much as possible to increase their strength. Also, don't worry about attacking with Bards in your party; it is better to play instruments at every turn, as their proficiency in music controls the strength of the spell.
The rest of the dungeon will appear empty, except for a locked door with no key. Hidden buttons will open the missing areas. Return to the entrance ladder first, then swing left (west). Search the back right corner for a button to reveal a hidden passageway. Follow the passage to the end to find a chest. I hope you brought someone that can disarm traps, or you will be taking damage here. This treasure is mainly potions, which will be helpful in your journey. Once you have grabbed the loot, backtrack to the ladder again. If you can't identify the potions, increase someone's artifacts skill or use the Identify spell if you know it.
Journey back south, then swing left and follow the right wall. Another hidden button is at the far right corner. Follow this passage to the end for another chest. The weapon in this chest is useless, but the armour might be decent for a fighter as it has -4 AC. Stash the Iron key for now, but keep the other at hand. Return to the ladder one more time.
Finally, go east to the locked gate and use the Old Gate Key to open it. A ladder to the lower level will be in the next room. If your party is at least level 3, proceed down; otherwise, you may want to level more, as the enemies below are more dangerous.
The lower level of this tomb is mainly empty but easy to get lost in. Many rooms will force you into a random encounter to keep you busy. Your goal is the lever on the far south end, but you should be at least level 4 before pulling it, as the creature inside can be challenging at lower levels. There are also no fountains here, so expect a long walk if you need to heal. It may be an excellent time to practice casting magic, resting, then casting more to heal. In most areas of the game, this will be your only option. Some enemies here will cause poison, and curing can be costly this early in the game. Thankfully the fountain on the upper level also cures this one ailment.
Once you're ready to battle the fearsome Ra-Sep-Re-Tep, pull the lever and enter its chamber. Ra casts spells frequently, some with terrifying effects, so put the birds to sleep so you can focus on the big guy in peace. Magic users should cast Fire magic instead of Cold to do more damage. Dispel Undead can quickly win the fight if you are lucky, too.
Once the bones retreat, move around the water to access the chest in the back. You need at least 10 points in swimming for each person, or they will drown, so don't touch the water. It is a good idea to start putting points into swimming as you level until you have at least 10, as crossing water will be needed later. You will need to turn your party as chests only open straight on. This chest contains some good items and an Amulet of Life that can resurrect dead party members. You'll need to walk back out to return to the overworld. If you're level 4, you should be good enough to explore outside this dungeon now.
Retrieving the Map Kit
Breathing the fresh air of Guardia, you will likely be ready to enter your first settlement. I recommend one last pit stop before visiting New City, if you didn't import.
Zig-zag your way out of the dungeon area and return to the road. Turn left, then left again to enter the location you started from. Find the opening that continues south on the right side. If you get a message about the towering trees, you're on the right path. There are a few short dead-ends here, so stay aware of where you are going. Casting Direction can help if you keep getting turned around. A few new enemies, like Alliphoots, make their home here, but they should only give a few issues if you were strong enough to clear the earlier undead menace. If you get poisoned, you can return to the tomb to heal if needed.
Continue south until you reach the water; two items of interest are here that will make your journey easier. Search when you find the dome at the water's edge to find Skull Bones; this magical relic increases poison resistance for the one who equips it. Follow the water's edge to find a chest in the corner too. Inside is some Suede Armor and a Journey Map Kit, which is required to use the Mapping skill. You can use the map kit from the world view (not read from inventory). More details will appear on the map with more points in Mapping. You need at least ten skill points to use it. You can now return to the road and venture to the city to the east (right).
New City
You can heal at the Tomb Fountain first; otherwise, follow the road into the city walls. Save before you proceed, as Rattkin will ambush your party; if you are unlucky, it will be an army. Starting the fight with a high-level casting of Bless is recommended, as it increases your hit chance and defence. Casting Sleep or playing the Lute is also very useful. Once free, you can proceed to the city gates (or heal again in the nearby dungeon). Savant Troopers guard the entrance, and you need a reason to enter. If you picked up and read the parchment in the tomb, you will have learned of Paluke's. Mention that to pass without conflict.
Wizardry 7 is an open-world game, so my path may differ for some. It is the one that is easiest for my play style. If you need help with specific sections, please use the Table of Contents at the top of this page.
Inside New City, explore everything, make friends and buy better equipment. Be careful if you encounter Savant Troopers, as they resist sleep, making them dangerous to fight. The Dane in the Southwest corner can also be frustrating at a low level. The Temple area has extremely dangerous Munks for low-level people, so expect a good fight if you encounter them while still green around the gills. Just be sure to save frequently, especially before entering buildings.
Some NPCs randomly walk around the world, so if you encounter one, try to make a friend, but don't anger it as they will tell their friends about you. Form truces if your diplomacy is high enough, or ignore them if it isn't.
I first go to Paluke's to get some new armour. He obtains new items over time, but the base stock will replenish every time you leave and enter the building. Need more boots than just one? Buy the one he is selling, leave, then return to buy another pair. It takes time, but better than being underequipped when facing the world's dangers. Also, be sure to ask him for information. If you explored the city, you may have encountered a prisoner asking for help. Asking the Armorer about it will reveal that the Savant guards have captured a Gorn Officer. He will be helpful if you want to make an ally of the Gorn. Add that to your to-do list while in this city.
It would be best if you likely had new weapons too. Go south past the temple gates, then take a left. If you encounter water, you must go south further before turning left. Here is the Arms of Argus. The Umpani running the shop will kick you out when you first meet him. To do business, you will need to know more.
Go to the Inn next, which is north of Paluke's. Continue north, winding left, back north, then left again. Dungeore's Inn is good for information, safe rooms and ale. Be sure to ask about Arms of Argus to learn about the Black Market. (If you don't know what to ask an NPC, ask about Rumors. It will cost you money, but they will give you a hint about what they know.) Dungore also has food that can heal. It can be worth buying 5 Bread Rolls if you need help healing.
If you want to rest, buy a key from him and use one of the four rooms here that cannot spawn enemies. The room doors lock once you leave the Inn, so rest fully before going. I prefer breaking into a house in the northwest corner and sleeping inside. The enemies you encounter here are less dangerous than in other areas, so resting is less risky.
With the knowledge of the Black Market, go back to Arms of Argus and ask about the Black Market to buy his goods. Once you access his wares, he will automatically offer them to you on your next visit. Rossarian has a good memory. Stock up on weapons and ask about the Old City (rumours). 50 Gold may seem expensive for rumours, but you will soon find that gold has little use on Guardia besides buying your starting equipment, ammo and potions. You will likely use gold more for bribing people, as better equipment is in dungeons. Rossarian's loot also changes each time, so he may not be as reliable as the Armorer, but he can carry some nice stuff.
Two chests are accessible at this point. The southeastern building near the Majik Shop has some useful ranged equipment. The building at the northeast, just north of the east gate, has a small chest with some consumables too. Most other structures have random encounters or are not yet accessible.
Before we look for the Old City, you can visit the Abby in the north-central area. If you "Sacrifice" some gold, either 20% or all, Father Rulae will reveal the entrance to the cellar below. It has a lovely healing fountain, so depending on the amount of gold you have, it might be worth it. I recommend buying everything you can (like potions and ammo) before providing a sacrifice. Ask for Guidance to be told to speak "Slay not he that cannot hear" to Brother Tshober, who we will meet later. You might want to write that down.
The old bank is the last area of interest if you have a thief with decent lockpicking skills. It is vacant now, but you can find a Copper Penny inside the vault. Search the vault for a button to reveal a chest. Successfully opening the chest will make a few in your party nauseous, but the Deadman's Hair is handy. The cloak and dagger are cursed, so be careful before equipping them. (The Poison Dagger is still handy even though cursed, though.)
We should now be ready to start some side quests. You can put off some of them and ignore others, but I highly recommend completing them all, as it will make your journey easier.
Prison Break and the Letter of Boerigard
Head east toward the east exit, but enter the building south of the gate. A group of Savant Guards are here, with a Black Wafer hidden in the far corner. The inscription will aid in getting access to the jail cells.
Go to the west gate, but go south (right) down the 2nd last path. The first door is marked Forbidden Zone. Continue forward to find the New City Constabulary. Save before entering, as you can get unlucky inside. The Savant Troopers have a nasty ability to stun, which can quickly be a death sentence if it affects the majority of your party. Enchanting your weapons before the battle and casting a high-level bless at the start can make a huge difference. I usually use my melee heroes for the trooper and my spellcasters again the guards, utilizing the most potent area-effect spells at my disposal.
Continuing to the next door, a small back box with buttons will give access to the jail. Examine the Black Wafer to learn the code is BYYR (Blue, Yellow, Yellow, Red.) You can dump it once you're done so it doesn't hold a precious spot in your inventory.
In the jail areas, two doors are locked; the middle one has the prisoner we need to free. The key is hanging just outside the north-most cell. Enter that northern cell only if you want to die quickly at your low level. Use the key, or pick the lock, to test your luck as an exterminator. Go to the third cell to free Capt. Boerigard. You can either use the key or pick the lock to enter. Ask about Orkogre Castle and promise not to tell a soul about its location. You will receive a letter, directions and instructions once there. Don't forget "Dartaen Alliance is broken" or the trip will be for nothing.
The next main section of the walkthrough will continue travelling to Orkogre Castle. Still, you should work on other quests in New City before leaving.
Quick Note About Maps
Maps can serve different purposes in the game. Some can help solve puzzles or provide hints, while others are useless, like the Fools map. To complete the game, you must have the Legend map to know the correct order. It's best to hold the map until you need it to progress and then sell it. The Fools map is not helpful and can be ignored.
NPCs may acquire maps and either give or sell them to other NPCs, but they may also fight over them, so keeping track of them can be challenging. Obtaining these maps as early as possible is advisable to avoid complications. Some believe that if Barlone has the Legend Map, it is impossible to get, but if you ally with them, you can buy it with the rest of their treasures or defeat them in hand-to-paw combat.
Abby Cellar and the Legend Map
I include this now, but you are complete Munkhrama first, then return to New City much later in the game. Skipping it is up to you, but remember that others may come across the map below before you do, which will likely lead to it being gone by the time you get here. I stumbled upon it by trying religious words, so if you want to get it now, I don't consider it cheating. When speaking with Father Rulae at the Abby, mention "Sacrament" to unlock a unique chest and healing fountain below.
Sometimes, NPCs steal maps from the chests, which can be frustrating to retrieve. To get the maps back, you must find the leaders and negotiate with them or defeat them in battle. Tracking these maps early on is essential to avoid future headaches. The * Legend * map found here is crucial to completing the game, so acquiring it as soon as possible is highly recommended. Additionally, having access to a healing fountain can be a significant advantage.
Once you're done talking to the NPC, exit the conversation and proceed to the door behind them. On the right side, there will be an open wall with a ladder going down. The enemies in this area are not very strong, and if you take a left at the first passage, you'll come across a fountain that can help you heal. If you keep going until the end, you'll find a chest that's trapped, but it contains the coveted *Legend* Map.
Old City and the Dragon Map
To find the Library, head to the east exit of the city, but continue north and take the first door on the left. Inside, you'll find the Book of Fables guarded by a Savant Controller that's currently dormant. A skilled thief can take the book without waking up the machine. This book contains information about witches who will be important in your journey later on. Next, go to the south room, where you'll meet Prof. Wunderland, a friendly Rattkin who can provide helpful information. Ask him about the Blueprints, Old City, and Archives. With this knowledge, you'll be able to enter the Old City.
Zig-zag south and west from the city's center to locate the Condemned Area. You can pick the lock if you still don't have a Pewter Key. Once inside, proceed left through the Crawling Waste and utilize the Old City Access Key at the end of the passage. Descend the ladder to reach the remains of the Old City. This ladder area is relatively safe to rest, as only weak birds may approach you.
This dungeon may pose a greater risk than what you're accustomed to. If you feel overwhelmed, return to the surface and increase your experience before venturing back. If you spot footprints on the ground, probably, someone has already taken the map from inside. In that case, you may choose to postpone the exploration. Remember to bring Cure Poison spells or potions, as enemies here can poison your party. Stick to the path and disregard the rooms. The gate opens with the lever located on the right wall before it.
To progress to the next gate, you must locate a hidden key within a small room on the far right side. Look for a button that will unveil a chest containing the key. Once you have obtained it, go directly to the gate and use the key to unlock it. Prepare for a tough challenge oozing on the floor a few steps past the gate. Use your most potent spells to defeat your opponents quickly.
If you are still in good condition, continue forward and follow it as it turns right. Ignore the first path and turn right on the second one. Keep a close eye on the right wall immediately after the corridor turns left for a button. Press it to reveal a new tunnel that leads to a chest. Next to the chest, another button will lead you to the * Dragon * Map. The remaining areas have nothing but enemies, so you can retrace your steps to the ladder and depart.
Orkorgre Castle
To depart from New City, take the eastern exit. If you encounter enemies too powerful for you, explore New City further until you have gained more strength. If you have a well-balanced party and your characters are at level 8 or above, you should be able to manage the challenges. Proceed towards the east, and the road will eventually lead you northwards. Avoid the eastern path at the fork in the street and continue moving north into the Orkogre Forest.
Although most of the enemies in this forest can be defeated easily, it's important to be cautious of the powerful Iguandadon. When first entering this area, encountering a group of them can be deadly for your party. Your options are to flee or attack aggressively if the group is small.
As you head north, you'll come across Lord Galiere. Show him the letter to gain his trust. He'll warn you about the civil war brewing in the forest ahead. Additionally, you can trade with him for leather armour and spear weapons, but only if you have enough money. Take this opportunity to sell unnecessary items and clear up space in your inventory. The "Lore" option will now provide information about the NPCs you've encountered and suggest they may have maps you haven't found yet. After you part ways, Lord Galiere will begin to travel the world.
To find Orkogre Castle, head towards the northwest corner of the forest. Despite encountering dead-ends and open spaces, continue travelling towards the north and west until you come across a clearing with a ladder. The castle is underground, so use the ladder to descend and gain entry.
Raiding the Armory
It's important to save your progress frequently since some groups of enemies, such as T'Rang Watchers, can potentially wipe out your whole party. Most of the first floor requires keys to unlock, so it's necessary to descend downwards first. To get there, head west from the ladder and move beyond the prison cells until you reach the lowest area. If a gate blocks you, you are going the wrong way. Only two rooms are available at first, but both contain challenging battles, so be sure to save before entering.
Head left and clear out the north room, which contains Gorn Ashigaru. It's best to put them to sleep and try to keep them asleep as much as possible. Prioritize defeating their allies before attacking them, and continue to keep them asleep. Once defeated, you will find the Armory Key, granting you access to a stash of weapons and armour beyond the gate between the two rooms. Additionally, there is a room to the south of the armoury where you can find Munkmeat and Munk Innards. The Innards are needed later. Hence, it's best to stash them away for safekeeping.
After upgrading your weapons and armour, resting is recommended before heading to the south room. This room has Gorn Lancers; defeating them will earn you the Crown Key. With this key, you can explore more of the first floor.
At this point, I often begin multi-classing my mage. I switch to a Bard, gain a few levels to acquire musical abilities and the ability to hide, and then change back to a Mage once I meet the requirements. Multi-classing like this permits the learning of more spells and the maximization of Thaumaturgy skills. Spells like Firestorm and Nuclear Blast can be incredibly useful in upcoming battles. Just be sure to increase their character level to above five before proceeding to the following sections; otherwise, only low-level spells will be available to cast.
Murkatos' Outer Sanctum
Head back upstairs and walk towards the ladder leading out of the dungeon. Upon reaching the ladder, turn left and keep moving forward until a gate blocks your path. Use the Crown Key to unlock the gate and proceed through it. As you continue down the corridor, you will see a blood puddle midway after the left turn. Searching the area will reveal the need for a reflective object, which we still need to acquire. Continue down the narrow path.
As you reach the end of the corridor, there are two gates that you'll come across. There are levers to operate these gates in the rooms just before them. The portcullis on the right leads to a Gorn Shaman, and you'll find a chest containing a staff, potions, flasks, and scrolls that could help. The left gate, however, will lead you toward the throne room.
To proceed, enter the room on the left, leading to another room on the right. Look for a hidden button at the corner opposite to reveal a passage, then continue until you reach a crossroads. However, the gate to the Throneroom is locked. Turn left at the intersection outside the throne room and continue until you reach the lower level. You will see a sealed gate on the left side, which leads to the chambers. However, you must pull a lever in the next room to open the gate. Be cautious, as a group of Gorn are guarding the lever. Once you open it, return to the formally sealed entrance.
There are two rooms inside. To find the Polished Steelplate and a valuable item for later in the game, go to the room on the right and check under the bed against the wall. Head back to the first floor and locate the bloodstain near a gate. Once you find it, face the entrance and use the Polished Steelplate to open the gate. If the gate doesn't open, search first, then use the Polished Steelplate. Shamans will attack, who may be accompanied by a Gorn army. In the middle of the room, search the back wall for a button revealing the late wizard's secret closet. You'll find a Ring of Steel Keys and a letter from Murkatos within. Once you've read the letter, it's safe to discard it where you found it.
Walk the ladder, then turn right to get back to the Prison. You may encounter dangerous creatures when entering most cells, but most contain items of interest. The first cell on the right has a Bunch of Bananas to enter the Throne Room. However, the second cell on the right has T'Rang Watchers, which can be challenging to defeat at lower character levels. That cell has nothing important, so I recommend leaving it closed.
To continue, head to the second cell on the left and look for a button on the far wall. Press it and proceed to the last cell on the left to find a lever in a secret room that appeared by the earlier button. Pull the lever to open a pit in another cell. Once done, return to the first cells and open the north gate to proceed.
Murkatos' Inner Sanctum
The area ahead contains a dangerous battle and no means of retreat. It is advisable to delay your journey if you cannot cast protective spells such as Air Pocket and Magic Screen at high levels. You can always continue to Munkharama, then return here later. Once you have defeated the DragonLizard, descend into the pit to reach the area below. To avoid taking damage, use Levitate spell if available.
In this area, you may encounter various creatures, such as slimes, so be prepared for different encounters. When you fell, you were likely facing north or west, so turn left or face the opposite direction and enter the southern passage first. At the end of the tunnel, you'll find a button. After pressing it, turn around and take the first left. Follow the winding path without taking any other turns. If the earlier button is active, the wall will be open here. Climb up the ladder to reach Murkatos' Inner Sanctum.
After climbing the ladder, pull the lever to open the nearby gate. Save and rest up, as the battle ahead can be frustrating. Casting Magic Screen and Enchanted Blade at the highest power level before the fight can help tremendously. The Shadow Guardian is highly resistant to magic, so focus on protection spells. In the first round, cast Bless to help your party hit the ghost. Also, cast the Air Pocket spell at power five or higher, as Asphyxiation can quickly wipe out your party. If you are unlucky, it will turn your party to stone with a touch or use Poison Gas, which is likely still a death sentence unless you have curing abilities. Casting Firestorm is also helpful as it has a chance to damage for a few rounds (at higher levels.)
After the fight, a friendly spectre will give you a quick warning and tip about a map location. However, don't let your guard down and heal up; one last dangerous fight remains here!
On the right corner is a table containing flasks, powders, a Wizard's Hat, and a Bonzai Tree that we will need later. On the opposite corner is a chest holding various random items. To open the gate, you need to pull the lever.
In the last corner of the room, there's a button that leads to a trapped area. If you trigger it, a silence spell will hit your party just before a large group of Spectral Ravens attack. Unfortunately, there's no way to disarm the trap. Before entering, save your progress in case the wrong people get muted. If you can cast Nuclear Blast, it will be handy in this battle. The fight will be long, as the Ravens constantly disappear and reappear. After defeating them, take a break if needed and search the nearby chest for upgraded Robes, the final key for the castle, and the Gem of Power. The Gem of Power has limited enchantment but improves AC when worn.
Use the lever next to the south gate to open it. Climb the ladder to the top level and open the next gate with the lever on the right wall.
Meeting the King and the Temple Map
After exiting Murkatos' Inner Sanctum, turn left and follow the passage to the intersection. Enter the room to the right, where you can find their pet ape. Offer the ape a Bunch of Bananas to befriend it. The ape will open the glass door and escape. Be aware that a Gorn Ashigaru will attack in response.
To enter the Throne Room, enter the cage and walk around the metal bars to reach the button on the wall. Next, return to the previous passage and pull the lever to the right of the gate. Step inside and walk to the far back wall to meet the king.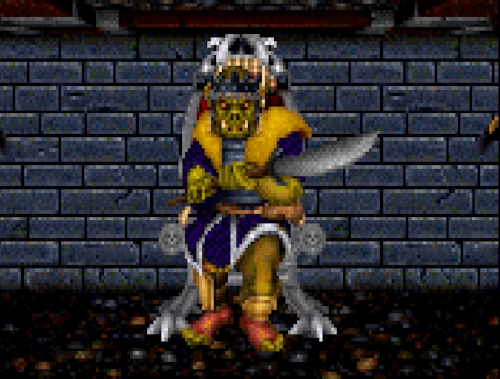
When speaking with King Ulgar, saying "Dartaen Alliance is broken," or he will leave. If you don't agree to help, he will attack. Deciding to help will earn his trust and result in receiving the Key of the Gorn King. Once finished, turn around and head back to the intersecting paths.
After completing your business with the king, he will embark on a journey around the world. If you choose to enter Orkogre Forest immediately, you'll likely cross paths with him again. He has valuable items for trade at this early stage of the game, which could provide added protection. Additionally, selling necessary items will ensure you can handle the weight.
Leave the throne room and turn right to return to the royal chambers again. Once on the lower level, the gate to the left will be open. Enter and turn left again, then press the corner button. Use the Key of the Gorn King to open the locked gate and access the chest. If the chest is empty, you missed the Temple Map, which you'll need to find the NPC who stole it. Asking for Lore may help find the correct person, but you may need Locate Person to see where they are. The Temple Map is optional but provides helpful hints for navigating Munkharama.
You will need to take a long walk towards the exit ladder. Before reaching the way up, turn right down the hallway and follow the winding path to the gate. Unlock it with the Key of Azure to access a mana fountain. It doesn't heal health directly but will enable your healers to restore your party to optimal health.
You have finished exploring this dungeon. To exit, backtrack to the exit ladder and return to the Orkogre Forest. Murkatos' Last Words, Boerigard's Letter, and the Polished Steel Plate, can be discarded. It would be great if we were provided with more options instead of littering all over Guardia, but that's likely why so many living wastes are oozing around.
There is a limit to how many items can be loose in the world, but you don't have to worry too much about it now. If you need to lighten your inventory temporarily, remember where you put them and get them later. If you have yet to drop and pick up items before, you will see the first item dropped on the bottom-right corner of the screen when you are on that tile. Just click on them and give it to a character to pick it up.
Munkharama
This section requires swimming, so if you don't have at least 10 points for each character, changing classes might be a good idea so you can add more points quickly.
Exit the Orkogre Forest using the south route and keep going until you come across a fork in the path where you can either go straight or turn left. Continue forward to return to New City, where we need to obtain an item. Once in New City, go to the Temple area, where you'll find a statue on an island. To reach the statue, you must swim, but be careful - characters with less than 10 points in swimming will drown instantly. Swimming requires a lot of Stamina, especially for inexperienced swimmers, so make sure everyone is well-rested before taking the plunge. Characters with better swimming proficiency will use less Stamina. Additionally, carrying too much weight will increase Stamina usage: characters carrying 50% or more of their carrying capacity will use 1.5x more Stamina, and 75% or more will use 2x more Stamina. If a character carries over 90% of their capacity, they will use more Stamina exponentially and even risk drowning.
Find the Moonstone at the statue's base and swim back. Before departing, check Paluke's and Rossarian's wares; they may have new items for sale. When leaving the city, head towards the branching path and turn right to head east. Continue following the road until you reach the river crossing, where Brother Tshober will greet you. There are several options on how to cross this river.
If you are friendly with the temple and have spoken to Father Rulae about "guidance for the spirit" or "Holy Work," the Brother will help you the most. When the Tshober asks how he can help, respond with "Slay not he that cannot hear," and then confirm that you are willing to proceed by saying "Yes." He will then provide information about what lies ahead and give you a Cable Trolly to cross the river, along with the phrase, "Be thankful ye that hath an ear!" Remember this phrase, as it will come in handy later. He also has slings, stones and Angel's Tongue for sale. After you leave him, Brother Tshober will leave this area and wander Guardia, starting from New City. Use the Cable Trolly at the water's edge to cross. You can leave the Cable Trolly here and retrieve it if necessary.
If you are not on the holy mission, you can pay Brother Tshober 150 gold to cross each time. It may take some bribery and diplomacy to make him happy to trade, but it might be worth it for Angel's Tongue if your Bard needs it.
If you are against the temple, killing Tshober is also an option. This option will give you his loot and the Cable Trolly. His ghost will haunt you for the rest of the game, but it is worth a lot of experience each time you vanquish it.
Lastly, you can swim across, which I often do, regardless of the option I chose above later on. Swimming two spaces will be nothing once Munkharama is complete.
Follow the path through the forest until you reach the gates of the Holy Temple City. Despite its name, Munkharama has few buildings. Your first destination is the building on the right. Go through the first door on the right, then continue through the next two doorways. Turn left and enter the chamber where you will find a well. The well will give you a riddle, and the answer is "Coin." As a reward, you will receive four coins.
Turn around and enter the courtyard. The awnings at the four corners have urns, but the Well Coins don't work. Four doors near each of the urns serve as our destination. Once inside each room, you will find a door with a cup attached; use the Well Coins to unlock them. I recommend opening all four doors to use the coins to avoid them taking up extra space in your inventory.
Bean Puzzle and the Apothecary
First, go to the northwest coin room and pull the lever. Then, head to the northeast coin room, where you will find a short hallway due to the earlier lever. Enter the next door at the end of the hallway.
The area consists of a central chamber with a small room in the middle, large rooms in each corner, and small rooms behind the other doors. You can find chalices in the bigger rooms, which require beans. For the beans, search the northern and southern rooms. A device rewards correct bean placement at the center but drops the wrong participants in a dungeon below. The penalty dungeon leads to the northeast room.
If you do find yourself in the Bean Dungeon below this puzzle, exit to the east, then turn left. Just follow this passage to find the ladder to the surface.
Determining which bean belongs in each chalice is not straightforward, as it varies for each playthrough. Place one bean in each chalice and use the device in the middle to check. To avoid damage from the expected drop, cast Levitate beforehand. B represents a correct placement, while W indicates an incorrect one. Getting all B on your first time is rare, so you may need to attempt it a few times. You'll need to gather the beans again if you receive an incorrect answer. Remember which beans you placed in each chalice and swap as necessary. It usually takes me around 3 or 4 tries to get it right.
After successfully passing the test, head towards the southeast room, where a passage leading south has opened. Take a right turn to reach a small area with water, serving as a swimming training ground. However, be careful, as it will penalize you for using it. Walk around the central water pool and swim towards the chest. Inside, you will find a White Rubber Bear, which can enhance one's swimming abilities. Equip it, activate the enchantment, and then put on your previous protective gear. Take a break if necessary, and swim back to the shore.
Walk around the central training pool again, then turn right to continue down the passage. Eventually, you will reach a courtyard with a building in the middle. Enter the building to meet Brother Moser.
The Apothecary is an excellent source of a variety of potions and powders. Additionally, he is aware of the "Land of Dreams" but will only disclose its name to those acquainted with it.
Exit the Munk's shop and make a right through the doorway. You'll find yourself in a cozy little spot with a button that unlocks the shortcut to the central courtyard. No more getting lost in the bean maze, my friends!
Finding the Lost Temple
Father Rulae has issued a call to find Holy Work at Munkharama, and we have a Temple Map that might give you a clue. Once you make it to the island in the middle of the courtyard (you'll need some decent swimming skills for this one), you'll find water in each corner. Four hidden items are in this area, so wade into those pools and search for some coins.
After retrieving the four coins, proceed to the shore and locate an urn beneath each of the four awnings. Begin in the northeast and move counter-clockwise, carefully placing the Emerald, Amber, Ruby, and Diamond coins into their respective urns. Each urn will only accept the correct coin.
To ensure your safety in the dungeon ahead, I recommend learning to swim until you can move three spaces without taking a break. Alternatively, you can purchase stamina potions from Brother Moser, although this may be more costly.
Once all the coins have found their place, hurry to the island and stand before the towering statue. With the Moonstone in hand, lift it above your head and witness as Builder of the Temple's power. The transporter will activate, and you will be whisked away to the fabled Munkharama Temple.
Lost Temple
Be careful in this dungeon; the enemies you'll face can be extremely challenging and may overpower you if you aren't careful. However, on the bright side, defeating them will earn you more experience. Defeat Spirits if you can, and don't discard any Keys of Gorrors, Crypts or Tombs they drop. These keys are rare and can significantly help you later in the game.
The party gets dumped into the middle of the central chamber of the temple. You may feel disoriented, so use the Journey Map Kit or cast the Direction spell to get your bearings. You will face the same direction as you were on the surface. If you ever need to head back to the surface, look for the southmost exit on the eastern wall and follow it south. Keep an eye out for a lever that will help you progress onward to a ladder. Once you climb the ladder, you'll find yourself in the Munkharama Forest, just south of town.
Let's start by checking out the northeast room from the central chamber. Although it may seem like an empty room, a concealed button on the back wall directly in front of the entrance will open a passage. The adjacent room may seem meaningless, but if you tug on the sconce, you'll uncover yet another secret passageway.
Loot the chest here to obtain the Munk's Key. The gate will not open, so there's no need to worry about it. Once done, return to the central chamber. If you're looking for amusement, head towards the middle north passage and activate the lever next to the gate.
It's important to avoid the middle door on the west side of the dungeon until we disarm a trap. The item we're looking for is further inside. If you want to see what the trap in the west room leads to, dive in now. It will involve Frothing Munks and Leper Giants; then, you will teleport back to the western area of floor one. It is suitable for gaining experience, but I find it more difficult than what you get. Instead, take the southern passage on the west side, which leads to the northern exit in a loop. Along the way, you'll come across four rooms, including one with an optional chest that contains random items and Rusted Keys. These keys are needed to unlock the prison cells in the north part of this level and release the terrifying creatures within. If you need more experience, it's worth checking out. We still need a key for the southeast exit, and the middle area is empty, so it's best to ignore it for now.
Lord of Dk. Forest's Cache
To reach the second level, use the southern exit located at the westernmost point of the area. You will need to use the Munk's Key to open the gate. The passageway is complex, but if you turn left at every intersection, you will eventually find the stairs leading down.
Hold on to your hats, adventurers! The encounter just beyond the stairs is not for the faint of heart on the higher difficulties. It may be downright impossible if you're not prepared. If you have yet to change classes for most of your party (spellcasters excluded) to mid to high-end professions, you likely will not survive, especially without the better equipment. You'll also want to cast high levels of Magic Screen, Armorplate, and Enchanted Blade to give yourself a fighting chance. Start with a bang by launching the strongest Nuclear Blast you've got at the enemy. Then, rally your soldiers and focus all your energy on taking down the Lord. It won't be easy, but with some perseverance and strategic planning, you can emerge victorious.
After smearing the remains of the last fight from your party, proceed into the room and loot the two chests here. The Key of the Temple is in the right chest, and the Key of Good Keep is in the left chest.
We need one more item to deactivate a trap and enter the final section of the temple. Take the left exit from the stairs and follow the corridor that wraps around the stairs room. This corridor has several small rooms branching off it. Walk down the hall and enter the third room. A button on the back wall opens a secret on the other side. Leave the room, continue down the hall, turn right after two more steps, and loot another chest of random items. Return to the path and turn left as the hallway wraps around. After another left turn, take three steps forward and turn right. The back wall of this room will now be open. Take the Notched Shaft from the chest and return to the hallway. Continue to the far end and loot the final chest to the right. You can now return to the stairs room and the first floor. Backtrack to the central chamber.
Holy Covenant and the Crypt Map
Upon entering the central chamber, turn right and take the second passage to your right. Once you've entered the archway, make a left and follow the path. Look for a button on your immediate left, which will open a secret passage. Proceed forward and to the right to discover the newly revealed room. Use the Key of Good Keep to unlock the gate and find a chest containing an Onyx Key. Return to the central chamber.
Turn left and enter the hallway at the southwest corner. Follow it as it turns right after passing the second room. Find a hole in the right wall mid-way up the tunnel and insert the Knotched Shaft. This action will close a pit shaft in the room next to it. Continue through the passage until you return to the central chamber. Turn right, then right again to run into a gate. The lever is on the right to open the gate. Proceed down the ladder.
Exit this room and take a left at the intersection, then take an immediate right and head towards the water's edge closest to the far wall. You must swim out to the fountain, which can heal your party's ailments and restore their HP, MP, and Stamina. After recovering at the fountain, press the hidden button on the wall to the left of it. Enter this new room and open the gate with the Key of the Temple. Once inside, you can find the Holy Covenant and the *Crypt* Map in the chest. If an NPC beat you here, they might have taken the map.
Swim back across the water and use the fountain to improve your swimming skill. Afterwards, head back to the narrow passages.
Wikum's Power Globe
Some players may find the next part challenging, and the item is only necessary later in the game. Delaying the acquisition of the globe is fine, but remember that you'll still need to get it at some point.
To get Wikum's Power Globe, take a right and head towards the last area. Use the Onyx Key to unlock the final gate. Once inside, go into the burial chamber and check the far right corner. Press the button located there. Be careful not to enter the pit if you want to survive. After pressing the button, pull the lever and return to the hole.
Prepare for an adrenaline-pumping fight because picking up that globe will trigger a treacherous trap and a fierce battle! Make sure to save beforehand, as this trap can paralyze your entire party and lead to a quick and gruesome death. Once you've defeated those undead fiends, embark on a long journey back to the first floor, and follow the passage east from the southeast corner of the central chamber to access a ladder to the dangerous and enchanting Munkharama Forest.
The Land of Dreams
To return to Munkharama, follow the woodland grass until you reach the road. Turn right and follow it back to the city. You can dispose of the Moonstone now, as it isn't needed. The ladder is available now if you want to return to the temple.
Once you enter the city gates, turn left and enter the next door to the left. If you didn't use the Well Coins to open the southern doors earlier, use them now. Pull the lever in the next room, backtrack out, turn left and enter the next door. Continue through to the next grassy exterior.
Save before you continue; the next fight can be a nightmare if you're unlucky. A strong Magic Screen before the fight is highly encouraged, too. Once in battle, hit the Mad Warders with your most powerful magic, such as Firestorm and Nuclear Blast. Their followers are less of an issue, so focus on the Mad Warders first.
After the battle, continue to the door to find the Place of the Gran Melange, which changes to the Land of Dreams. If you enter, you will get kicked out. You can return to Brother Moser and enquire about the Land of Dreams, then Gran Melange. Listen to him closely to learn about seeking your inner dreams and that completing it will lead you to walk the land of the living dead.
Return to the Gran Melange and tell them you seek your "Inner Dreams," the answer is "Walk the Land of the Living Dead." You will need 500 gold to enter, which should be fine if you have been buying too much from NPCs. Once inside, prep all your Armorplate, Enchanted Blade and Magic Screen, as the fights inside can be brutal if you are not prepared.
The Land of Dreams can be confusing since you must constantly ascend and descend stairs. Start by climbing up and down ladders until you reach a room with three ladders—the left one brings you into a dungeon area where Dream Weaver will attack. Beyond the ghost, you will meet the first Dream Munk, who provides a pipe.
Return up the ladder and go down one to your left. Follow up the linear path until you reach another room with three ladders. Take the closest one to you first to encounter a Nightmare and another Dream Munk. The Munk gives nothing, but the chest contains a scroll, Golden Apples and the Chromatic Lyre, which causes Itching Skin. I don't find this instrument helpful with my play style, but if you find it helps, keep it.
Return up the ladders to the room with three choices. Turn right and climb this ladder. After a short path, you will find yourself in a room with three ladders, two up and one down. Save, then take the other ladder up first to encounter a 4 Furies. Magic Screen can help significantly in this fight but still expect a challenging battle as they are all in separate groups and cast many spells.
The last Dream Munk in the corner of the room drops a Mysterious Pastille. Go back to the previous room and climb down the final ladder. You'll come across a black door the Munk advised not to enter. Merge the Pipe and Pastille to create the Pipe & Pastille. If you have this combined item, you can disregard the warning and go through the door. If not, come back with the required items.
When you reach the ground and can move, Move forward until you see a vision, then fall again. Use the Pipe and Pastille until you get the hint that your party smoked too much. Using the item again will give you no effect. Continue ahead to the flames again to encounter the Spirit of Life. It will offer a Sword, Staff, Gown, Ring or Stone. Each of these is a wonderous, albeit cursed, item:
- Sword: Sword of 4 Winds and STR increase for all.
A 2-handed sword dealing 8-20 damage + Drain and Death chances. Max HP and Asphyxiation Enchantment. - Staff: Stave of 12 Stars and INT increase for all.
An extended staff dealing 6-12 damage + sleep chances. Magic restoring abilities. - Gown: Gown of Divine Mail (U) and Gown of Divine Mail (L), and PIE increase for all.
Each has -10 AC, Death and Lifeforce resistance, and +1 Regen HP. Vitality and Age enchantment. - Ring: Ring of Invisibility and DEX increase for all.
-4 AC, Death and Missiles resistance. Invisibility spell enchantment. - Stone: Amulet of Healing and VIT increase for all.
-4 AC, Lifeforce resistance, +2 Regen HP, Stamina. Healing enchantments.
The choice is entirely up to you, so pick the one that best matches your party and play style. I usually choose the Gown or the Stone, as they offer regeneration. Note that although both parts of the Gown provide regeneration, health regeneration doesn't stack, so splitting them between two characters is better.
The spirit will place you into a new area of Munkharama that we didn't have access to before - the School of 5 Flowers. Proceed forward and into the dojo to meet Xen Xheng. If you don't know the password, he will kick you out. If you still need to ask Brother Tshober, seek him out and ask him the question. If you murdered the poor Brother in the game, just hit that restart button and hope the NPCs can forgive and forget. Just kidding - the answer is, "Be thankful ye that hath an ear!"
Since we already have done the Holy Work, give the item to him and learn the ways of the 5 flowers. He will ask you to gather some mountain flowers and grant you access to the chest in the back. If you have Ninjas without proper attire, this chest has the equipment you are looking for! Xen also sells Samurai and Ninja equipment if needed and may even have a map to trade. If you can't afford it, remember to note who has what map, as you require most of them in your adventures. Unfortunately, he will leave and wander the world, making him harder to find. The Locate Person spells become critical when finding these map holders.
Leave Munkharama and return to the Dojo to get a scroll with instructions to speak the Holy Sacrament to Father Rulae to get the Legend Map and the directions on combining the flowers. You can drop the Pipe & Pastille as they are not required.
Ukpyr or Nyctalinth should be your next visit. I usually go to Ukpyr first since it is closer, and it saves on backtracking a bit.
Ukpyr
To enter Munkharama Forest, head towards the south exit of the Holy City. Be prepared for some forced encounters as you navigate through the forest, with the first encounter being the most challenging. The Xeno Rocketeers pose a significant threat since they can kill you with every hit and tend to attack first. To quickly eliminate them, use acid-based, poison, or psionic attacks. The entire southern region of the forest has a potential threat of Xenozoids, so it might be best to explore that area later if you find them too challenging. You may also come across a few Komodo Dragons along the path, but they should be fine if you have encountered them. After what will seem like a long journey through the dangerous forest, the party finally arrives at Ukpyr.
If you want another way to get to Ukpyr, you can swim up the Eyrn River and enter the Ukpyr Mountains. However, be warned that this area has mighty giants and will require good climbing skills. Once you reach a point where you can choose between going north or south amongst the rocks, choose the south and climb the mountain at the end. Search the steps for four pieces of Vine, merge them, and find a spot that needs a rope to climb down at the south east area. After using the vine to climb down, head south, and you will ultimately reach Ukpyr. If you want all the steps for this path, skip down to the Ukpyr Mountain section.
Upon arrival, guards will approach and ask if you want to join them or leave. Accept their offer and become a scout since you did just make the arduous journey to get here. Remember to identify yourself as a "New Recruit" and use the code word "Victory" if needed.
Head to the southern part of the settlement regardless of how you arrived. The two buildings near the south entrance are safe to rest in, but it's partially a lie. The building closest to the gate can still have encounters, whereas the second barracks is secure. Proceed east of the south gate, pass through the archway, and enter the building to meet with Sageant Balbrak. Join the forces to receive your first set of orders.
I.U.F. Orders #1.
Start from the Recruiting Station and take the path to the right. Turn right at the large middle building, then left. Keep walking north until you reach the Supply Depot. You can find Sargent Kaboom behind a locked door, peering through a window. Hand him your orders to receive your equipment for 9250 gold. Even if you have the money, say that you don't. This way, you can get a discount and an extra weapon for 8000 gold. Kaboom's prices won't go any lower, so ensure you have enough funds. Although the sword and armour could be better, they may still be helpful. If you need more items later, you can return to Kaboom, and he'll offer you the same ones for trade. Additionally, you'll receive new orders.
I.U.F. Orders #2
At Kaboom's, you can sell unnecessary items and head out. After leaving, take a right from the Depot and walk across the grass until you reach the road. Continue straight ahead and turn right onto the path. The Firing Range will be on your left, and Lieutenant Gromo will greet you and provide instructions on using a musket. To use the firing range, you will need to pay the soldier. It may feel like they are taking advantage of your wealth, but it is necessary. You will receive new orders, but practicing at the firing range is recommended first.
Enter the right door, walk to the end, then use a target. Return to the red line at the arch and use a Musket from your inventory. Don't equip it! Even if you miss, each use increases your Firearms skill by 1. I recommend passing them around and giving each person at least 1 point so they can use it in the future.
I.U.F. Orders #3
This one might be the hardest one of all! Exit the Firing Range, turn right and follow the path to the southern area. Turn left. See that archway? We must rush over there and convince someone to give you new orders. These orders aren't a mission at all. Just speak to Sargent Balbrak at the Recruiting Station to get a fourth set of orders.
I.U.F. Orders #4
Finally, a real mission! Leave the city through the north gate and follow the road to the first clearing. You will meet K'Borra T'Rang at the end, who will ask you to help them instead.
If you want to ally with the T'Rang, you must fight to access the Spaceport building, pick some high-level locks, turn the Umpani against you, and learn of the coordinates. Be sure to be very accurate when reporting them or D'Rang will believe you are deceiving them and attack anyway. I recommend doing this only if you are 100% loyal to the T'Rang.
Otherwise, tell them you will help them to score some points toward their alliance with you and return to the city. Once you enter the city gates, turn around and return to the insects. Tell them you have it, then tell them anything to start a fight. If you did this quest early due to starting at Ukpyr, pleasing the T'Rang might be difficult.
After you leave their bodies in the forest, return to the Recruiting Station for your reward and a new mission.
I.U.F. Orders #5
With the Humpa Card in your possession, we need to warp to New City and give orders to Rodan Lewarx there; he will not be happy with them. From the Recruiting station, turn right on the road, then enter the first building on the left. Use the Humpa Card to enter, and pull the lever in the corner to activate the teleport to New City.
As you exit the room, Rodan will charge toward you. Give him the orders; he will ignore them and focus his anger on his adversary. Not good! Leave the building and return to allow easy passage between New City and Ukpyr. We have yet to get the code for the door, so ignore it for now.
If you're new to New City and began in Ukpyr, it's best to finish the Umpani quests before returning here to proceed with your adventure.
Return to the Recruitment Station and report the headache to come. You don't get the opportunity to tell him the bad news before he shoves new orders to you.
I.U.F. Orders #6
Orders #6 are the last of the Ukpyr missions, so if there is anything you need to do here, like target practice, do so now or forget about it.
From the Recruiting Station, turn right at the street and continue into the central building we couldn't access before. Show the soldier your orders, then proceed inside. Stick to the path given, or the guards will be unhappy. Once you reach the General's door, another soldier will ask for the orders, too. After showing your papers, proceed inside to speak with General Yamo.
As he gives you a Thermal Pineapple and the quest to rid the world of the T'Rang infestation, an attack on the city happens, and everything changes in Ukpyr. No more friendly Umpani will be found in Ukpyr, meaning you can loot the place!
First, return to the entrance of the Command Center and enter the room on the left marked as Security Station. Search the far corner to learn the vault code 2723539. You will need it back in New City. Next, turn left, enter the next room, exit through the the right door, then enter the next room to the left. Searching the middle of this room will reveal a hint of something in the Sea. Exit this area and go to the western buildings. The southern of the two has some rudimentary Umpani gear, as does the first building across from the target range.
Everything else here is gone, so let's return to New City through the teleporter. As you pass through Rodan's dwelling, use the vault code found in Ukpyr and loot the chest inside to get the Comm-Link Device. Feel free to drop all the I.U.F. letters and the badge. You will not need them. Keep the Humpa Card as the teleporter is helpful later. It is time to return to the road.
Nyctalinth
Leave New City through the eastern gate and follow the path back to Orkorgre Forest. Pass through this one and into the Northern Forest. This forest is relatively barren, so once you reach the crossroads, turn left and follow it to the end. The path takes you directly to the gate once the town walls appear. The way to the left takes you into the Red Forest.
Upon arriving at the entrance, a guard will greet and direct you to H'Jenn-Ra. Follow the broken path towards the west and turn towards the north when you reach the wall. Continue northwest until you reach the High Chamber. Do not enter the door facing west at this time.
Another guard will greet you inside. Turn left, then enter the door to your right. Enter the Imperial Chamber and approach the window to collect your first test.Thankfully they have a shortcut to Shritis' residence in New City.
Swing around and turn right. Enter the door here to find yourself in another teleporter room. Pulling this lever will bring you to T'Rshiechess House in New City, which we couldn't enter before. We now have Fast Travel between three areas of the world!
Exit the teleporter room and take the left door to meet the monstrous Shritis, who even the Umpani fear. Tell him it H'Jenn-Ra sent you and to Strike. If you accept to help, the next time you see Rodan, you can defeat him and get the medallion to bring back to Shritis when you encounter it. This quest is optional and is up to you if you want to bother with it. Only complete this if you expect to keep allied with the T'Rang rather than the Umpani. Rodan can be difficult to track down once you give him the message in the I.U.F. missions.
Open the chest here to get the Control Card, then leave the building and enter so the structure is open in the future. The Control Card is needed much later; the dead creature in the chest is a clue, but getting it now will save some backtracking later.
Return to Nyctalinth and speak to H'Jenn-Ra again. It will send you off to find the Boat Map hidden in the Funhouse below the Rattkin Ruins. There is a Spear Trap that protects it, and the bug graciously gives you a hint to solve it, but only once.
The T'Rang do not trust you; you shouldn't trust them either. You can complete the Funhouse area and return with the map, but it doesn't get anything other than a slimy friend. While here, we should journey to the graveyard as instructed by the Ghost of Murkatos in Orkogre Castle, and we have that Thermal Pineapple from the Umpani.
To enter either area, we need to explore the city thoroughly. Suit up - It's time to squish some bugs!
Mystery Ray and Security Codes
If you decided to help the T'Rang and get the Boat Map for H'Jenn-Ra, do that before this section!
Leave the High Chamber, turn left, continue to the far wall, turn left, and walk foward to the next building. Turn left again and enter the Security Area. Fight through the guards, walk down the small corridor, then Raid the room at the end. Pick up the two Finger Rods found in the corner.
Leave the Security Area, then return to the High Chamber but turn left. Enter the building labelled Tactical Depot. Both left, and right doors lead to locked doors. Both require a different Finger Rod. The right will reward your group with a small stash of Shock Rods and Stun Rods. The left will reward you with the critical Mystery Ray.
Leave this building and return to the High Chamber building. After entering, turn right instead and continue through the following few rooms until you break up a nasty group of bugs. After the fight, you will find a third Finger Rod. Stash it away for now, and enter the room on your right.
Descend the ladder to enter the Nyctalinth Caves. Go north from the ladder, and you'll encounter deactivated Savant Guards. Use the Mystery Ray item to activate the machines, which will attack. One will spit out a code, which the Ray gun user will note down after the fight. Do not open the VATS in the other dead-ends, as they may cause Nausea. Keep the Mystery Ray use against androids. It is not useful against robots, only the Savant's androids.
Leave the High Chamber again, and turn left. Proceed across to the other end of the ruined city. Enter the Observation Control Center to fight with several models of Savant Guards. The terminal here will provide a new set of codes, which you will also get on a parchment. Follow the last Savant Controller into the final room, wipe its memory banks and take the TX-Coder from the corner.
We are collecting many odd items that will be helpful later, with one more left here. Leave this building, then follow the right wall to get to the Landing Port. Open the left door with lockpicking or a Pewter Key. Send the bugs to the moon and take the T'Rang Portbook from the corner. To read the book, you can utilize the TX-Coder. However, we still need to gather more information, so it's best to keep the book in a bag until later.
Tyme Bandyt (Tydnab Emyt)
I strongly advise that you come prepared with the ability to cure poison and remove curses before entering this area. Once you pass the barrier, the only way out is through the deadly caves under the city.
Find the church entrance at the southwest corner of Nyctalinth. It has the sign of Livestock Breeding Ground above the door. Use the third Finger Rod from the High Chamber to enter. Expect a colossal battle with Hog Beetles as you cross the archways. After clearing out the T'Rang's food supply, continue ahead into the middle area to meet a spirit who guides you to walk through the wall. You can only enter, not exit, through this wall.
Within the graveyard, turn right and steal the grave keeper's Longstem Spade and stash. The bottle will be helpful since it restores magic.
Have you ever wished to enter a graveyard and dig up any grave you wanted without getting caught? You can now live out that fantasy in this cemetery. If you dig up the remains of Ymmu on the north side, you will learn that he isn't entirely dead. He has a unique dagger-style weapon and an intelligence-boosting necklace that can be useful. We need something to collect an item from the two tombs on the south end, so ignore them for now. Check the graves on the southeast corner for a way into the dungeons below. Cast Levitate before entering, or you'll take damage.
Travel north from your landing point, then turn right when you reach an intersecting path. When the pathway branches again, turn left but prepare for poisoning with a trap when it opens to a larger chamber. A poison gas pocket is at each exit, so it might be best to activate all four before curing it. The poison is only power 2, so you will likely not die, but it will reduce your odds against the enemies. The northern route has a chest with some valuable items, but the passage southeast continues onward. Travelling down the narrow tunnel, look out of a passage to the left. Take this path and continue forward. All offshoots only have dead-ends with enemies.
Climb the ladder at the end of the winding cave to enter a crumbling building on the surface.
Leave the building to enter a small courtyard. Turning left will lead to a small locked building with a chest guarded by a ghost. To proceed, turn right, which leads to a chain of other vacant buildings. Eventually, you will reach a small garden with a statue. As you enter, a Minoskell will attack. Dispel Undead or Zap Undead should help with the fight if you can cast them. Approach the statue and use the Longstem Spade to dig up the Time Bandit, which is spelled backwards for added effect.
Return to the previous building and press the button on the left wall to reveal a secret passage to sneak into the adjoining building, then exit into Nyctalinth. You will find yourself in the northeast area of the city. I recommend returning to New City to heal up and sell anything you don't need, then return to the Nyctalinth graveyard.
Vilet Kanebe and The Serpent Map
You can drop off your shovel at this point unless you want to dig up other graves. Turn left and enter either one of the two small crypts here. It doesn't matter which one you choose. Use the Tydnab Emyt stone once the ghost leaves to summon it back. It will leave the Crux of Crossing and take the Time Bandit in trade. The staff is cursed, so only equip it if you can remove the cursed item afterward. You need to cast the spell at Power 5 at a minimum!
When ready, equip the Crux of Crossing to any party member, turn left and pass through the invisible barrier protecting the far west end of the graveyard. You can cast the Remove Curse spell now; wait to remove the stave, as you need it to leave! Enter the Tomb of Valet Kanebe here.
Before entering, cast protective spells. The undead creature will attack once you descend the ladder. It resists most magic, but Paralyze and Acid spells are often effective. When facing Valet and its minions, prioritize targeting Valet, as it is a powerful spellcaster. Once Valet is defeated, take care of any other remaining minions. Claim the Serpent Map as your reward from the chest and depart.
After passing through the barrier again, you can remove and discard the cursed staff. We can't leave the graveyard from the entrance, so cast Levitate and fall back into the caves.
Exterminating the Bugs! (I.U.F. Orders #6 continued)
Once you drop down into the caves again, return to the intersection just north of your arrival area. If you want to complete the queen's quest, retrace your steps from earlier by taking the right path. Otherwise, take the left tunnel to wipe out the bugs!
Please note that following the left tunnel will forever make the T'Rang hate you. It is your choice if you want to betray them to this level.
After the path opens, you'll find yourself in a bigger room with four poison traps. These traps are at both ends of the room, so it's better to cure your poison once inside the smaller tunnel on the other end.
Ignore the first branching tunnel to the right, as it just leads to Cave Thraxe, unless you want the experience. The second path on the right is a helpful one. It will twist and turn until it gets to a larger chamber. Cave Thraxe will charge you as you enter, which has left remains of another adventuring party in the corner! Loot their remains to get some beneficial gear. The Stone is especially valuable as it protects against Lifeforce attacks and can fully heal a person while adding vitality and making them younger when invoked. The cloak is also a useful item to keep if you plan on importing it into Wizardry 8.
Return to the main tunnel, strafe right, then continue. Save at the eggs, as the Thermal Pineapple has a lousy reputation for killing the party that uses it. Pull the pin and fry the unborn T'Rang. You will take damage and likely be blinded, but you can proceed. Don't bother trying to protect your party from the blast; no spell has any effect on it.
Now that H'Jenn-Ra's babies are gone, proceed further down the tunnel and climb the ladder above. Travel down the only hallway here until you get to the large room. H'Jenn-Ra will not be pleased once you enter its chambers and will attack, generally with a small army. Since the Thermal Pineapple worked so well on its young, it's only fitting to use Nuclear Blast here too! Hit them with everything you have quickly; the more left alive, the more damage you will take. Their remains will have any maps the T'Rang had before their demise.
If you find the fight too challenging, feel free to return later. You must walk back through the caves and take the western path to leave, though.
After you squish the queen bug, continue east into the hallways. Both branches lead to buttons that reveal hidden passages. The south branch returns to the High Chamber, and the east path goes to the landing port.
Dionysceus
Collect your Munk Innards first if you have dropped them; you will need them in this tower.
From the city gates of Nyctalinth, take the south path into the Red Forest. In the middle of the forest, you will encounter a fight between a Valkyrie and a group of T'Rang. If you save Jan-Ette, she will thank you for helping her and give you the Helazoid's Banner. Bring the banner to her home in City in Sky later in the game for a special reward.
Eventually, you will come across a new path exiting to your left. This path back to the Field of Wild Orchids will put you to sleep and bring you to the other side. Only go that way if you want to force your party to take the long walk of shame. Continue down the road, and you will eventually reach Dionysceus, Great Tower of Dane. This area is full of magic casters, so keeping your Magic Screen up is highly recommended. Slide down the ladder to the first floor.
Temple of the Initiate
Once inside the gloomy walls, turn right to see two passageways. Take the left passage to meet Almagorte. Tell him you have yet to hear the word but are willing to join. You must give him 100 gold to show your eagerness to be a member. Ask about urns, sacraments, and the trial. If you want to know more about the tower or other Dane that you've heard of, Almagorte will give more information. He also sells potions, powder and food. Jonga Powder is valuable as it disarms some traps. Buy at least five Jonga Powder, but a sixth will help later in the game.
Return to the entrance and take the passage on the opposite corner of Almagorte's. Check the right wall mid-way to the next room for a button. Follow this new passage until it opens into a large room with a sign labelled Temple of the Initiate. Use Jonga Powder on the urn here to disarm a nearby floor trap.
Take the south or north side passages and follow them to the middle. A gate will be on one side, and a room with a chest across from it. Approach the chest to get attacked by the Spirit of Dane. Defeat it to get Ashes of Diam, which will be needed later. Loot the chest to score the Golden Idol, then return to the central room with the urn.
Enter either of the inside rooms and turn to the middle. You will get a trap in the middle cell if you don't use the powder. Turn into the next room to find a marble altar. Use the Golden Idol here to open the gate.
Return to where the gate was and pass through to the next chamber to meet Tollen Dane, who will promote you for the cost of 250 gold. You will need a lot of gold ahead, and each time you meet Tollen, he will ask for more. You must pay to be allowed to proceed further.
Continue forward once Tollen leaves you to proceed up to the next floor.
Temple of Divine Order
Continue down the corridor until you reach a crossroads. If you turn right, there is an advertisement for Belcanzor in the corner, otherwise, take the left passage and turn left into the small room. Use Jonga Powder on the urn to disarm a trap, then turn around and enter the large chamber.
Navigating the pit puzzle can be perplexing due to concealed pressure plates that open and close the pits. If you activate them in the incorrect sequence, you might have to drop into a hole to reset the puzzle. Fortunately, using Jonga Powder at the urn can help avoid fall damage if you tumble down to the lower level.
- Step on the first pressure plate in front of the entrance.
- Turn around and walk to the left corner.
- Travel to the other corner to close several pits.
- Step on the middle tile, then turn around.
- Stride back to the floor tile in the right corner.
- Stomp on the floor button in the left corner.
- Find the floor plate on the north side of the room.
- Return to the left corner, followed by the right corner again.
- Approach the middle area and turn right to activate this pressure plate.
- The right corner needs to be triggered again.
- Dance your way over to the tile on the south side.
- Return to the right corner again.
- Go back to the middle and turn left to activate the last pressure plate.
You can now pass through the middle without falling into any pits. If you fail to use the Jonga Powder in the earlier urn, the active trap will silence your party upon leaving the puzzle. Turn left until you reach the wall. Right leads to Belcanzor's shop. Turn left first, which leads into a loop with gates revealing inner rooms. The gates will never open, but if you check the north wall facing the rooms, you will find a button that opens the first one. Search this small room for another one to reach the Golden Idol chest. If you want to get some magical knick-nacks or sell things to make money to pay Tollen, visit Belcanzor before leaving the northern area.
Return to the crossroads, then turn right and pass by the pits. A gate is on the left side, but you need to place the Idol on the altar at the end to open it. Once you set Idol on the altar, enter the previously gated room to meet Tolen Dane again, who will demand 500 gold to proceed. Proceed forward and up to the third level.
Temple of Eternal Night
After progressing up the stairs, continue until you reach an archway with darkness beyond it. I hope you're not afraid of the dark! I recommend casting the Direction Spell, then glancing at your Map Kit if you get turned around.
For the upcoming directions, always move forward to the next wall after turning unless it says otherwise.
- Step into the darkness.
- Strafe left, then step forward once.
- Turn right.
- Turn left to reach a lit room with an urn. Use Jonga Powder.
- Turn around and step into the darkness again.
- Turn right, then continue through five left turns.
- Turn right twice, then strafe left.
- Take one step forward.
- If you don't use the Jonga Powder, a blast of Mental Energy will hit, and you will encounter an enemy.
- Turn left twice.
- Turn right.
- If you turn left, step once, strafe left, then turn right at the wall, you can find a healing fountain if needed.
- Otherwise, turn right.
- Turn left twice.
- Turn right twice and take a step forward.
- Turn left, then right.
- Turn left twice and walk to the end of the long hallway.
- Take a left, then strafe right.
- Continue to the end, where a teleporter will activate.
Take a short break from navigating the maze and enter the room to meet Myntor. Let him know that you're interested in learning and he'll give you the Key of the Beast. Remember to come back to this room once you've bested the beast on this floor.
A choice of three paths awaits you. If you choose the wrong one, you must turn left and walk a small part of the maze again to return. The correct choice is the one on the left. Move forward twice until you hit something. Search to find the Golden Idol. Turn left and step forward into the maze of darkness once again.
- Turn right three times.
- Strafe left and walk forward.
- Turn left twice, then right twice. Take only two steps forward!
- Turn left twice.
- Turn right, then left.
- Two more right turns.
- Turn left, then strafe right.
- Turn left, then right twice.
- Once more left turn, then a right turn.
You will find yourself in a small lit area with a gate to your left. To defeat the beast, move forward, turn left, then follow the spiral turning right until you reach the gate. Save, then use the Key of the Beast to fight the PSI Beast.
This fight can be horrible due to its insanity attacks. Hit it with powerful fire and cold spells to defeat it quickly.
Retrace the spiral by following the right wall for five turns, then turn left to reach the gate again.
You must backtrack through the dark maze again, then step on the teleporter and return to Myntor's previous location. Meditate here. Each time you meditate and succeed at staying awake, the character will gain a point in Mind Control until you reach 50, then every few successful attempts afterwards. After each meditation, step back, rest quickly to awaken the sleepy ones, then move forward and meditate again. Since this skill protects from Sleep and other mental attacks, raising this as much as possible is recommended!
Once you have meditated as much as your sanity or boredom can stand, enter the maze again and return to the gate. Face away from the gate and enter the darkness. Turn left, then make two right turns. The easiest way to find the alcove to the right is to walk to the wall, back up once and turn right. Place the Golden Idol on the altar, then return to the now open gate.
Tolan Dane needs 1000 gold to allow you to pass. Pay the crook and pass to the next floor.
Temple of Aerial Whimsey
You're finally free of the maze of darkness, but now you will bounce around with a maze of teleporters. Turn right to step on the first teleporter, which brings you to the middle of the southern wall. Turn left and follow the passage west. You will see a chest at the end, but a teleporter will yank you away just before you reach it. Don't worry; we'll get there in a moment.
This area has four paths, but each time you step in the middle, it changes your direction randomly. Use the Map Kit or the Direction spell to tell which way you are facing. Go South first to get teleported into a large chamber. Travel directly west (forward) to step on another teleporter. Follow the hallway to the end to get teleported to the chest we saw earlier.
Swipe the Key of the Stone from the chest and move into any direction to return to the random direction room. This time, take the east passage. Move forward and follow the left path to another teleporter.
You will see a chest behind a gate. Use the Key of the Stone to enter and loot the chest. The Stone of Gates and other helpful items will be inside. Take the teleporter at the end east side to appear in the middle of the labyrinth. Follow the right wall until it opens, then take the left passage to the random direction room again.
Unless you forgot something, this should be your final visit to the random direction room. Take the north path to be plunged into darkness again. Turn left to experience a vision which rewards you with the Golden Idol. Turn left again and step forward to be teleported out of the dark.
A gate will stand before you, taunting your party with its sturdiness. Turn left and follow the left wall until you reach the shelf that needs the Golden Idol. You can now return to the gate to find it has retreated in awe of your awesomeness. Don't take the west wall walking to the gate; you will hit an unwanted teleporter.
This gateway will zap you into a small room with two teleporter pads. The left will take you back to this floor's entrance; Tolen Dane guards the right one for a hefty fee of 2000 gold for passage. Step forward to be teleported to the exit hallway. If you move away from the stairs, a teleporter pad will send you back onto the floor, so don't go the wrong way. Travel up to the next floor.
Temple of Deadly Coffers and the Serpent Map
Follow the narrow passage until you reach the water's edge. This floor is a pirate's worst nightmare! All the chests explode as soon as you face them, and there is a lot of required swimming. Save before approaching each treasure in case the results are too severe.
Before you start exploding chests, swim to the central archway in this room and sprinkle some Jonga Powder to deactivate a trap in the middle room. A coffer key rests in most chests on this floor, but only four are worthwhile! In this room, the north and south chests have good keys. You cannot distinguish between the good and bad keys, so be careful what you pick up.
Once you have the two good keys in this room, find the gate on the east side and use the Coffer Key from the South chest to open it. This small room has two chests and gates in all directions. The south chest is the only one with a good key, which opens the eastern gate. Proceed to the east into the final chest room.
There are five chests in this eastern area. The chest left of the gate we passed through has the good Coffer Key, but there is also random treasure in the one directly across from the entrance of this room. The Golden Idol is to the right of the chest of treasures.
Check the wall between the two south chests for a button. A gate in the secret chamber requires the key found in the northern chest from the first room. Unless someone stole it, the Serpent Map is inside. I have only seen it still in this chest once, so don't expect it to be there.
Swim back to the western gate to return to the middle room. We need to get to the north gate and use the last Coffer Key we retrieved from the east room. I recommend backing up to the entrance, then turning around so you don't trigger the chest. Place the Golden Idol on the ledge after opening the gate to open the southern path. Cross the room to be mugged by Tollen Dane again. 5000 Gold lighter, progress forward and up the next floor.
You may want to postpone your trip to the next floor if you don't have near 10000 Gold. If my pockets are too light, I usually backtrack to Belcanzor, sell my collected junk items, then return here. Thankfully the dungeon isn't too large, meaning you can get to Belcanzor and back in just a few minutes. Navigating back is even easier if you follow our beneficial interactive map! This is also an excellent time to use that healing fountain in the Temple of Eternal Night.
Temple of the Wanderers
This floor has annoying enemies; most are powerful spellcasters, so cast Magic Screen. The puzzle on this level is invisible floor plates that change the walls, which can make it very confusing to pass through.
As you step into the first room after the stairs, you will be randomly placed in a new direction and area of the room. We want to go west first, so the cast direction AND enter that passage. It may rotate a few times as you travel, so watch your direction.
The walls will shift as you pass through this winding corridor, but all in our favour. You are not notified in any way of the changes, though. When you see the gate, turn left until you reach the end, then turn left into the next room. Continue forward and follow the corridor to the chest to get the Chrome Key, which is required later.
Turn around and enter the previous room to find the door we came through is gone. The small adjoining room will open a passage out. At first, the new area will appear to be a dead-end, too, but entering the left section will close the path behind you and open a new one.
We need to return to the rotating room and have two options. I recommend turning right and making the entire loop around now, as it will save a bit of back-tracking later. You can also go halfway, then turn around, but you must make the entire loop later if you do. If you follow the whole circle, turn left at the gate again and right into the rotating room.
Take the east exit this time. At the junction, turn right, enter the small room, turn around and turn right at the passage. Take another right at the intersection, continue to the wall, and follow the hallway to the right.
Follow the passage as it twists until the end, then turn around until you return to the archway before the path north. Turn left and walk to the dead-end here, too, only to turn around and walk to the wall again. Turn right and walk to the end again to find the chest with the Golden Idol!
Backtrack to the hallway and follow it north. Turn left at the intersecting passage and weave back to the rotating room. If you travelled the entire loop before, take the north exit and turn left; otherwise, take the west exit and walk around. Return until you see the gate, then turn around so you face away from the gate. Check the wall for a button.
Place the Golden Idol on the shelf we just revealed, turn around and fork over your vast amount of gold to proceed. Thankfully that is the last time he will rob you of your money. Continue walking straight to the wall, then turn around again. Return to the area with three archways. Turn left and open the chest to get the Key of Ascension.
Back to the central passage and turn right. There are two teleporters against the south wall. The right one returns you to the first floor near the tower's entrance. A gate protects the left one. Use the key we just obtained to open the gate and enter the portal to jump to the top of the building.
Pit of the Demon Spawn
When you Teleport to the top, you will be next to a switch that will return you to the Temple of Wanderers, near where you last saw Tollen Dane. Don't pull it yet! A cage protects the center of this room. You must activate the switch on the southwest corner to enter the cell, but wait to pull that one too! Take the stairs on the west side.
Follow the path and down a second set of stairs. You will return to the sixth floor, near the Temple of the Magna Dane. Turn right and enter to speak to the leader of these blue beings. Choose the Spawning Pit. He will tell you how to summon the demon, kick you out of the temple, and seal the gate.
Return to the top of the tower and pull the south lever. You will find yourself in the middle of the caged area of the Pit of the Demon Spawn. We don't have the Book of Immortals yet, so cast Levitate and plunge down the hole. Follow the only path here and fall into the next hole as well.
Leave this small room and turn right into the hallway with gates on the left side. This passage would be a deadly fireball hallway if you didn't speak to the Magna Dane and wandered down this passage when exploring the Temple of Wanderers. Walk to the far gate, turn right, pull the lever, then open the gate with the Chrome Key. If you need the Chrome Key and somehow closed off specific passages earlier, you may be trapped in the tower. I hope that isn't the case...
Once the gate is open, save before entering as the fight with the High Father can be deadly if you're unlucky. If you survive, turn right and loot the chest to get the Book of Immortals and many other items. Read this book to learn it the steps for the ritual. Press the button just south of the chest to open a passage.
Step through the new opening, turn right, then left at the intersection. Follow the winding path back to the rotating room again, then take the same exit as last time and return to where you spoke to Tollen Dane. Return the left portal to the top floor. You can also head back down to heal first if you need it.
At the top level, pull the southern lever again to return to the central pit. Save first, use the Munk Innards (I hope you kept them from Orkogre, or you can't do this quest), the Ashes of Diam, and finally, the Stone of Gates.
Once the fight with SPAWN begins, cast Fire Shield or Anti-Magic (the spell or using the Book of Immortals) to protect against its attacks. Astral Gate at high levels also has a chance to destroy it. You can also fight it the old-fashioned way.
After defeating the demon, cast levitate and drop down the pit to collect the Cornu of Demonspawn. This instrument casts Astral Gate, which is excellent against demons. Save it for use in the final area of the game. Follow the path down the next pit too. You will need to repeat our steps from earlier to get back to the tower's top floor. From the top, take the stairs and return to the Temple of the Magna Dane.
Save before approaching the gate, and cast all your protection spells. The Magna Dane can inflict over 1000 damage, so you will likely lose someone. Resurrection potions, scrolls and spells will help you survive. After the fight, search the dead to find the Ring of Demons. Do not equip it!
Step inside the Magna Dane's chambers to find two fountains. The first will turn you into a statue, but the second will heal anyone not afflicted by the first. Search the back wall for a button, open the gate with the Cornu of Demonspawn, and plunder the final chest of the tower.
Sell the cushion to recover some of the gold you had to spend here, but keep the Coil of the Serpent. It is cursed and will drain your health, but the damage it causes is massive, and anyone can use it. If you equip it with the Amulet of Healing or another healing relic, you can swing away as much as you want. It is also required later in the game.
Once done, descend from the tower and return to the surface. You must return to the top of the tower, flip the switch on the northeast corner, then take the teleporter to the first floor. If you still have any Munk Innards, the Book of Immortals, or the Ring of Demons, drop them.
Leave the tower and follow the path until it branches to the right. Follow this path to return to New City. If your party learned the Mind Control skill from the tower, you can safely pass through without falling asleep.
Rescuing Vi Domina
Return to New City and enter the Forbidden Zone across from the Jail. Expect intense fights with Savant Troopers as you enter, so it usually is a good idea to cast protective spells again. To open the first Inner door, use the Control Card from Shritis' residence earlier. More Savant Controllers will attack, then vaporize when defeated.
Walk straight to the back wall to find a computer. One of the parchments we got from Nyctalinth has the code for the Black Ship.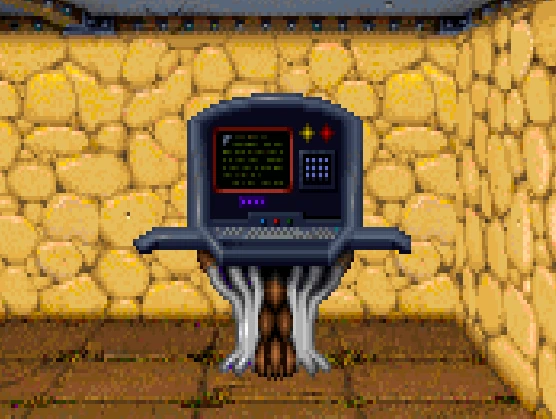 Use the Comm-Link Device and enter the code into the computer (023@41A2). When it asks for the Host, enter Black Ship Command, as noted on the parchment. Also, ask for File, Personnel, then Vi Domina. After the short scene, the visitor will get tossed into the nearby cell. Approaching the door will tell you it is a security cell. You can also glance at her through the nearby window.
Other file searches available from the Black Ship include:
- Ship > Nargisst
- Ship > Horatha
- Personnel > H'Jenn-Ra
- Personnel > Shritis
- Personnel > Yamo
- Personnel > Lewark
- Personnel > Phoonzang
Read the parchment for Security Access and write down the code server code (018@67C1). Return to the computer, and use the Comm-Link Device again. When it asks for Host, type Central Security Access. Ask for Control, then Security Cell. Return to the door and open it. A few guards will attack, but it should be a simple fight. Step further in to speak to Vi.
If you haven't guessed from the maps yet, you must get to an island in the Sea of Sorrows; swimming there is not a good idea, but not impossible. You can drop the two parchments but keep the Comm-Link Device and Control Card.
Leave the Forbidden Zone and enter the docks area of town. The building opposite the water is Sogheim's; our target is the door right (east) of his. If you don't have the Copper Penny from the bank, pick the lock and find it on the vault floor. Use the Copper Penny to enter the Curio Museum.
Save before proceeding, and if you don't have a method of Curing disease, you should return here when you can. Inside the Curio Museum, turn left and walk to the corner with a display of a wand and balls. Take the wand and keep your hand within the portal to find the Rebus Egge. Your first character will get diseased, so cure them. We don't know the solution to the spinning heads in the other corner yet, so leave this room. If you don't have Holy Water, you should get that from Father Rulae before you go. Also, remember to unload anything you don't need.
Rattkin Ruins
Exit through the east exit, travel north through Orkogre Forest, and enter the Northern forest. You need the Bonzai Tree from Orkogre Castle, so get it if you don't have it in your inventory. Follow the path east of the intersection, then enter the first clearing to the left. Save and enter the odd area in the middle here. You will know it is the right area when your party gets an oppressive feeling. Man O' Groves, Halloweech, and Tobagan will attack as you approach the central grove. It is a long series of fights with no breaks, so keep healing until the battles are finally over.
Once the fights end, go to the central paved area and use the Bonzai Tree, which will summon a being that will open a path at Rattkin Ruins. Before leaving this area, go northeast to get a chest of goodies. Return to the road when done.
Turn left and continue north, then east. The road will break up as it turns more south. If you follow the broken path southward, you will find it blocked by trees. Instead, follow the northern treeline and continue east to find a way up into the treetops of the Rattkin Ruins.
Meeting the Thieves Guild
Missile Shield is very helpful in many of the fights in this region, but casting it is required in each battle, so you may want to pick your use to run out of magic. The Armorplate spell is also recommended.
While in this area, we should help ourselves to some abandoned treasure, but if your lockpicking skills are lacking, you may need to get this chest later once you get a Brass Key. Go through the nearby door and slide down the ladder. You must go up and down a few other ladders and pick one lock (or use a Brass Key) to reach the chest. Return to the entrance room afterwards.
From the area the tree dropped you off, go down the ladder in this room, take a right and pass through the next room. Use the right door to enter the courtyard, then turn right twice and follow the right wall.
Drop items you want to keep, as there is a strong chance you will lose something you need. The upcoming thief will steal random things unless they are essential. I have once lost all my Bard's instruments, so be careful. Eventually, find a covered area where Blienmeis will appear and ask for money. If you say yes, he will pick your pockets. Do the same to him to get the Signet Ring. Even if you aren't successful, he will give it to you.
After he leaves, return to the building we came from and enter the door directly to your right. Follow the passage until you reach a hall to the right. Walk this corridor south until the end and go up the ladder you will find after passing through two doors.
Follow the empty passage and down the next ladder. Turn left and enter the door for a ladder leading to a chest, then return and continue down the hall to the ladder at the end. You must wear the Signet Ring and put your hand through the window in the next room. You can remove the ring and drop it once approved. It is only needed to enter this one door.
Blienmeis will meet you inside again. He's a decent source to trade, but a better one is further inside. Ask him about the Funhouse, Reflextion and buy the Nose from him. With the Nose, you can enter the Funhouse. Buy his thieving tools to help open difficult chests and doors.
Backtrack to the long hallway, but continue past the left door. Eventually, you will find yourself outside. Locate the door on the far end and climb up the ladder at the end. This room has three doors to choose from. The south exit is empty, so take the east door to Bertie's shop. Trade whatever you need or want to sell, but get the Feather Weight potion, as it is an essential item for later.
Return to the ladder and take the west door if you want another chest, but a few tough rats guard it. It contains some helpful assassin weapons, plus a Brass Key if you couldn't pick the earlier lock. You may need at least two additional Brass Keys if you can't pick the locks, which Blienmeis sells. Return to the outside of the ruins once done looting the place. You can also explore the forest east of the ruins, but it only has enemies.
The Funhouse
Venture to the south area of the Rattkin Ruins to the massive building. Use the Red Rubber Ball (the Nose) to enter.
Approach the door across of the entrance, but instead, turn right and follow this hallway. All the doors besides the central door require Brass Keys if your lockpicking skills are too weak. Turn right again, enter the left door, and pick up the Black Pyramid against the wall. This item is cumbersome, but it is needed. Get your strongest character to drag it along for now.
Leave this room, turn right and follow the right hallway to the second door. This room contains a chest with a Lodestone, Wooden Dowel and some Robes. Drop the Loadstone, as it is there to trick you for a puzzle in the lower Funhouse. Return to the center door near the entrance and enter. If you can't pick or force the lock, check out Blienmeis for the Silver Key. Slide down the ladder into the interior of the funhouse.
Elevator Shaft
The first part of the area requires setting up a Funhouse Gadget to propel your party into the rest of the dungeon.
Take the central path forward and down the ladder, which brings you to the third floor. Once the following passage opens into a larger room, approach the back wall for a springboard and a chain. If the Chain is not here, move one step to the right to drop the chain, then step back left again. Attach that heavy Black Pyramid to that chain to finally relieve your party from its burden.
Back up from the gadget and turn right to follow the new passage. Take the hallway to the left and go up the stairs to the second floor. Continue past the branching path and climb up the ladder at the end of the passage.
As you enter a small room, turn left twice and walk down the hallway. Grab the Tarnished Key from the end, then turn around and climb back down the ladder. Follow the left wall until you reach a room. Turn around and strafe right to find a button on the wall. Fight past the undead and grab the Spool Handle from the corner.
Turn around and return to the hallway with the ladder. Turn left, then turn into the short dead-end on the right side. Use the Spool Handle here.  Turn around again, then turn left and go down the stairs to Floor 3.
Turn left and unlock the gate with the Tarnished Key. The chest contains a Rubber Band. Return up the stairs and ladder again, but turn right this time. Use the Rubber band at the gate, then return to the 3rd floor again. Turn right and return the gadget. Use the Feather Weight potion before approaching the springboard on the opposite side where you placed the Pyramid. If you put everything in its correct place, the gadget will launch your party up to the rest of the Funhouse.
Barlone's
After recovering from your launch, turn left and follow the passage to the end. Take the stairs down and enter the next room, where a gate will open as you approach it. Enter to encounter Barlone.
He will ask if you are interested in dealing with him. Choose Yes, and he will ask you about a ship at Nyctalinth. You should have the T'Rang Portbook and TX-Coder if you have already completed that region. Use the TX-Coder on the Portbook to learn the next arrival is 088:53. Leave the area to the ladder, then return to tell the Ratt Boss the stardate. He will tell you about the Old Archives map, then kick you out again. You can discard the TX-Coder and Portbook as they are a waste of space now.
If you have 40000 Gold, return to the stairs and up the ladder again. They might offer you to plunder their loot for a small fortune if you have a strong enough alliance with them. You may need to meet Ratsputin and butter him up firs, then d return if they don't offer it to you. You will also get any maps they have, plus the Displacer Cloak, which is a neat protection item that has a minor Blink enchantment on it. Enter the passage attached to their hall and pull the sconce to open the gate to enter. The things in their vault are random, so sometimes they are helpful, but many times they aren't. Save before opening each chest to get the best items. Return to where we arrived from the Springboard afterwards.
If you choose to return to Rattkin Ruins at this point, travel down the ladder directly across from the springboard pit, then turn left and walk up the stairs at the end. Pull the lever on the left to open the gate to the entrance of the Funhouse. Once you're ready, return to ladder across from where we arrived after the Springboard again.
Waterslide
Find the pit south of the ladder. Use Levitate before stepping into it, or you'll take a lot of damage as you fall. Unfortunately, you can't avoid taking damage on the first landing, but it will protect you when you hit the 3rd floor. After picking your party off the ground, step forward, then turn left to find the Painted Ball.
Use the lever left of the gate to exit this room. Turn right and slide down the ladder. Two water pits in this area will provide a landing for wrong choices of the Waterslide above. From the ladder, turn left until you get to the water. Turn left in the water to find a passage. The far right corner has a hidden Bar & Rope. Return to the ladder and go back up to level 3.
Follow to the path past the room we dropped into earlier, then turn left to climb the ladder to return to level 1. Turn left toward Barlone's, but turn right into a small jumbled path instead. Stick to the right, and you'll be fine. Take the ladder here, save, then proceed to the edge of the pits, where you can toss the painted ball at a target. You only have a 40% chance of success, so if you miss, you need to reload the save or drop into the pit to collect the ball and run back up.
Once you finally hit the target, backtrack to Barlone's passage and turn left. Follow the hallway again and enter the mechanical pit at the end. This time you won't hit the gate and will pass through it to the 2nd level. Before you start messing with the waterslide, turn right and go to the very end of the passage. Use the Bar & Rope at the pit, backtrack, and turn right at the holes.
We now need to manipulate the water flow for the slide so it dumps us down the correct path. If you mess up, you drop into the pools on the 4th floor.
You will find a ladder to your right as you travel down the passage. Take this ladder and skip the first lever next to the water, but flip the one at the end. Return up the ladder and turn right.
Continue down the corridor, turn right and flip the switch nearest to this ladder. Return to the hallway, turn right again, and climb the next ladder on the right side. Do not flip the farthest switch on the second level. When you go up the ladder, follow the stairs back down and pull the switch here too.
If done correctly, the water slide should be ready to drop you to the correct area. Return to the passage, turn left and return to the pits on the right. Turn left, take the right up the path (not the hole) and jump onto the conveyer belt to the first floor.
Wait to turn right down the first passage; instead, continue forward until the next hallway, then go down the ladder. Turn around and take the left route. At the end of the passage, turn left and strafe right into the corner. Insert the Wooden Dowel here, then return up the ladder.
Turn left, then the next left to arrive at the water slide's beginning. Step into the water and get whisked away. You should reach the rope and swing across if your party prepared everything correctly. Walk to the end to pick up the black ball, then return to the hole and climb the rope to the second floor.
The Back Door and Boat Map
Walk down the long path, turn left and back up the conveyer belt. Walk to the very end of this hallway and use the black ball. Walk back down the hallway and turn left to ride the waterslide of destiny again! Use the rope to cross the pit again and approach the area where we just got the black ball. This time it will shoot you to the floor above, where your party will automatically grab the Wooden Dowel we placed earlier.
Walk up the stairs here and turn left to slide down a ladder. The gate is locked, so walk to the back alcove to encounter the famous Six Spears Puzzle. If you completed Nyctalinth, H'Jenn-Ra would have given you a hint on how to open it, but that was a long time ago, and you likely forgot to write it down.
- The first is not before the third.
- Nor the second, but first after the sixth.
- It is the fifth that is first.
- And the fourth after third, which is second.
If you need help figuring out the riddle, the answer is 5-3-4-2-6-1.
Enter the previously gated room to encounter some undead before you finally get to the Boat Map. This map shows how to get to a boat to cross the Sea of Sorrows. If you provide it to H'Jenn-Ra, take note of it or get the boat before giving them the map.
Turn around, go back up the ladder and turn left. Pull the switch to open the gate to the back exit, which takes you to the northern area of the Ukpyr Mountains.
You can safely dump the Signet Ring and Spool Handle unless you plan to take another trip through the funhouse.
Ukpyr Mountains Area
Yes, the rocks are supposed to be towering mountains, but this was amazing to see compared to the earlier games in this series!
From the Funhouse exit, travel south until the path splits left and straight. Travel left toward the Eyrn River. You can explore the Eryn River if you wish, but it requires a lot of swimming. If you don't have a high skill in swimming, you should explore the area for practice. There is one treasure chest at the northeast corner of the river area, but you likely have better items by now.
Giants' Cave and the Red Rosis
Before you reach the water, turn left (east) and walk until you reach an area you can climb down. Save if you slip and fall, then climb into the Giants' Cave. This cave has five giants - but you can avoid all but the last one. I usually hunt them down and gain those sweet XPs as the cave I loot the den.
This chest is optional, but it contains some fantastic loot. It requires extreme swimming and stamina potions or the Restfull spell. From the entrance, turn right in the first room, then turn left immediately to avoid Brunatz. Once you reach the water, hug the left wall and rest up to restore you have full stamina for all. Once ready, save, then swim four strokes forward, turn left and swim through the Pirannha Shark-infested waters and into the small cove on the right side. If you get attacked while swimming, you may get paralyzed or put to sleep, which will instantly cause drowning if active when the battle ends, so be sure to be diligent in your curing. You must backtrack through the water again and return to the first room.
Back at the first room from the cave, turn left if you're facing away from the entrance. Hug the right wall and walk to the furthest edge of the water. If you are collecting flowers for the Ways of the 5 Flowers, and you should be, turn left and enter the water. You should be able to swim four strokes south, encounter some Pirannha, and turn right to a ledge. This one you should be able to swim to without using stamina restoration. Pick the Red Rosis, rest, then swim back to the shore.
Back on land, you have two choices. Take the path to the north and through L'il Ogo, or swim to the passage to the east. If you beat up the giant and feel like bullying the tall people more, Mucstachio's home is past L'il Ogo and to the left. Regardless of your choices, take the zig-zagging passage northward. If you want to take down another colossus, Gruengard makes his home in the eastern branch.
Eventually, the path north turns east (right), and you will bump into Bonehead. You cannot avoid this one. Check the dead end beyond Bonehead's room to find a switch that opens a hidden area that his pet inhabits. Do not underestimate SPOT and use the power of Cold to send this giant lizard to meet its departed master. It has over 1000 HP, so expect a very long battle.
Search the back corner of SPOT's dwelling to find the Necromatic Helm, which is vital to learn more about the witches. Leave the cave and climb back up to the Ukpry Mountains.
Collecting Vines and Picking Flowers
From the cave, follow the route through the forest and turn right when you reach the intersecting clearing. Follow this to the next split, then turn right again. Follow this to the end, where you will find a spot to climb up. Expect a lot of climbing in this area.
On this western ledge of the upper mountains, begin by turning left and obtain a Vine at the far end. This item is the first of four that we will need to collect. They are heavy, so you may need to split them between your party members. Swing around and reverse down the passage, turning left the only branch here. Follow it to the end and climb up to the next step. Four trails branch from the middle on this one step. First, turn left and climb up. Two more vines are at the end. Once collected, turn around and return to the previous step. Turn left at the next intersection and continue up.
At this top step, you will encounter a brief ghostly encounter. Turn left at the next intersection and collect the last vine. Don't take the northern path here yet; we must complete something first. Return to the previous landing, turn left down the last trail, and climb up again.
Follow the left path and pick the Purple Plumac at the end, then backtrack and follow the trail to the end. Merge the four vines and use them at the southeast corner to create a climbing spot. Save before going down, as the chance of death is very high.
Walk to the next intersecting trail and turn right to find the White Dahlia. Turn around and follow the path forward and to the right. Soon you will reach a clearing that gives your party the chills. Wear the Necromatic Helm, back up and wait until dark. Re-enter the clearing to experience a series of visions regarding the witches. The center will have the witch that needs help, while each direction from it will have one of the evil ones. Remember their names! You will need to remove the curse from the headwear to remove it.
Take the west exit from the haunted clearing, then left at the next intersection. You must zig-zag southward through the forest until you find a road. Turning right will lead you to Ukpyr. Instead, turn left on the road, then continue down the broken road eastward. Turn right just before the pathway turns north and follow the forest trail, keeping to the right until you reach the mountain's base. Turn left to encounter the Mtn. Thraxe, which guards the Blue Mythia.
Turn around and return to the road and turn right. Follow the broken path, and keep right again until you return to the mountain's base. The last flower, the Yellow Lione, is growing here, but you must climb a slippery slope to get it.
Once you have the last flower, read the Note of Xen Xheng for the instructions to make the potion. Save as if you mess up, you will lose the ability to make it. If you don't have Holy Water, travel south from here to get to Ukpyr and teleport to New City to buy some. Merge the Red Rosis with the Blue Mythia, then merge the Yellow Lione and the Purple Plumac. You should now have the Rosis & Mythia and Plumac & Lione. Merge these two to make Orchid Ambrosia. Combine the White Dahlia with the Holy Water to create Dahlia Water. Mix the Orchid Ambrosia and the Dahlia Water, and you will finally have the Snakespeed Potion! It can only be used for one person, but it will make that person faster.
You can drop the note of Xen Xheng once the potion is created.
The Witches of Fables
You will need 4000 Gold in this cave, which you should have by now. Return when you have the money if you need to earn some first.
Backtrack to the broken path and follow it south until it turns east toward Ukpyr. Instead, turn right, follow the grassy forest trail, and return to the large clearing where you used the Necromatic Helm earlier to see the vision. Continue north from the clearing and climb the vine again (remember it is dangerous), then climb down at the nearby step. Turn right at the 4-way crossing, climb the mountain, and continue north into the cave. The Silent Lyre is extremely helpful here, so I hope you didn't toss it out.
Keep turning left from the entrance until you meet the South Witch. You will encounter a ghost that will silence your party before the second left turn, but you will only see the cause if you still wear the Necromatic Helm.
When you reach the first witch in the southern area of the cave, speak her name Xandasa to pass her test. You must give 1000 gold, which should be a small part of your fortune by now. Defeat the Statue and get the Gold Teeth.
Backtrack through the passage until you reach a branch. Turn left, right, forward until the wall, left, then finally right again when you enter a larger chamber. The narrow corridor on the right side will eventually take you to the West Witch. Find the central pillar in the cavern at the end and face the east side. Call her Carmela, pay the 1000 gold and defeat Althedides. Grab the Golden Ears, then return to the previous chamber.
At the larger chamber, turn left, left, right, straight to the wall, then strafe right to enter a tunnel. When the passage opens, check the north-facing wall of the central pillar for the East Witch. She is Barbana and will demand 1000 Gold, too. This time you will need to fight a representation of Vi Domina. Pocket the Golden Nose, then leave this narrow passage.
Only one evil witch left. Continue north and follow the left wall. You will eventually encounter some Witch's Lights, then reach a small room with a chest with some possibly useful items. Leave this room and continue hugging the left wall. At the end of this passage, the North Witch can is at the western-facing wall of the central pillar. Naralda will demand her 1000 gold, too, before transforming into the Dark Savant. Thankfully it is a poor representation of him and a little dangerous. Pry the Golden Eyes from the corpse and return your southward journey.
You will need to turn left once before you reach the final chamber. Check the east wall of the pillar to see an image of a faceless witch. Turn around to find a golden head. Use the four items we got from the other witches here. The spirit will present you the Elysiad of Divinity, which will auto-resurrect a character when fallen. Save it for the final battle in case you need it.
A passage north will open, which takes you to the Sphinx Map. Weave your way out of the cave; the exit path is the middle passage facing south from the junction area if you can't find the way. You can dump the Book of Fables and Necromatic Helm to free room in your inventory.
Sphinx Cave
Backtrack down the mountains and back to the broken path in the Tramontane Forest. Continue following the fractured road until the intersecting trail. Turn left, then right, to reach a new cave. The Sphinx Cave is not large, but it can be deadly for those who forget the Rebus Egge. If you don't have it, check out the museum in New City.
Just inside, turn right and follow it to the water's edge. Swim forward to find a required switch on a dry bank just a few strokes ahead. After flipping the switch, backtrack, but continue past the entrance. At the intersecting tunnel, turn right. There was a dead-end here, but now you can pass to the water's edge. Read the Sphinx Map for instructions on how to cross. Use the Rebus Egg at the shore to summon the magical creature, forming an invisible bridge. Take note of its riddle; you must answer it the next time you meet it. Proceed ahead to get the Majestik Wand. Backtrack out of the cave, and follow the path to Ukpyr. Use the Humpa Card and return to New City.
Dragon Mountain
If you still need to get Wikum's Power Globe from the Lost Temple, get that now.
Return to the Curio Museum in New City near the dock and enter. Read the Boat Map to get a hint for the heads. Fear is the Scared Imp; Anger is the Angry Demon; Devil is the Laughing Devil; Still thy Tongue is the Silent Devil; Become Amazed is the Surprised Imp; and Begets Enlightenment is the Happy Demon. A passage will open next to the heads; take it to reach a boat with no propulsion.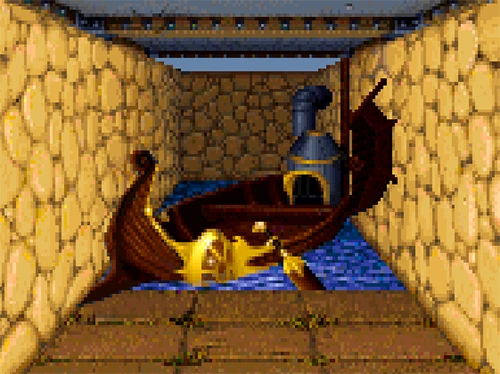 Step onboard the boat, then use Wikum's Power Globe. You can now travel the seas without worrying about stamina. Press the button at the end of the tunnel to access the open sea.
There are a few areas of interest accessible from the Sea of Sorrows. An island is in the middle, but we'll get to that later. The Lesser and Greater Wilds are east and west sides of the sea. These are good areas to gain experience but don't expect any treasures. After exploring the sea and the surrounding areas, follow the west coast as you travel south. Save as you approach the fog, as some Shallow Reefs will damage everyone if you pass over them. Find the small island on the west side closest to the fog and line up with it directly. Travel south into the mists, then turn left when you hit the wall. You will need to wait here until night, so you might as well pass the time by reading the Serpent Map.
The Mountain Beyond of Fog
The Serpent Map may be one of the most cryptic messages, but it hints that the serpent will grant access to the mountain during the mists of night. There is a small section inset into the mountainside. To enter, use the Coil of the Serpent on the right side at night. If you do it at the wrong spot, it will do nothing; if you do it too early or late, you will look like a fool.
While it is possible to avoid Brombadeg entering, it will make leaving a nightmare due to cave-ins. Follow the water in until you encounter the sea monster of legend. She attacks up to 8 strikes per round, so expect to take a beating and reload frequently. Use of all boost spells, including Haste and Bless, is recommended.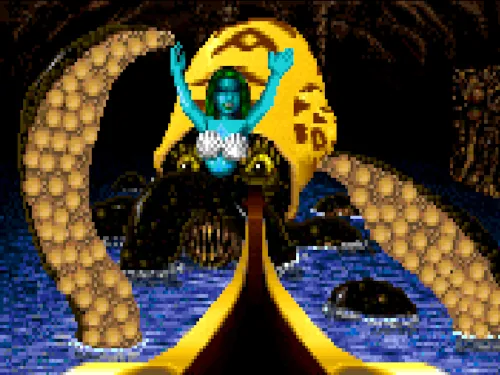
Once she falls into the murky waters, take the boat further into the cave. First, we will make our dock at the southeast corner; you can follow the right wall until you reach a place to beach. Travel this tunnel but do not take the right branch, as it will cause a cave-in. Continue south through the chamber, then turn left at the junction and continue east. Take the path on your right when the tunnel splits. Eventually, you can go east no more, so take the passage to the right until you encounter a Dragorra.
Open the chest in the corner to trigger a trap that opens a new passage while closing the one we came through. If you read the Dragon Map, it tells of what to expect here. Locate the new path north out of this room, check the right side for a button, then pull the lever it reveals. The switch will open the sealed wall leading to a dragon's hoard. Continue north, turn right, then left to reach the dragon's nesting area. You will need to fight a few groups of dragons, but four chests will be your reward. Its owner will return as you leave this area.
Return to the boat, cross the water directly north, and land again. If you wish, an optional chest guarded by another Emerald Dragon in the passage north of this one. If you decide to get it, return to this landing and enter the tunnel to the east. Keep right as you follow the twists of this tunnel to avoid a cave-in until you reach a cavern with an exit at the southwest corner. Now follow the left wall until the passage ends at a north-south tunnel. Turn right to encounter another Dragon Pup that guards the exit and hidden treasure behind a secret button on the right path. The left pass will take you up to the City of Sky.
City of Sky
If you have not angered them, the guards here will greet you and fly off. If you killed many of their kind or sided against them, wandering in this city may be more difficult.
A Valkyrie will welcome you to their city as you leave the ladder, but you must pass through an invisible maze to get anywhere. I will guide you to see their leader first.
Travel south, strafe right, step forward, turn left, then walk to the wall. Turn left, strafe right, then walk ahead another two steps. Turn right, strafe right, take another two steps forward, then turn right again. Walk to the hidden wall, then strafe right, step forward once, then strafe left, forward once, then strafe twice to the left. Walk ahead to the end, turn left twice and take the long passage north. Another invisible wall will be in the courtyard, but turn left and follow along the walls around it to reach Dame Ke-Li.

Give her the Helazoid Banner to receive a Helazoid Pendant, which grants the Eagle Eye skill to one person. You can also sell some maps, such as Serpent, Dragon, Boat, Temple, and Sphinx. Keep the Crystal, Legend, and Crypt Maps. You can buy some powerful Ankhs too, which you should spend all your gold on to make your party as strong as possible. If you need power paks for energy weapons, buy credit cards to buy them. Ensure you have at least two Credit Cards to get a unique item!
We need more information to proceed behind Dame Ke-Li; we must return here later, so go back through the maze to get back to the ladder. Don't descend the ladder; leave the invisible room, then turn right to enter the northern courtyard. Walk around the narrow building and continue north. You will encounter another friendly woman as you approach the east side. Use the Credit card here to open the door. Unfortunately, we can't open the glass doors in this room, but if you proceed forward and enter the room to your left, you will find a chest with items and a Storage Key.
Leave this building, then turn right to return southward, but turn right again and follow the building wall. Turn left when encountering another Valkyrie, and follow the south path to the Storage room. Use the key we just picked up. Inside, enter the left room, then turn left again. (If you go right instead, you will reach another area to buy PowerPaks via Credit Cards.) When you find a split path, turn left again, then enter the small room to get teleported away. Step forward once, strafe right, then onward to pick up the Key of light.
Backtrack to the invisible wall; strafe left, then forward until you hit a wall again. Strafe left, forward to the wall, then turn left to follow the wall until the end. Strafe right, step once forward, then turn left. Step forward until you exit the building. Turn left twice, right, onwards to the wall, right once, strafe right and step forward twice. You will be near the ladder to the mountain again. Turn left again, then right at the next barrier.
You can now travel north back to the Hall of Preservation. You will need to use another Credit Card to enter again. With the Key of Light, we can choose one advanced weapon or armour, but only one. On the left, you will find the Light Shield closest to you and a Light Saber, sorry, Sword in the other room. On your left, you can get 2 Frontier Phasers or a Cobaltine Powerglove; each requires PowerPaks as ammo. These are all fantastic items, so choose the one that best fits your party. Return to the ladder, and pass back through the Dragon Mountain.
Hall of the Dead
To safely navigate the fog to leave, turn left and move once to enter the mist along the wall, turn right, then pass forward until you are in open waters again. Our next destination is the islands in the middle of the Sea. The easiest way to find it is to travel directly south from the port in New City. Move left a little to find a brick wall and step on the small patch of grass there. Use the Majestik Wand to summon the Sphynx and answer the riddle it gave back in the cave. 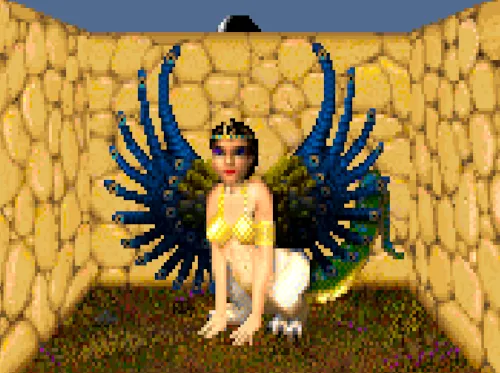 The answer is What is Man, but man or woman is accepted. It will fly away as it gives one last question with no time to answer. Proceed forward to the entrance of the final dungeon.
This dungeon has four sections. The first is the Hall of the Dead, containing all sorts of undead and other powerful creatures. I recommend having one Jonga Powder, but you can complete it without one. Also, if you dropped the Combs & Brushes from Orkogre Castle, retrieving them is a good idea. Traps will haunt your passage, so step carefully; you cannot avoid them all. Turn right at the gate and enter the room to encounter a ghost. Strafe right to avoid a trap, then proceed into the small room and press the button here. The lever inside will open the gate. Trace your steps back and enter the newly opened section to your right.
Walk to the gate to encounter a terrifying voice, then turn right again. Proceed to the middle of the six rooms, save, then enter the middle room to your left room. If you want to fight all the Gorrors, search this room and reload as needed until you get at least two keys. The keys drop only 25% of the time, so you may need to several attempts to find one. They are not required, so it is up to you if you want to bother.
Turn around, exit back into the corridor and turn right. Continue until you encounter the apparition, save and continue to undergo a paralysis trap. I had cases where I was attacked once paralyzed and wiped out before I had a chance, so you may need to restore a save here until you can rest until the paralysis wears off. Another trap will silence your party in the far right corner. Turn right here and press the hidden button, then flip the switch for the next gate. Return to the main hallway and turn left into the next area.
As you enter the next section, another trap will blind your party. Most fountains here are toxic, but the one on the left area will restore your stamina. Take the right path to encounter the hag ghost once again. Save again, then step toward the passage here to be paralyzed again.
Once you can move again, proceed into the passage, then turn right into the first room. Press the button and loot the chest in the room. If you already have two Key of Tombs or Key of Crypts, get the other type to improve your odds of getting as many Key of Gorrors as possible before finishing this area.
Return to the hallway and turn right. When you enter the room, turn left, follow the wall south, then turn right and enter the Tomb of the Gorn Queen. Use the Bone Combs & Brushes here to ease the restless spirit you've been encountering. Leave this small room and travel east down the hallway until you enter a large chamber. Find the urn at the south of this room and use Jonga Powder, if you have it, to disarm most of the traps in the Hall of the Dead. The fountains here are not very useful, too.
We will return to the locked gates here in a bit. Continue east down the passage and into the next room with four tombs. A Death Ankh is available on a Mummy in the northeast tomb, but it will activate poison traps around it. Go down the north hallway and take the 2nd small room on the left to search for more keys. Make sure you get two more here.
Before you start, return to the southern chamber where you can use Jonga Powder, you have a few areas with chances to get more keys. A Ghost of Gorn resides within the southwest tomb in the middle section, which has a 5% chance of dropping a key. The Ungorn Daimyo in a grave next to the Gorn Queen also has a high probability of a key drop.
The two rooms east and west of the southern chamber require the Key of Tombs. You can get a Key or Crypts and a Key of Gorrors from the chests. The central gate requires the Key of the Dragon that we got from Dragon Mountain. *Doom* awaits you inside.
Doom can be a deadly encounter, but a prepared party should be able to defeat the dragon after two rounds. Deadly Poison and Crush can be helpful spells.
Once the dragon has fallen, use a Key of Crypts to open the rooms on each side of the stairs. These rooms also may drop a Key of Gorrors. Descend the stairs when you're ready to the Chamber of Gorrors.
Chamber of Gorrors
First, you should travel forward to the Gaelin Stone, then face the left side of it. Use the Legend Map to get the Key of Skulls, allowing you to leave this floor. You are not ready to descend, though. Reading the Crypt Map will instruct you how to access the Jewel of the Sun. Turn around and walk around the left side of the stairs, then step into the water and press the button to reveal a long hallway. Grab the Jewel of the Sun from the chest at the end, then backtrack to the central area again.
There are six memorable fights in this room, the ones in the corners you need to swim to, so expect the need to recover stamina before you unlock the cage fight. They are 100% optional, and you need a Key of Gorrors for each one. The southeast one is a rematch of Ra-Sep-Re-Tep, which is extremely easy. The others can be a nightmare and nearly impossible with some difficulties. Your reward is a chest with random high-level weapons and armour, so it is up to you to risk the fights. Also, don't expect to be able to disarm the traps on these chests successfully; reload until everyone survives.
When ready, use the Key of Skulls to unlock the gate and continue into the Hall of the Past below.
Hall of the Past
This area can be a nightmare to navigate. You will frequently teleport up and down between 8 floors, and if you head down the wrong path too early, you will have to find your way to start again. Half of level 2 is also a dark maze, so expect to use your mapping skills to avoid getting lost. The Cornu of Demonspawn is very helpful here, so I hope you kept it!
From the start, follow the path to the end to teleport down; don't take any branches. Turn around, step forward and use the button on the wall to your left to access the chest. Return to the junction we appeared in and turn left to travel north, don't turn down the left passage, and teleport back up.
Exit the room, turn left and jump down the hole at the end. Turn left and press the hidden button to access the chest with the Key of Waters. (Did they expect you to randomly search the wall in the dark maze to find that?) Take a step backwards (southward) after opening the chest to teleport again, then follow the hallway to return to the darkness of level 2.
Turn around, walk to the wall, turn right and teleport into more darkness. Step forward, strafe right, then forward to be teleported again. Now take a step back and strafe left to return to the light. Follow the west passage northward and unlock the gate with the Key of Waters. Stay to the left wall and use the fountain to replenish magic and heal.
Step toward the east exit of this room to teleport back up a floor. Continue forward (east, then south) and drop down two levels to level 6. Follow the path ahead - don't turn right - and teleport back to Floor 5. Avoid the pit down by strafing right once, then enter the hallway to the west. Follow this corridor north, past the mandatory random encounter at the intersection, then turn right at the end and walk to the hole in the east corner.
This next area can be frustrating, so save before you enter the large room on the right. A chest is available from the southwest pit, but the items there are cursed. The Staff of Doom is worth it if you have something regenerating 2 HP, though. If you get the Doom chest, follow the other exit to return to the area with the pits. To proceed in the pit room, you need to get to the middle hole, but you will be pushed into a random direction when you approach it, so if you don't find yourself in a hallway when you drop down, reload.
Walk north, then turn right and take the teleporter here to access the chest with the Key of the Gate. Save your progress before opening it, as a valuable instrument may appear. For instance, you may come across the Lyre of Cakes, which can heal your entire party with its Cure Lesser Condition spell, or the Tomb of Demons, which can summon powerful creatures.
Take the portal next to the gate and return to level 5. Turn left at the monster-infested intersection, then follow the left wall in the next room to teleport to level 4 again. Turn right and travel east until you reach the passage, then turn left, use the Key of Gates, and teleport up again. Enter the room, then turn left twice to get the *Star* Map! It is doubtful this map will get stolen by an NPC, but it can happen if you've taken a long time to get here.
We must return to the surface and collect a few items to proceed. The fastest way back is taking the drop across from the chest, turning right, then left at the northward passage. Leap into the left teleporter at the end of the hall. Back up once, turn left, then follow the wall to a button that reveals another teleporter upward to Level 1. We need to take another portal up to the exit, though. Follow the passage back to drop down into the darkness. Turn right and walk forward to encounter another teleporter to return to Level 1. Exit this room, then turn left. Walk to the far room, enter, and take the pit inside to return to the darkness again. Step back once, then strafe right to reach the area near the exit. You just need to turn right at the path, and you'll be back at the stairs to the Chamber of Gorrors.
Before you leave, read the Star Map, then walk around the Gaelin Stone to decipher the order of the maps shown on the Star Map. It requires a lot of flipping back and forth, unfortunately.
The Locket of the Tomb
Walk through the Chamber of Gorrors and the Hall of the Dead. Once outside, jump on the boat, turn left and travel to the nearby island. Walk around the pillar here and into the west side. Use the Jewel of the Sun here, then step back, turn right and swim to the southern island. Walk into the south side of the pillar to be teleported to the Mysterious Courtyard. Search at the statue's base to be rewarded with the Locket of the Tomb.
Leave the courtyard by returning to the teleporter pad that got us here. Instead of taking you to the south island, you will appear in the north island pillar where we used to Jewel of the Sun. Jump on the boat and return to Dragon Mountain and the City of Sky. Navigate the invisible maze back to Dame Ke-Li, but continue past her throne and seak the Hall of Crusaders behind her.
Each room is locked, but you must please the statues to open them. The first requires you to speak the name of the creator. If you don't remember, it is Phoonzang. The second statue requires knowledge from the Star Map and Gaelin Stone. The correct order is Pyramid, Cross, Serpent, Dragon, Wand, Skull, Gate, then Star.
Saving before proceeding to the next room is a good idea. Upon entering, be cautious, as the Meta-Droid will launch a fierce attack. However, with the right weapons, we can defeat it quickly before it can use its devastating attacks. Investigate the statue and enter the landing pad!
At the ship, speak Phoonzang again and enter. 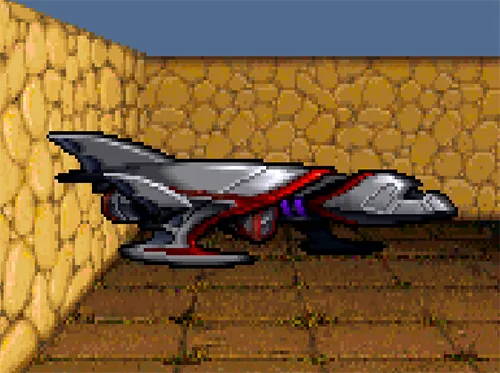
Search the vessel and open everything here to get the Globe Map and the Ring of the Globe. Also, use the Locket of the Tomb on the ship before you leave. Read the map to learn who can access the Astral Dominae. We are now ready to finish this! Sell anything encumbering you at Ke-Li and return to the Hall of the Past again. Feel free to heal up in New City on the way. We are now ready to complete the game!
Tomb of the Astral Dominae
We need to find our way through the Hall of the Past to get to the Tomb. The fastest way through is:
- From the stairs, follow the path to the end, avoiding all branches to fall to level 2.
- Turn around and fall the pits to level 4.
- Exit the room, turn right, follow the path to the end, and drop down to level 6.
- Turn right into the first teleporter to appear at the Crystal Puzzle.
There are two crystals in each of the four rooms. Read the Crystal Map to learn the correct order: Dragon, Tower, Moon, Cross, Skull, Star, Egg, then Sun. Step on the pentagram in the east area to open the wall to advance once you press all the symbols. If you were correct, the right wall opens to allow passage to the end, but the left wall opens if you are wrong — forcing you to do a walk of shame to return.
Dropping down the right pit will eventually lead you to rest on the 8th floor in a short linear journey. Once you reach the crossing paths, turn left to descend into the Tomb of the Astral Dominae.
Your party must step on all the pressure plates in this vast maze to access the inner tomb. Cast all your protection spells; you will need all the help you can against the Battle Droids and Mega-Bots here. I recommend saving after each battle, as you may encounter a large party of machines that will evict your party from the tomb without their bodies.
There are nine pressure plates that we need to activate to access the Astral Dominae, and they are all over the place. Below is the order I find the most streamlined:
- From the stairs, turn right at the first chance, then right again to find *Star*.
- Turn around, turn left and proceed to the next intersection. Strafe left, walk to the far wall, and strafe left again. Step forward twice, then enter the right niche to find *Crystal*.
- Turn around again, strafe left, and walk to the far wall. Strafe left again, then travel to the end of the passage to find the *Dragon*.
- Flip around again and turn left down the first corridor. At the wall, strafe left and step forward to the *Temple*.
- Strafe left once more, then follow the winding path north to activate the *Serpent* in the Northwest corner.
- Do an about-face and strafe right at the wall, then walk east. When you hit the next walls, strafe right, left, right, then turn left and walk to the end to activate the *Sphinx*.
- Turn around and turn left at the first opportunity, then right at the next intersection. Follow the passage into a larger room, then strafe right and continue through the next room. Turn left into the next niche with *Boat*.
- Leave the niche and continue east, following the path as it turns south. Turn right again before the dead-end, then turn left into the next chamber. Take the right corridor from here to reach the *Crypt*.
There is only one pressure plate left, which is at the gate. Turn around and enter the previous room. Turn right to enter the path that will eventually split, leading to dead ends. Take the right branch and search for a button at the end to reveal the inner tomb. Rest up, save, then step forward to fight the Cosmo-Bot!
Use the same strategies you use with the other robots in this area, and you should be able to destroy it. It is stronger than the others, so you may need to try a few times to win.
Once you are past the giant robot, step forward to the gate to activate the last pressure pad to open the gate. Make a backup save here (using a different file name). Your choices ahead will change how the game ends and where you start if you import your save into Wizardry 8.
When you enter the resting place of the Astral Dominae, call Vi using Vitalia's Device. Tell her you have the items and give them to her to use, as the Globe map hinted. This will summon the final boss, the Dk. Savant and his army of Sv. Kui'Sa-Ka. This fight would have been a great place to have special battle music.
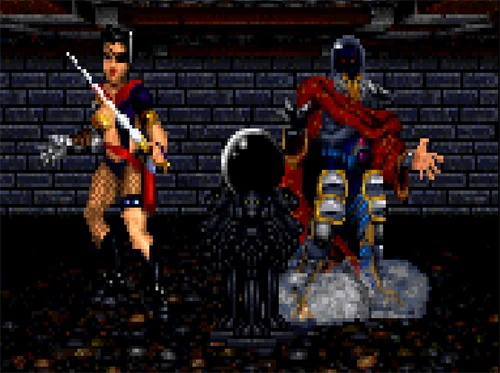
If you maxed out the Mind Control Skill, you will have a much easier time during this battle! Having at least 75 points in Mind Control and a max-level Magic Shield will help drastically. Without Mind Control, expect to cure insanity frequently (which is where multi-classing everyone helps.) Paralysis can still be an issue, so keep curing your party quickly. I focus on the Dk Savant first, as his abilities are far too powerful to leave unchecked. Summoning spells are helpful as they provide additional targets for the foes to worry about, and Deep Freeze has a chance to cut through enemy defences. Nuclear Blast won't hurt the Dk Savant, but a few high-level casts can quickly remove his army.
Once the smoke clears, Vi will tinker with the globe before giving it to you. She will then ask if you found the ship. This choice will unlock different endings; you will start the best ending if you say Yes (you needed to have actually found the vessel to have this option) or the Umpani and T'Rang endings if you say No. Another ending is available, but it can happen regardless of your choice.
Regardless of your choices, note that once you reach the end of the game, you cannot continue playing to exchange equipment to import into Wizardry 8, like you could in Wizardry 6. The items you can bring are very specific this time, and many behave differently in the sequel. Faeries can't even use many of the robes you can import in, even if they can be used in Wizardry 7. See this spreadsheet for the list of items you can bring.
Also, change classes, increase them back to level 5 or higher, and boost their stats. Only the specific class skills will transfer over; for example, only Bards will have instruments and the Music skill. I also usually change my Bishops back into Priest and Mage Professions so they learn their spells faster in the sequel.
Ship Ending
If you say Yes, she will ask you to meet her at the ship in the City of Sky. There is no teleporter back out, so you need to walk out on foot.
Go back into the maze and keep left as much as possible. Once in the Hall of the Past, turn left at the intersection to teleport to level 5. Continue forward through the forced encounter intersection to teleport up to level 4. Turn around, turn left to take the northward passage, then enter the teleporter on the right. Take the right path to head for the stairs to the east and continue out of the crypt.
Travel back to the ship at the City of Sky and use Vitalia's Device to call her once you reach the vessel. If you say Globe to the ultimatum, you will experience a Bad ending. Choose the Girl to travel across the stars and into Wizardry 8.
Umpani or T'Rang Endings
She will ask you to meet her at the Forbidden Zone in New City if you tell her No.
Go back into the maze and keep left as much as possible. Once in the Hall of the Past, turn left at the intersection to teleport to level 5. Continue forward through the forced encounter intersection to teleport up to level 4. Turn around, turn left to take the northward passage, then enter the teleporter on the right. Take the right path to head for the stairs to the east and continue out of the crypt.
Boat back to New City, enter the Forbidden Zone, use the Control Card to enter the area where you first met Vi and use her device again to call her. If you say Globe to the ultimatum, you will experience a Bad ending. Choose the girl, and the fiend will leave into the sequel. You will be left siding with a choice between the Umpani or T'Rang. Surprisingly, it doesn't matter who you allied with earlier, so choose the one you want to travel with. You will need to fight the other group you didn't pick. A few max-level Nuclear Blasts should clear them out regardless. The winner will wisk your party away into Wizardry 8.