


Quests
To Rescue A Queen
To Rescue A Queen is the third part of the main quest in the Final Chapter of Trails in the Sky. It's time to split up and commence an assault on the palace.
Client: Princess Klaudia
Pay: 20000 Mira, 10 BP
Bonus: 5 BP
Prerequisite Quest: Hostage Liberation
Locations:
Grancel Sewers
Grancel Castle
Description:
- Princess Klaudia has asked us to rescue Her Majesty the Queen. In order to do so, however, we'll need to storm the castle. But though our forces have grown in number, a frontal assault is still implausible.
If we could only take our adversaries by surprise... - We'll force a landing on the Garden Terrace, then head directly for the Royal Keep.
Whether or not we can secure the queen's safety before the enemy reaches her will spell the difference between victory and defeat.
Notebook Entries
- We have a plan! Joshua's party will gain entry from the sewers, the Royal Guard and bracer parties from the street, and my party from the air.
- Joshua's plan, part 1: Organize equipment, and enter the sewers.
- Joshua's plan, part 2: Inspect the mark on the sewer map.
- Joshua's plan, part 3: Find and enter the hidden passage.
- Joshua's plan, part 4: Stand by at tunnel's end until go time.
- Joshua's plan, part 5: Flip switch in Royal Guard Room and open Grancel Castle's front gate.
- Landed on the Garden Terrace! Let's hurry to the royal keep.
- Defeated Captain Amalthea!
- Arrived at the Royal Keep! Her Majesty's room is inside.
- 2nd Lieutenant Lorence is inside with the Queen.
- Just when we thought we defeated him, he levelled us in an instant!
- Upon releasing the queen, he threw himself over her balcony?!
- Secured the queen's safety! The coup d'etat has been thwarted!
- The queen claims that something much bigger is on the horizon...
- Colonel Richard is on his way to unleash the seal on the Aureole that sleeps beneath the castle.
- It seems an elevator was erected in the Treasury recently...
Walkthrough
For the first time, Estelle isn't in your group. Joshua, Olivier and Zin will arrive in the city of Grancel. Check-in with the Guild to complete your last mission, buy anything you need, then head into the sewers. I recommend stocking up on all recipe items, EP Charges, and whatever else you can afford. There will be very little shopping once you continue.
I recommend using the East Block entrance, but it doesn't matter. Your goal is to get to the northern section. From the East Block stair, follow the same path you used the first time you came this way. Instead of continuing south to the switch area, head west and back north to an area with three small dead-ends. You can follow the Grancel Sewer Map or our map here if you need help finding it. Inspect the middle one to discover the path to continue.
The path is quite linear, with only a couple of branches that contain fantastic boss-guarded treasures. Once you reach the stairs and the exit door, swap out your equipment. If you have a Gladiator Belt and Gladiator Headband, remove them for Estelle's party to use. They will need it more than Joshua's party at this point. Once you're ready, "wait on standby."
Now in control of Estelle's team, talk to Payton and upgrade everyone's Orbments, get Silver Earring, Lily Necklace, and Glam Choker for everyone. Equip the Silver Earrings first as everyone will need poison immunity, then board the vessel.
With the start of the push, Joshua's team will need to open the gate first. Go up the closest stairs and take out the soldiers. Chaos Brand is helpful throughout this entire area; use it as needed.
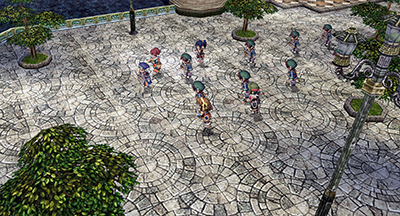
Once the gates are open, Estelle's team will land and encounter Captain Amalthea. If you have Silver Earrings equipped, you can treat her just like any other ranged soldier. With the Captain down, you can revisit Payton for any items you need, then head up to the royal chambers. Use the Tear Balms here instead of your Arts; you will need them for the coming fights. Expect some nasty fights as you make your way through.
Inside you will encounter the Duke. Defeat the soldiers but not him for the bonus BP once the mission is over. Once you get past the Duke, change your equipment. Everyone will need Confuse and Mute protection. The Lily Necklaces and Glam Chokers will help here. Once ready, rush in to fight Lorence. The game continues if you lose this fight, but a successful fight gives you more BP for the mission.
After Lorence leaves, you will reunite with your friends, and start the final push in Aureole.