


Walkthrough
The sixth Wizardry game is composed of nine larger areas, with the Castle at the center of it all.


Optional sections of the walkthrough are in blue text so you can skip the unnessary to charge forward on your adventure.
Enemies in this area:
Banshee Huge Spider Indigo Bat Monstrous Snake Nightgaunt Poison Viper Skeleton Skeleton Lord Spectre Spirit TarantulaWraith Zombie Guard
The Isle of the Dead stands just south-east of the Castle entrance. Use the Key of the Dead to enter the gate, then venture around into the tomb below. The Hall of the Dead is sealed until you set the Cylinder of Ash in the niche. Also, put Incense at the location to circumvent the trap in the next corridor.
This winding corridor is full of graves, and many of them are full of random enemies.
If you forgot to buy insense, save at the second warning, then trigger the boulder trap until your party survives. A dancing Disko Zombie will attack as you proceed to the left, and a Ghostly She-Hag will try to kill you silently as your path returns north.
Zig-zag through the long winding corridor, until you finally reach the locked gate blocking the path. Turn around, take two left turns, and enter the last long hallway. Explore the second-last right grave for an Insane Skeleton, who holds the key you need. Once you have the key, continue down the corridor and open the far portcullis with the Skeleton Key we just received.
The catacombs are much larger than the first half of the Hall of the Dead. First, examine the torches at the north and south (left and right) sides of the room to expose doorways to the rest of the area. I recommend you to go south (right) first and go left into the southern section to find the healing fountain, which heals all ailments, health, magic, and stamina. This way, you will have a clear path to return here as needed.
Backtrack to the entrance, then continue north, then turn east (right). You will find a small room to the north that appears empty, but if you go to the nitch in the wall, you will meet the Bane King. Regardless of what you choose or say, you will end up in a fight with him. Don't bother trying to win, you will be unable to harm him, and he will flee after a few rounds. Just survive the meeting, which shouldn't be difficult. Once this encounter is finished, turn around and receive the Key of Queens from the nitch.

Return to the fountain and enter the room here with this key to visit the former queen. She will tell you the story of her cursed life, her daughter, and the mission she has for you. Press the button at the north-west corner of this room to open the eastern chamber.
There are four optional battles in this area that provides you with very valuable equipment.
The south-west nitch in the south-west chamber holds the Key of Knights, which unlocks the little room in the north-west. This room contains the Black Knight and Dark Crusaders. This fight will reward you with the best sword, The Avenger, Ebony Plate (U), Ebony Plate (L), and Ebony Heaume.
The west room contains the Key of Drows with an eastern skeleton. The south-western chamber holds Robin Windmarne and Highlanders, which drops the Elven Bow, Peacemaker Arrows, Chamail Doublet, Chamail Pants, and a Forest Cape.
The Key of Valkyries rests in the eastern nitch in the north-east chamber. This key opens the north-eastern room where Brigerd Woltan and her Valkyries rest. This battle drops the Maenad's Lance, Armet, Mantis Gloves, Mantis Boots, and the Horn of Prometheus. When equipping the Maenad's Lance, Mantis Gloves and Mantis Boots, only invoke the special abilities once or the items will disappear. The Horn will likely be your most used intrument after you obtain it.
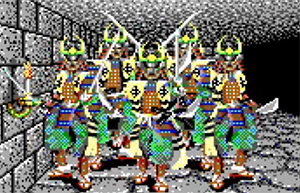
The fourth opponent is accessible by passing by the Valkyries. To get to the next room, press the button the right of the door, then take the new passage that opened up. Press the button at the end of this hall to enter the next mini-boss room with Haiyato Daikuta and his Samurai. This battle will provide you with the Muramasa Blade, Hi-Kane-Do (U), Hi-Kane-Do (L), Kabuto, and the Wakizashi +1. The perfect equipment for a samurai in your party if you have one.
Before you head into the east chamber, you may want to return to the castle and sell whatever you don't need, and increase your character levels until you are ready for the final battle. You are at the point of no return. Also, save your game and copy the safe file (SAVEGAME.DBS) somewhere safe. You may want to restore this save game if you want to go down a different path to get an alternate ending.
When you're ready, use the Key of Evil at the left exit in the eastern chamber, then follow the only available path to the right. Before approaching the middle, you have a choice to make.
Do you listen to the ghost of the queen, or do you choose a different path? This choice will alter events at the end of the game.
If you choose to follow the queen, equip the cross on your priest, then move him or her to the front of your party by using ORDER.
If you choose to choose the other path, drop the cross or place it in your swag bag.

Once you are ready, visit Rebecca.
It doesn't matter what you choose as she will eventually hypnotize you, then drag you to the locked room to the south to visit the Bane King. Once he reaches the one with the cross, if applicable, you will be shown a vision. You will awaken in a cell in the Temple of Ramm: Lower Level.
Enemies in this area:
Guardian of Ramm Huge Spider Indigo Bat Jail Rat Monstrous Snake Poison ViperTarantula
Do not drink from the fountain here as it will harm you. Be sure to re-order your party again, so everything is in your preferred fighting order then explore your cell. There are two ways out of the cell; the Dagger of Ramm can be used to open the gate or the Red Mushroom can be eaten at the chains in the corner to shrink out of here. Both will lead to stairs to the Forest, albeit in two different areas. Regardless, we need to go to the west side once you're free of your prison
Continue to the Forest